If your air layer’s moss is bone dry and you see no roots, congratulations—you’ve just received the clearest diagnostic signal your plant can give. The problem isn’t a mystery; it’s a message about timing and environment. Many gardeners see this as a failure, but in reality, these are precise clues that, when read correctly, can turn a stalled attempt into a successful propagation. This guide is your systematic air layering troubleshooting checklist, designed to move you from frustration to diagnosis. We’ll decode what dry sphagnum moss really means versus what the absence of roots is telling you, and we’ll pinpoint the critical timing clues that dictate when to check, wait, or intervene. By learning to interpret these signs, you shift from guessing to knowing, transforming common air layering problems into solvable puzzles.
A successful air layering troubleshooting checklist starts by interpreting the clues: persistently dry moss signals a failed moisture seal or incorrect initial watering, while no roots after ample time points to species-specific timing, insufficient light, or a weak parent branch. Your first move is always to check the plastic wrap’s seal and the moss’s core moisture. If it’s dry, the environment inside the bundle has failed, halting the entire process. Diagnose these factors systematically—moisture first, then timing and vigor—before considering the attempt a loss.
Decoding the Primary Clues: Dry Moss & The Absence of Roots
Your air layer is sending you two distinct signals. Interpreting them separately is the first step in your air layering troubleshooting process. Dry moss and no roots often occur together, but they point to different parts of the system that need your attention.
Dry Moss: A Barrier or Hydration Failure
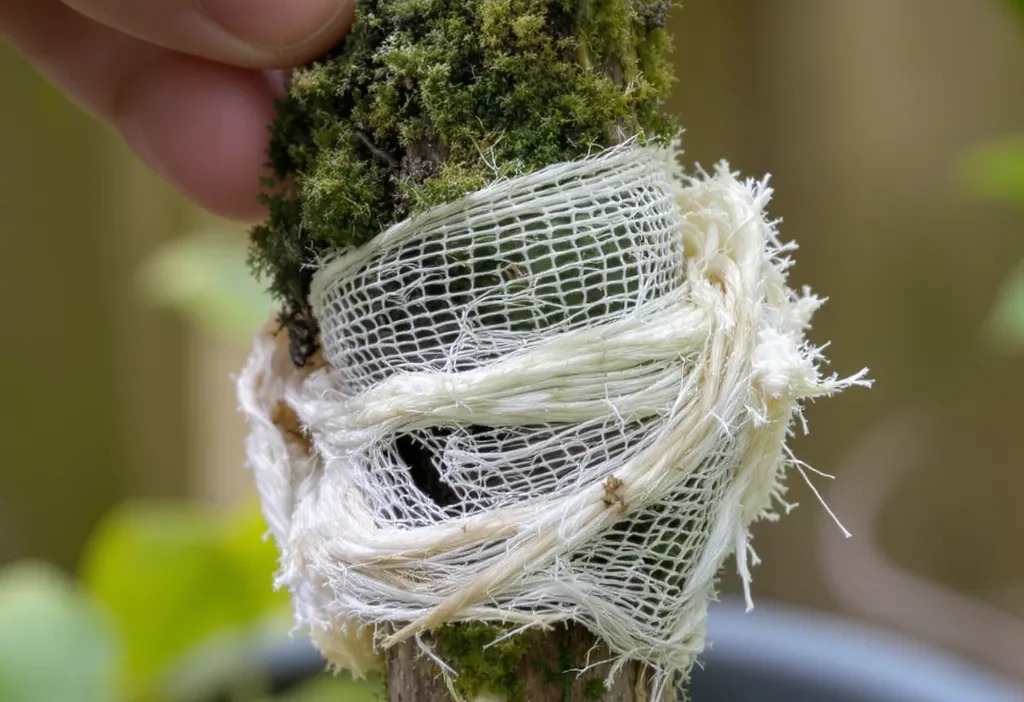
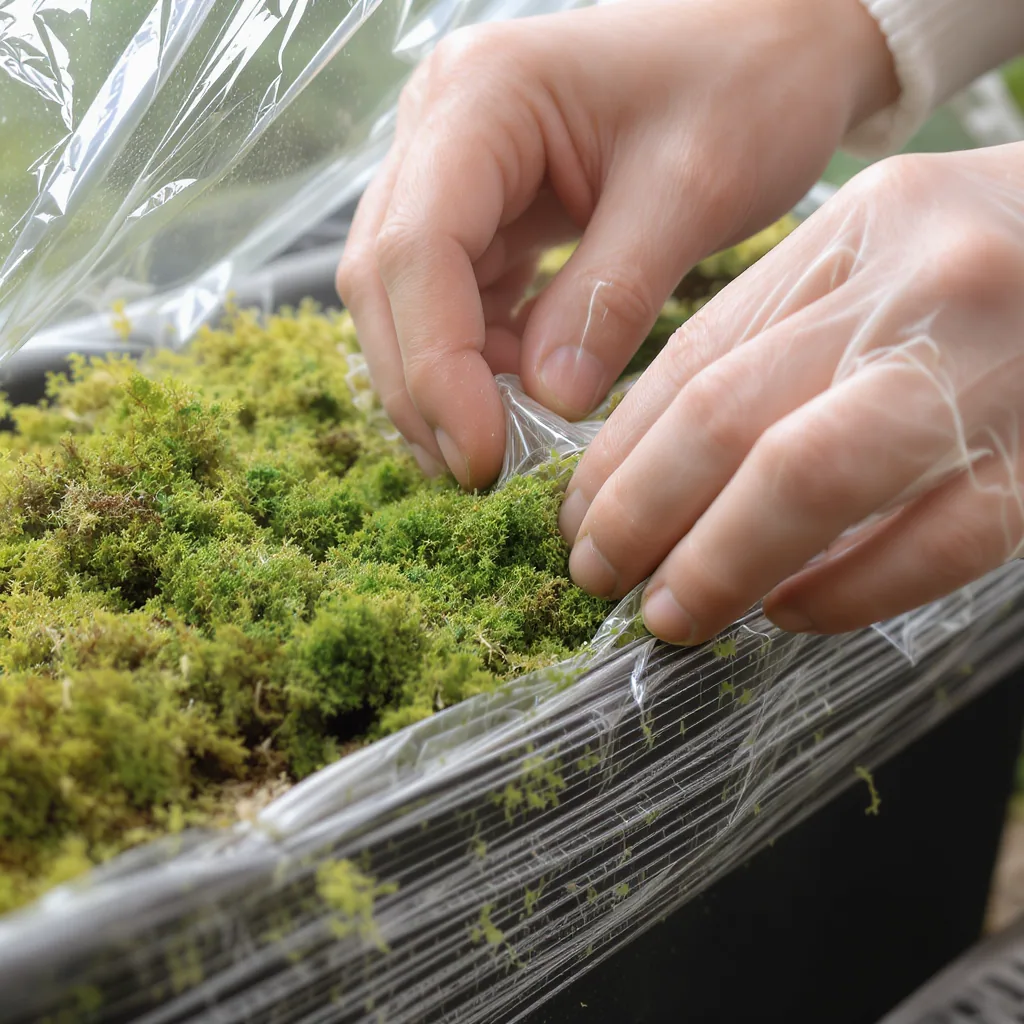
When the sphagnum moss in your air layer is consistently dry, it’s almost never a root problem. It’s a packaging problem. The moss acts as a moisture reservoir for the wounded stem, encouraging root growth. If it’s dry, that reservoir is empty because moisture is either escaping or was never properly added. This air layer dry moss problem typically means your plastic wrap seal has failed, you started with moss that wasn’t thoroughly soaked, or the layer is in a location (like direct, hot sun) that’s actively baking the moisture out.
No Roots: A Physiology or Timing Puzzle
The absence of roots, on the other hand, speaks to the plant’s internal processes. Root initiation is triggered by hormones and requires energy. If the moss is moist but you see no roots, the issue isn’t moisture—it’s often related to timing, light, temperature, or the health of the branch itself. The plant may simply need more time, or it might be in a dormant period, or it may be struggling to generate the energy needed for rooting.
Remember, this diagnostic guide is for educational purposes to help you understand common plant responses; success can vary based on many individual factors.
The Diagnostic Flow: From Symptom to Likely Cause
Let’s walk through the most common scenarios. Follow this logical path to pinpoint where your attempt went off track.

Scenario 1: “The moss is dry just a week after wrapping.”
This is a clear-cut case. Your immediate checks are:
- Initial Wetness: Did you wring out the sphagnum moss so it’s dripping-wet, not just damp? Bone-dry starting material is a classic error.
- The Seal: Are both ends of the plastic wrap tightly sealed with tape or twist ties? Any gap is a highway for moisture loss.
- Location: Is the layer in intense, direct sunlight? This can create a miniature oven, rapidly drying the moss from the outside in.
The fix here is almost always to carefully open the wrap, re-soak the moss, and re-seal it properly.
Scenario 2: “The moss is still moist, but there are no roots after 8+ weeks.”
Here, your environment and timing are under the microscope. Ask:
- What species is it? A vigorous Ficus elastica might root in 6 weeks, while a slower Citrus or Jade Plant can easily take 3 months.
- What’s the light and temperature? Roots need energy (from light on the leaves) and warmth to grow. A dim, cool spot drastically slows the process.
- How healthy is the branch? A thin, weak, or recently pruned stem lacks the resources to push out new roots.
This is where when to remove air layer becomes a question of strategic patience versus recognizing a stall.
Critical Timing Windows & Species-Specific Expectations
One of the biggest mistakes is checking too early and disturbing the callus tissue. Realistic timelines prevent unnecessary panic. As a rule, most common houseplants and woody ornamentals need a minimum of 6-8 weeks under ideal conditions to show the first white root nubs.
Do: Start checking a vigorous Monstera or Pothos at around 6 weeks by gently feeling the outside of the moss ball for firm root bumps.
Don’t: Open the wrap on a Magnolia, Gardenia, or Citrus air layer before 12 weeks, especially if attempted in late summer or fall. Cooler temperatures and shorter days slow everything down. Understanding these air layering timing clues helps you manage expectations and avoid sabotaging a layer that just needs more time. If you’re unsure, a good resource is your local university extension service, which often has guides on propagation timing for regional plants, like this one from the University of Florida IFAS Extension on plant propagation techniques.
Salvage Ops & Strategic Patience: Your Action Plan
Based on your diagnosis, here’s what to do next.
If the Moss is Dry:
This is your most salvageable situation. Carefully unwrap the plastic, keeping the moss ball intact if possible. Submerge the moss in water for 10-15 minutes, then squeeze out excess water until it’s uniformly damp like a wrung-out sponge. Re-wrap with new plastic, ensuring an airtight seal at both ends. Place it in bright, indirect light and monitor.
If Growth is Just Slow (Moist, No Roots):
Practice strategic patience. Move the parent plant to a brighter, warmer location if possible. Do not open the wrap. Wait another 3-4 weeks before a gentle external check. Many air layer not rooting situations resolve with more time and better light.
When to Cut Your Losses:
If, after 4+ months in the active growing season with perfect moisture and good light, there’s zero root development and the stem looks stressed or is dying back, it’s likely a failure. The branch may have been too weak. Carefully remove the setup, make a clean cut below the wounded area, and consider restarting on a more vigorous stem.
Turning Diagnosis Into Prevention
Viewing dry moss and delayed roots as clues, not failures, transforms you from a passive observer to an active participant in propagation. This diagnostic mindset is your best tool. Next time, you’ll know to squeeze-test your moss, double-check your seals, and choose a stout branch in peak season. Air layering is a dialogue with your plant, and now you’re fluent in interpreting its signals. Apply this systematic approach, and your next attempt will be guided by experience, not guesswork.