You’ve carefully wrapped your branch in damp moss, sealed it tight, and waited patiently for weeks, only to find… nothing. No roots, just a stalled, frustrating air layering attempt. The culprit is almost always the very first step: the ring cut. It’s counterintuitive, but the biggest mistake isn’t cutting too deep and damaging the branch—it’s cutting too shallow and leaving the cambium layer intact. This thin, vital layer of living tissue is the hidden gatekeeper of root formation. When you fail to remove it completely during the girdling process, it simply reconnects, bypassing the stress signal that tells the plant to grow new roots at your carefully prepared site. This article is your diagnostic guide to the subtle, often overlooked errors in the ring cut technique that lead directly to rooting failure, turning your propagation effort into a lesson in patience rather than success.
Rooting stalls in air layering most often because the ring cut fails to completely remove the cambium layer. This thin, living tissue can reconnect, blocking the hormonal signal that tells the plant to grow new roots at the wound site. If this layer remains, it continues transporting nutrients, preventing the plant from triggering the stress response needed for root formation where you want it.
The Science Behind the Ring Cut: Why It Triggers Roots
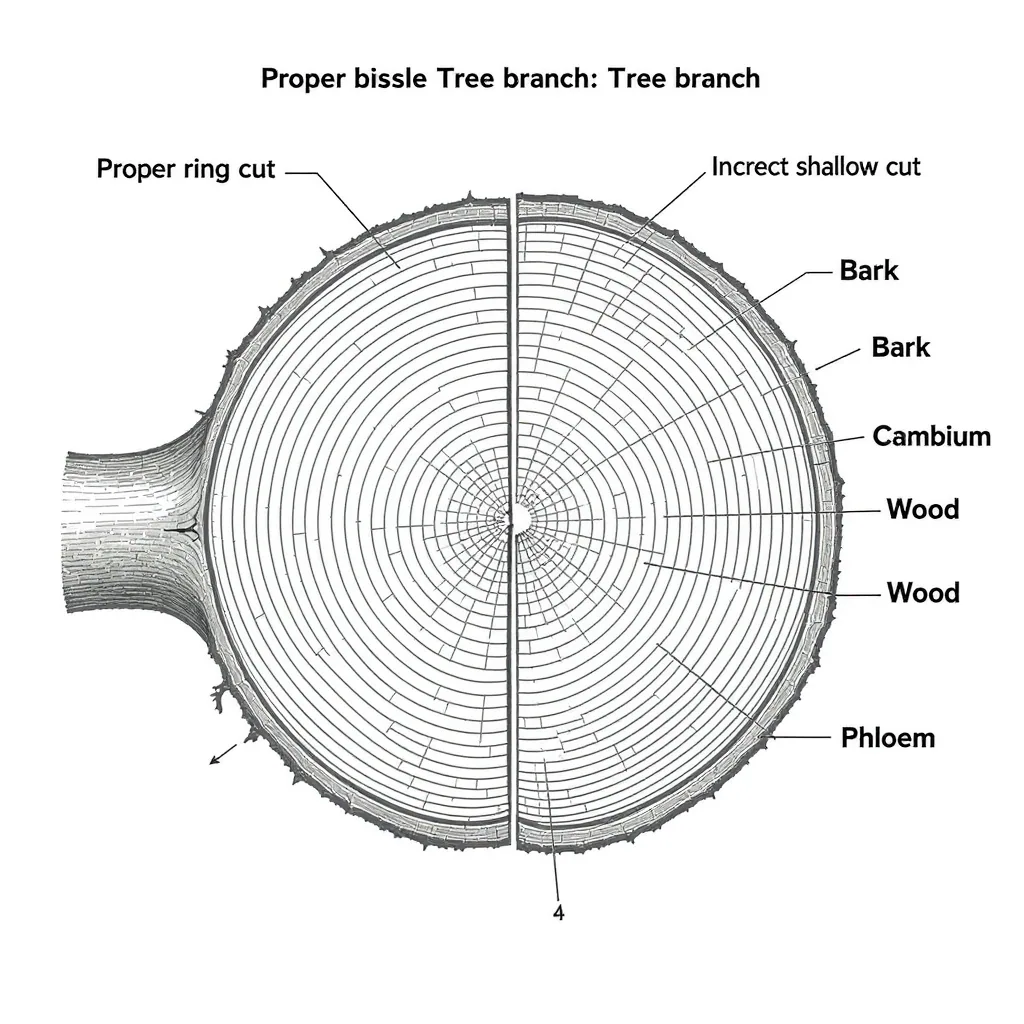
To fix air layering ring cut mistakes, you first need to understand what a perfect cut is supposed to achieve. The goal of girdling for air layering isn’t just to wound the plant; it’s to strategically interrupt a specific flow of hormones and nutrients. A branch has two main vascular highways: the xylem (which moves water and minerals upward) and the phloem (which transports sugars and hormones, like auxin, downward). The phloem sits just inside the bark, and the cambium—a thin, green, actively dividing layer—is sandwiched between the bark and the wood. fix air layering ring cut
When you make two parallel cuts and remove the ring of bark, you sever the phloem. This stops the downward flow of sugars, which begin to accumulate just above the wound. More critically, you must also completely scrape away the cambium. If this living layer remains, it can quickly produce new cells that reconnect the vascular tissue, allowing auxin to continue flowing past the wound. It’s this interruption of auxin, coupled with the accumulation of sugars and other compounds, that signals the plant to initiate roots at that exact site. Incomplete cambium removal is, therefore, a primary cause of rooting failure in air layering. The plant simply never gets the strong, clear signal it needs.
Diagnosing Your Ring Cut: The Four Critical Mistakes
If your air layering attempt is stubbornly not rooting, the issue almost certainly lies in the girdling process. Here are the four most common technical errors that stall root development.
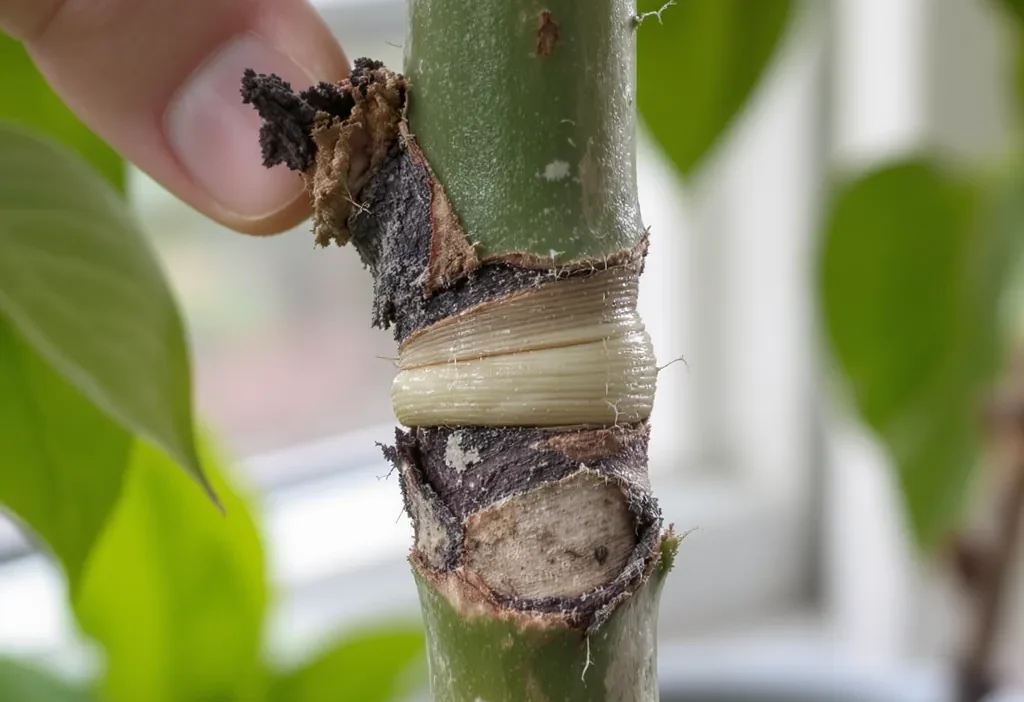
1. The Shallow Cut (Missing the Cambium)
This is the most frequent error. You cut through the bark and stop, feeling like you’ve done enough. But if you look at the exposed wood and see a shiny, greenish, or slippery film, you’ve left the cambium intact. This layer can regenerate a connection in days, nullifying your entire effort. The cut must go deep enough to expose the hard, dry, non-green wood beneath.
2. The Jagged or Uneven Cut (Creating Cambium Bridges)
Using a dull blade or a sawing motion often creates ragged edges. These uneven surfaces frequently leave tiny “bridges” of cambium tissue connecting the upper and lower parts of the ring. Even one small bridge is enough for the plant to maintain hormonal communication, preventing the localized root trigger. Your cuts must be clean, parallel, and made with a single, confident stroke of a sharp knife.
3. Skipping the Scrape
Removing the bark ring is not the final step. After the ring is off, you must vigorously scrape the exposed wood with the back of your knife or a scraping tool. This ensures any residual cambium cells are physically removed. Scrape until the surface is completely dry and matte, not shiny. This step is non-negotiable for success.
4. Incorrect Ring Spacing
The two parallel cuts should be spaced about 1 to 1.5 times the diameter of the branch apart. If they are too close together, you don’t create a large enough wound site for significant root formation. If they are too far apart, you create an unnecessarily large wound that the plant may struggle to callus over, delaying or preventing rooting. Consistency matters.
The Right Way to Girdle: A Visual Guide to Success
Now that you know what can go wrong, here’s the positive, corrective procedure for a perfect girdle. Follow this sequence to eliminate common air layering propagation problems.

Do’s for a Successful Ring Cut
- Do use a razor-sharp, sterilized blade. A sharp grafting knife or utility knife blade is ideal. Sterilize with rubbing alcohol to prevent introducing disease.
- Do make two clean, parallel cuts. Hold the blade perpendicular to the stem and rotate it around the branch in a smooth, continuous motion. Apply firm, even pressure to cut through the bark and just into the wood.
- Do remove the bark ring completely. Use the tip of your knife to lift one edge of the bark between the cuts, then peel or twist it away cleanly.
- Do scrape the exposed wood thoroughly. This is the step most people rush. Scrape back and forth 10-15 times until the surface is completely dry and no green tissue is visible.
- Do apply rooting hormone (optional but recommended). After scraping, a light dusting of rooting hormone on the upper lip of the wound can significantly boost root initiation.
Don’ts to Avoid Immediately
- Don’t use a dull blade or scissors. They crush and tear tissue, creating the jagged edges that lead to cambium bridges.
- Don’t cut too deep into the heartwood. You only need to expose the sapwood (the lighter wood just under the cambium). Cutting too deep can weaken the branch unnecessarily.
- Don’t assume the bark removal did the job. The scrape is what guarantees cambium removal. Never skip it.
- Don’t let the exposed wood dry out for too long before applying moss. Once prepped, the site should be wrapped within a few minutes to keep the cells viable.
Beyond the Cut: Other Factors That Can Stall Rooting
While mastering the ring cut solves the majority of air layering not rooting issues, a few other factors can contribute to stalled root development. If you’re confident your girdling technique was flawless, consider these secondary culprits.
Moisture is critical. If the sphagnum moss in your air layer ball dries out completely, the delicate root initials will die. Conversely, if it’s sealed in plastic and becomes waterlogged, it can rot. Check the moss periodically; it should feel like a damp, wrung-out sponge. The parent plant’s health is also key. A plant under stress from insufficient light, poor nutrition, or drought will prioritize survival over propagation. Ensure the mother plant is healthy and actively growing. Finally, timing and species matter. Air layering is most successful during a plant’s active growth period (typically late spring through summer). Some plant species simply root faster than others, so patience is still a virtue, even with perfect technique.
Master the Cut, Master Propagation
The frustration of a stalled air layer almost always traces back to the precision of the initial ring cut. By understanding the “why” behind the girdling and meticulously avoiding the four common errors—especially the incomplete removal of the cambium—you transform the process from a hopeful gamble into a reliable technique. This single skill eliminates the vast majority of air layering propagation problems.
View your next attempt not as a repeat of past frustration, but as a new application of precise knowledge. Armed with this diagnostic understanding, you can approach your favorite plant with confidence, knowing exactly how to give it the clear signal it needs to produce roots. Turn that stalled project into your next propagation success story.