Most plant propagation guides treat air layering as a one-size-fits-all technique, but that’s a fast track to disappointment. The single biggest mistake you can make is using the exact same method on a pencil-thin azalea branch as you would on a thumb-thick magnolia limb. The truth is, the best way to air layer branches isn’t a single method—it’s a tailored protocol that changes based on two critical factors: the thickness of the branch and the type of plant you’re working with. Getting this match right is what separates a successful, rooted clone from a withered, failed attempt. This guide moves beyond generic tutorial to give you clear, actionable playbooks for both thin, flexible growth and thick, woody stems, ensuring you apply the right technique for the right branch every time.
The best way to air layer branches depends on their thickness and the plant type. For thin, flexible branches (under 1/2 inch), use a simple sphagnum moss wrap. For thick, woody branches (over 1 inch), you must score the cambium layer more aggressively and use a larger rooting medium volume. Always match your technique to the plant’s growth habit—deciduous trees, evergreens, and tropicals each have specific timing and care needs.
Why Branch Thickness Changes Everything
At its core, air layering works by convincing a stem to grow roots from a wounded section while it’s still attached to the parent plant. The success of this process hinges entirely on your ability to interrupt the flow of nutrients (specifically, sugars moving down through the phloem) and encourage the exposed cambium layer—the thin, green, living tissue just under the bark—to produce roots instead of just healing over with callus.
This is where thickness becomes the critical variable. On a thin, flexible branch, the cambium is close to the surface and actively growing. A simple notch is often enough to redirect its energy. A thick, woody branch, however, has a more developed bark layer, a larger volume of sapwood, and a cambium that’s less vigorous. If you use a gentle notch, the plant will simply bridge the gap with callus tissue before roots ever have a chance to form. For an air layer thick branch, you need a more decisive intervention to fully stop the downward flow and create a large enough area for root development. Matching your technique to the branch’s physiology isn’t just a detail—it’s the difference between success and a bundle of dead moss.
The Thin Branch Protocol (Under 1/2 Inch Diameter)
This method is perfect for plants like azaleas, ficus, rosemary, and young camellias. The goal is minimal, precise intervention during the plant’s active growth period (typically late spring to early summer).
Step-by-Step Playbook
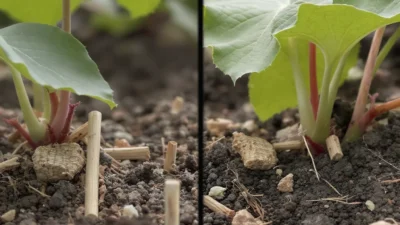
- Select Your Branch: Choose a healthy, pencil-thin stem from the current or previous season’s growth. It should be flexible but not overly succulent.
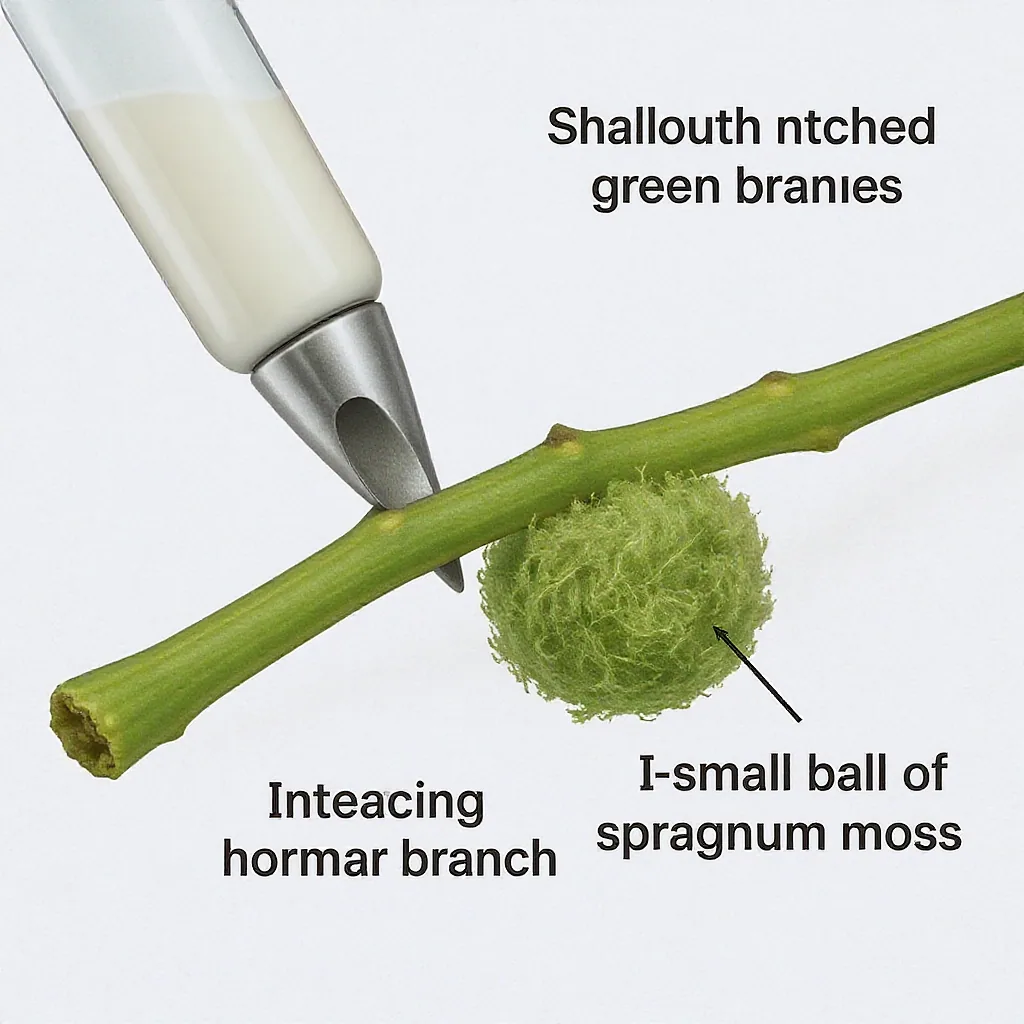
- Make the Wound: Using a sharp knife, make an upward-slanting cut about one-third of the way through the stem. You can also make two close, parallel cuts and remove a tiny sliver of bark. The key is to expose the cambium without severely weakening the branch.
- Apply Hormone (Optional but Recommended): Dust the exposed area with a standard-strength rooting hormone powder. This gives the rooting process a clear signal to begin.
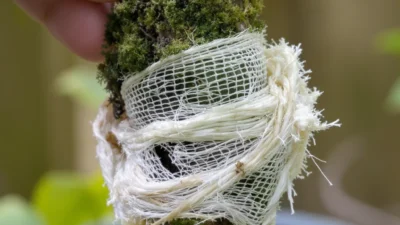
- Wrap with Medium: Take a handful of pre-soaked and wrung-out sphagnum moss—about the size of a golf ball—and wrap it tightly around the wound. The moss should be moist, not dripping.
- Seal and Secure: Enclose the moss ball in clear plastic wrap, ensuring it’s completely covered. Secure the top and bottom tightly with electrical or grafting tape to prevent moisture loss. No foil or black plastic is needed here, as light penetration can be beneficial for thin stems.
Check for condensation inside the plastic every few weeks. You should see roots in 6-12 weeks. For this air layering technique on flexible growth, patience and a light touch yield the best results.
The Thick Branch Protocol (Over 1 Inch Diameter)
When you’re aiming to propagate a mature limb from a magnolia, oak, citrus, or other woody tree, the stakes and the scale change. This is the definitive method for how to air layer thick branch material successfully.
Step-by-Step Playbook
- Select Your Branch: Choose a healthy, sun-exposed limb that’s 1-2 inches in diameter. Avoid overly old, shaded, or cracked wood.
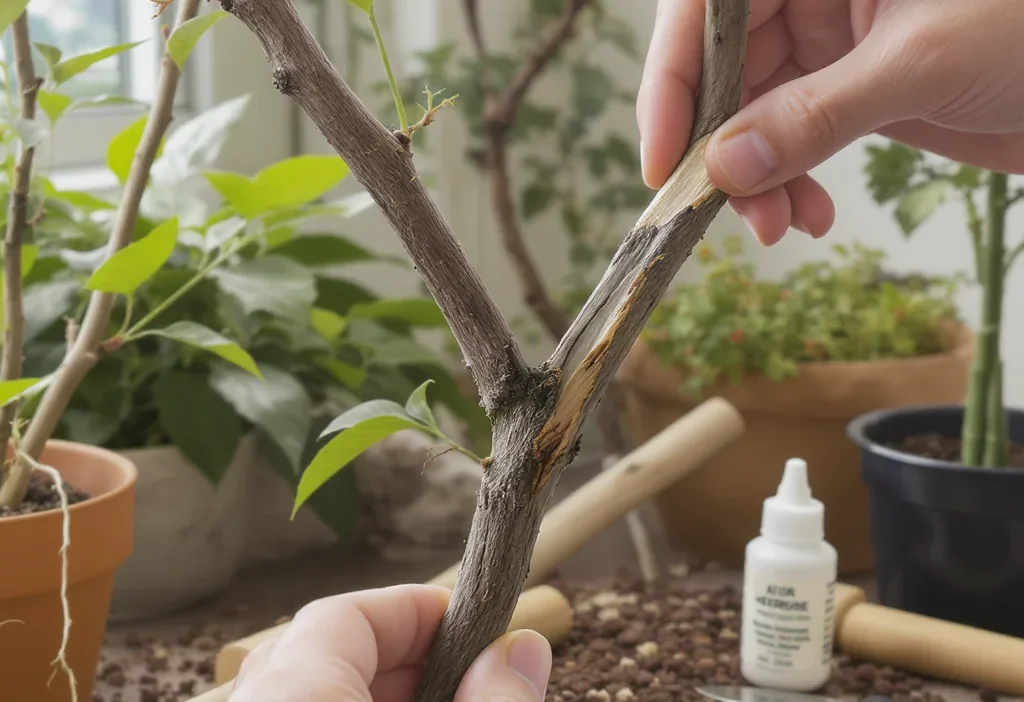
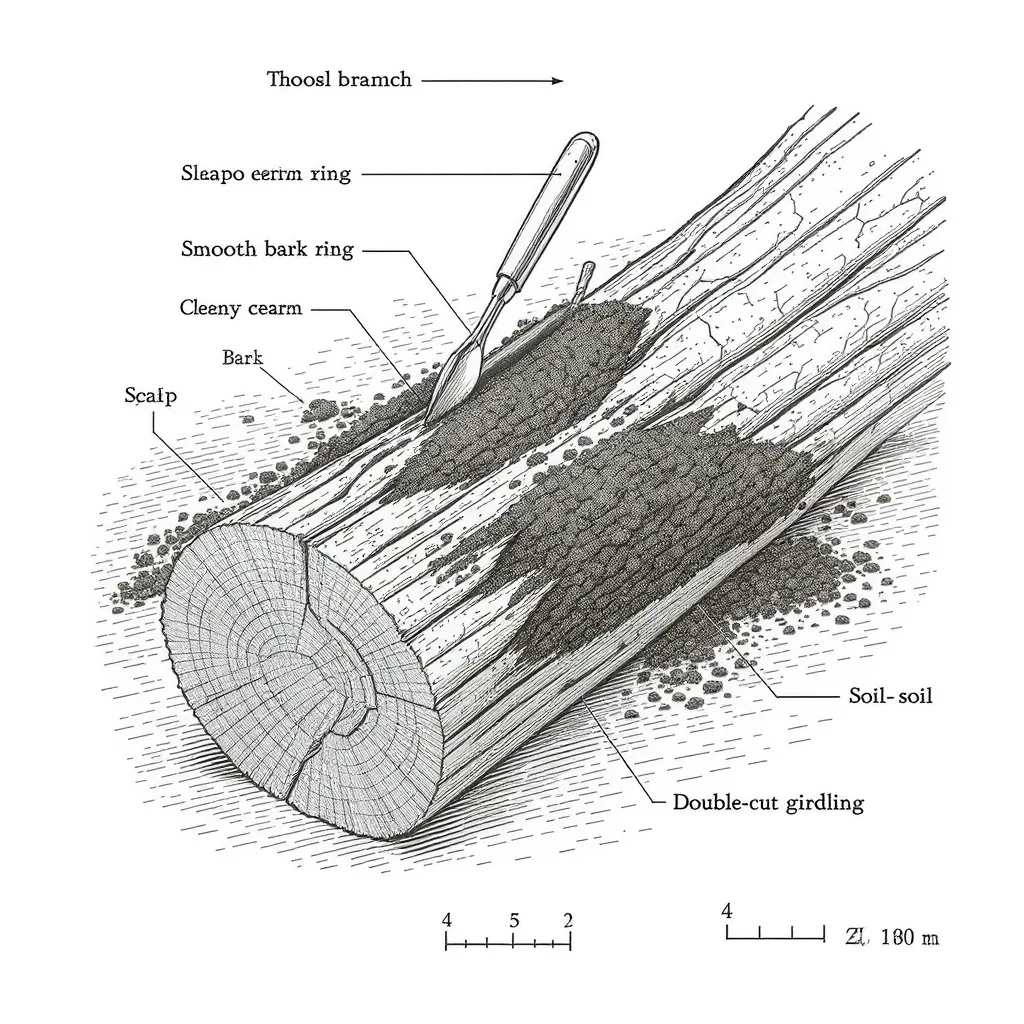
- Girdle the Branch: This is the critical step. Make two parallel cuts around the branch, about 1-1.5 inches apart. Carefully remove the entire ring of bark and cambium between them. You must see clean, white wood.
- Scrape the Cambium: Use your knife blade to thoroughly scrape the exposed wood. This ensures no residual cambium cells are left to bridge the gap and form callus. This step is non-negotiable for air layering woody stems.
- Apply Strong Hormone: Use a rooting hormone powder or gel containing a higher concentration of IBA (Indole-3-butyric acid), formulated for hardwoods.
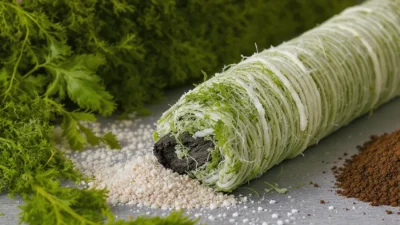
- Pack a Large Volume of Medium: You’ll need a softball-sized mass of moist sphagnum moss, or a 50/50 mix of moss and perlite. Completely envelop the girdled section, creating a substantial “rooting chamber.”
- Create a Rigid, Opaque Enclosure: Use black plastic or foil (which blocks light and discourages algae) to wrap the medium. Because of the weight, you may need to support the bundle with stakes or tie it to a neighboring branch to prevent breakage.
This process requires significant patience—roots may take 3-6 months, or even two full growing seasons. The larger volume of medium is crucial to retain moisture over this extended period.
Tailoring by Plant Type: Deciduous, Evergreen, Tropical
Once you’ve chosen the right protocol for branch thickness, fine-tune your approach based on the plant’s growth habits. This is where your best method for air layering becomes truly customized.
Deciduous Trees & Shrubs (Maple, Apple, Lilac)
Timing is everything. The ideal window is late spring, just as new leaves have fully expanded and the cambium is actively growing. This gives the new roots maximum time to develop before dormancy. Use the thick-branch protocol for mature wood. After separation in late summer or fall, pot the new plant and provide winter protection, as its root system will be small.
Evergreens & Conifers (Juniper, Pine, Holly)
For air layering woody plants that are evergreen, target semi-hardwood—growth that has started to firm up but isn’t fully old and brittle. This is usually in mid to late summer. Conifers can be slower to root, so ensure your moisture seal is impeccable. A rooting hormone is highly recommended to overcome their natural resistance.
Tropicals & Houseplants (Ficus, Monstera, Dracaena)
These are often the easiest candidates for air layer propagation. You can perform it almost any time indoors, but warmth and high humidity accelerate success. The thin-branch protocol usually suffices. The roots will often be visible quickly. After separation, keep the new plant in a humid environment (like a clear plastic bag for a week) to ease the transition to an independent root system.
Common Air Layering Pitfalls (And How to Avoid Them)
Even with the right protocol, small oversights can lead to failure. Here are the most frequent mistakes gardeners make and how to sidestep them.
1. Incomplete Girdling on Thick Branches
The Pitfall: Not removing every trace of the slippery, green cambium layer when girdling. This allows the plant to heal the wound with callus, blocking root formation.
The Fix: After removing the bark ring, scrape the exposed wood vigorously with your knife until it feels completely dry and looks uniformly pale. No green streaks allowed.
2. Letting the Medium Dry Out
The Pitfall: The sphagnum moss inside the wrap desiccates, killing the delicate initial root cells (root primordia).
The Fix: Use pre-soaked, wrung-out moss and create an airtight seal with your plastic. If you see no condensation for a week, carefully inject a few milliliters of water with a syringe and reseal.
3. Using a Branch That’s Too Old or Weak
The Pitfall: Choosing a thick but ancient, shaded, or diseased limb with low vegetative vigor.
The Fix: Select a branch that is healthy, receives good light, and is no more than 2-3 years old for optimal air layering success rate. The plant needs energy to produce roots.
4. Attempting Air Layering During Dormancy
The Pitfall: Trying to layer a deciduous tree in winter when its biological processes are shut down.
The Fix: Always layer during the active growing season. For most plants, this is from spring through late summer.
5. Wrapping the Bundle Too Tightly
The Pitfall: Constructing the plastic wrap so tightly that it constricts the branch or compresses the rooting medium, leaving no air space for roots to grow.
The Fix: Secure the ends tightly to seal in moisture, but leave the main bundle loose enough so the moss isn’t crushed. Roots need oxygen as well as moisture.
Mastering a Reliable Propagation Skill
Air layering can feel like a magic trick, but it’s really just applied plant physiology. The key takeaway isn’t a single “right” way, but the principle of adaptation: match the aggressiveness of your cut to the branch’s thickness, and the timing to the plant’s life cycle. By following these tailored protocols, you move from hopeful guessing to confident execution.
Start with an easy winner—a vigorous ficus or azalea—to build your confidence. Feel the difference between scoring a thin stem and girdling a thick one. With that first successful bundle of roots, you’ll realize this isn’t a mysterious art, but a repeatable, highly reliable skill that puts the propagation of prized plants firmly in your control.