Most plant propagation guides treat all stem cuttings the same, offering a generic list of steps that often leads to disappointment. The single biggest mistake isn’t a dull blade or forgetting rooting hormone—it’s using the wrong technique for your stem’s maturity. The best way to take stem cuttings by stem type is to first identify whether you’re working with soft, semi-hard, or hard wood, then match your entire protocol to that specific physiological state. This one decision, based on the stem’s flexibility and the season, dictates everything from timing and preparation to rooting environment and patience level, transforming propagation from a guessing game into a reliable, repeatable process.
The best way to take stem cuttings by stem type is to first identify your stem type: soft (new, bendy growth), semi-hard (partially matured), or hard (fully mature, woody). For softwood, take cuttings in spring/early summer, use a sharp blade, and root in high humidity. For semi-hardwood, take in late summer, use a slightly longer cutting, and root in a well-draining mix. For hardwood, take in dormancy, use longer ‘sticks,’ and plant directly outdoors or in cold frames. Success depends on matching your technique to the stem’s maturity.
Why Stem Type is Your First (and Most Important) Decision
Think of a stem’s maturity like a plant’s age. A young, flexible stem has different needs and capabilities than an old, woody one. Trying to propagate them the same way is a recipe for disappointment. The best way to take stem cuttings isn’t a single technique—it’s a system that matches your method to the stem’s physiological state.
This state, determined by how much lignin (the woody substance) has developed, dictates everything: when you take the cutting, how you handle it, and the environment it needs to root. Get this match right, and you work with the plant’s natural rhythms. Get it wrong, and you fight against them. Your first step is always to identify which of the three core types you’re dealing with: softwood, semi-hardwood, or hardwood.

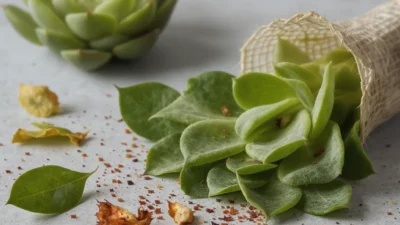
Photo by Olha Ruskykh on Pexels
The Stem Type Matrix: Softwood vs. Semi-Hardwood vs. Hardwood
This quick-reference table is your cheat sheet for making that critical first decision. Use it to match what you see on your plant with the right protocol.
| Stem Type | Best Season | How to Identify | Example Plants | Rooting Speed | Special Note |
|---|---|---|---|---|---|
| Softwood | Spring to Early Summer | New, green, flexible growth that snaps when bent. Leaves are often smaller or still developing. | Coleus, Fuchsia, Impatiens, many herbs (mint, basil), and deciduous shrubs like Hydrangea. | Fast (2-6 weeks) | Requires high humidity and constant moisture. Wilts easily. |
| Semi-Hardwood | Late Summer to Early Fall | Current season’s growth that has begun to firm up and brown slightly at the base. Flexible but not as brittle as hardwood. | Camellia, Holly, Boxwood, Rosemary, Lavender, and many broadleaf evergreens. University extensions often recommend this for woody herbs. | Medium (6-10 weeks) | More forgiving than softwood; needs good drainage to avoid rot. |
| Hardwood | Late Fall to Winter (Dormant) | Fully mature, woody, leafless stems from the previous season. Stiff and does not bend easily. | Deciduous trees & shrubs (Fig, Grape, Willow, Rose), and some fruit bushes. | Slow (months over winter) | A “set and forget” method often done outdoors or in cold frames. |

The Softwood Cutting Protocol (Spring/Early Summer)
This method is all about speed and maintaining turgor (water pressure) in tender tissue. Mastering these softwood cuttings basics lets you multiply fast-growing plants quickly.
Step-by-Step Playbook
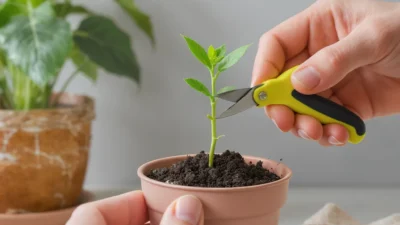
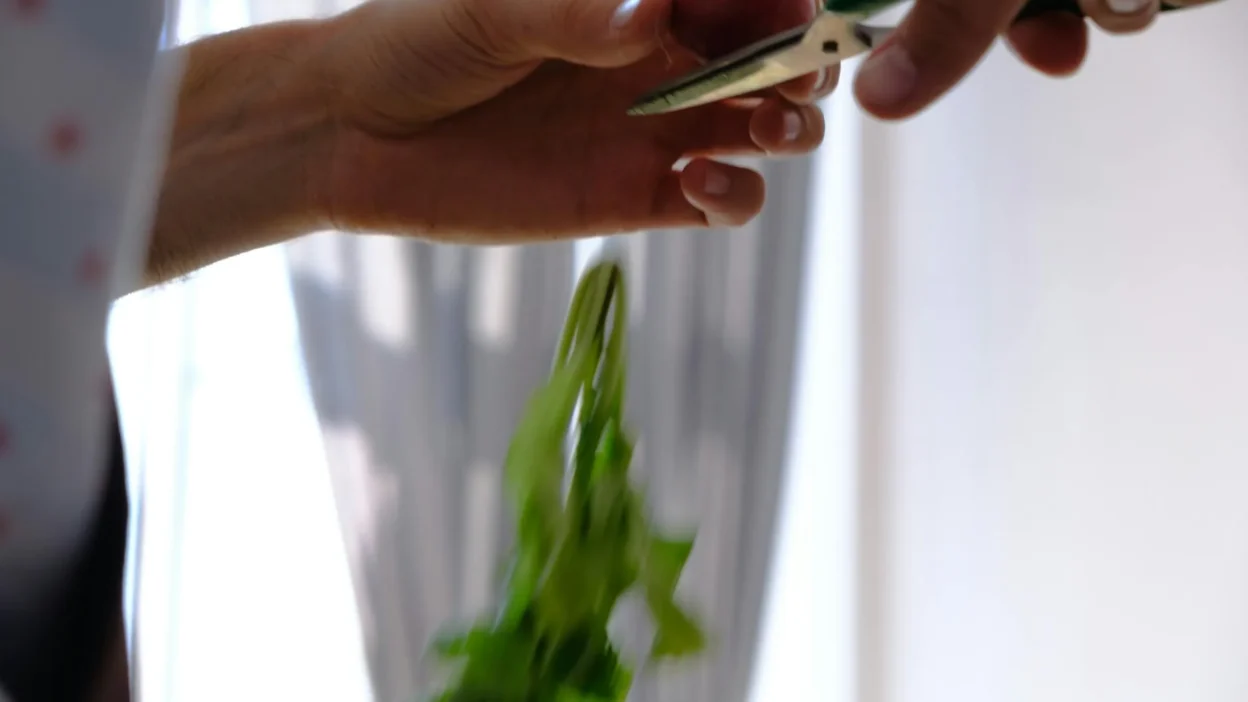
1. Select & Cut: In the morning when stems are full of water, choose healthy tip growth 3-5 inches long. Using a sharp, sanitized blade, make a clean cut just below a leaf node (the bump where leaves emerge).
2. Prepare the Cutting: Immediately strip leaves from the lower half to two-thirds of the stem. This reduces moisture loss. Optionally, dip the cut end in a rooting hormone powder or gel to encourage faster root development.
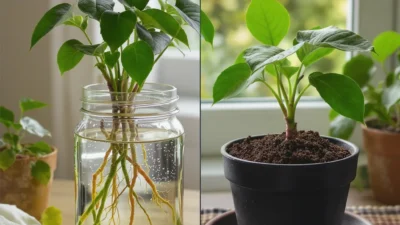
3. Plant & Enclose: Insert cuttings into a pre-moistened, sterile, and light medium like perlite, vermiculite, or a seed-starting mix. Firm the medium gently around the stem.
4. Create a Humid Dome: This is non-negotiable. Cover the pot with a clear plastic bag or place it in a propagation dome to trap humidity. Keep it in a warm spot with bright, indirect light—never direct sun, which will cook them.
5. Monitor & Harden Off: Check daily for condensation and slight moisture in the medium. Roots form quickly. Once you see new growth, gradually open the dome over a week to acclimate the plants to lower humidity.
The Semi-Hardwood Cutting Protocol (Late Summer)
This is the Goldilocks of propagation—not too tender, not too woody. These semi hardwood cutting tips focus on patience and good airflow to prevent disease while the firmer stems root.
Step-by-Step Playbook
1. Select Firmer Growth: Look for stems from the current season that have lost their bright green softness and show a slightly brown, firmer base. Cuttings should be 4-6 inches long.
2. Wound Thicker Stems (Optional): For plants with thicker bark (like holly), lightly scrape the bottom inch of the stem with your blade to expose the green cambium layer. This can stimulate root formation.
3. Hormone & Plant: Use a rooting hormone, as these stems benefit from the extra boost. Plant in a well-draining mix (e.g., 50% potting soil, 50% perlite).
4. Moderate Humidity: While a plastic bag can help, semi-hardwood cuttings don’t need the intense humidity of softwood. A loosely tented bag or a propagation dome with occasional ventilation is perfect. Ensure good air circulation to deter mold.
5. Be Patient: Rooting takes longer. Keep the medium lightly moist but never soggy. Tug gently on the cutting after 6-8 weeks; resistance means roots are forming.
The Hardwood Cutting Protocol (Dormant Season)
This is the most hands-off method. You’re essentially planting dormant “sticks” and letting winter and spring do the work. It’s a fantastic way to propagate many deciduous shrubs and trees cheaply.
Step-by-Step Playbook
1. Collect Dormant Stems: In late fall or winter, after leaves have dropped, select pencil-thick, healthy stems from the previous year’s growth. They should be fully hardened and woody.
2. Cut into “Sticks”: Trim stems into sections 6-10 inches long. The top cut should be straight and just above a bud; the bottom cut should be angled and just below a bud. This helps you remember which end is up.
3. Bundle & Store (Optional): You can bundle cuttings, bury them in moist sand or wood shavings, and store them in a cool garage or fridge until early spring. This is called “heeling in.”
4. Plant Deeply Outdoors: Plant cuttings directly in a prepared garden bed or deep pot, burying two-thirds of their length. The top bud should just peek above the soil. A well-draining location is key.
5. Wait for Spring: Nature takes over. Keep the area weed-free and moderately moist. By spring, buds should swell and leaves emerge, indicating roots have formed below.
Common Pitfalls & How to Avoid Them
Even with the right protocol, small mistakes can derail success. Here are the most frequent issues, sorted by stem type.
Softwood & Semi-Hardwood Pitfalls
Pitfall: Overwatering and rotting stems.
Fix: Your medium should be moist like a wrung-out sponge, not wet. Ensure your pots have drainage holes and you provide airflow, especially for semi-hardwood cuttings.
Pitfall: Taking cuttings that are too old (for softwood) or too young (for semi-hardwood).
Fix: Do the snap test. True softwood should snap cleanly. Semi-hardwood should bend but not break easily. If in doubt, err toward slightly more mature material for semi-hardwood.
Universal Pitfalls
Pitfall: Using dull or dirty tools, crushing the stem and introducing disease.
Fix: Wipe blades with rubbing alcohol between plants and always make a sharp, clean cut.
Pitfall: Impatience, especially with hardwood cuttings.
Fix: Mark your calendar and resist the urge to dig them up. Hardwood propagation is a test of faith in the process.
Pitfall: Not labeling your cuttings.
Fix: Write the plant name and date on a tag. In a few weeks, you’ll be glad you did.
Your Next Step: Match, Then Execute
The theory is simple, but success lives in the action. You now have the clear protocols for the best way to take stem cuttings by stem type. Don’t let this become just another article you read. The very next time you’re in your garden or looking at a houseplant you love, examine a stem. Is it soft and green? Firm and brown-tinted? Or bare and woody? Identify it, recall the corresponding table and steps, and take that first cut.
Mastering this single decision—matching your technique to the stem’s maturity—unlocks the ability to confidently propagate a huge range of plants. Start with one type this season, get a win, and then expand your skills. Your future, larger garden (that cost you almost nothing) begins with that one informed cut today.