You’ve sown your seeds with care, tucked them into their warm, moist bed, and now you wait. Days pass, and you find yourself staring at that flat of soil, willing the first green shoots to appear, wondering with a quiet anxiety if you’ve done everything right. This moment of hopeful uncertainty is a universal rite of passage for gardeners. The journey from a dormant seed to a robust, transplant-ready seedling isn’t magic—it’s a reliable protocol. This germination and seedling care guide is that protocol. It breaks down the process into clear, manageable phases, moving you from passive hope to active confidence. By understanding and managing just four key factors—moisture, warmth, light, and air—in the correct sequence, you can consistently achieve strong starts that form the foundation for your entire garden’s success.
A strong start for seeds and seedlings is built on a simple protocol: provide consistent warmth and moisture for germination, then immediately transition to bright light and good air circulation for sturdy growth. Avoiding common pitfalls like overwatering and insufficient light is key. Success hinges on managing these four elements in the right order and intensity, turning uncertainty into a repeatable, confident process.
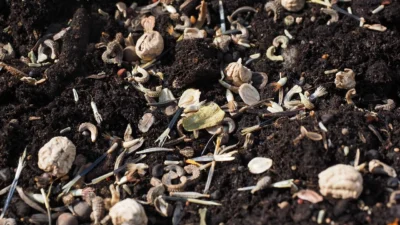
The Germination Protocol: Your Pre-Sprout Checklist
Before a single seed touches soil, success is determined by your setup. This phase is about creating a stable, passive environment where the seed’s internal programming can run without interruption. Think of it as setting the stage; get these seed germination tips right, and you drastically increase your odds of a full, healthy tray.
Your Pre-Sow Essentials
Gather these items to avoid mid-process scrambles:
- Fresh, Viable Seeds: Check packet dates. Older seeds may have lower germination rates.
- Clean, Shallow Trays or Cells: Sterilize reused containers with a 10% bleach solution to prevent disease.
- Soilless Seed-Starting Mix: This is non-negotiable. Garden soil compacts and can harbor pathogens. A fine, fluffy mix retains moisture and allows easy root penetration.
- A Warmth Source: A seedling heat mat is the most reliable tool for providing consistent bottom heat, which many seeds crave.
- A Way to Maintain Humidity: A clear plastic dome or a sheet of plastic wrap.
- Labels and a Watering Can with a Fine Rose or Spray Bottle: Gentle watering prevents displacing seeds.
Executing the Protocol
Now, follow the sequence:
- Moisten Your Medium: Fill your containers with mix and water it thoroughly until it’s evenly damp, like a wrung-out sponge. Let excess water drain.
- Sow at the Correct Depth: A general rule is to sow at a depth twice the seed’s diameter. Tiny seeds (like lettuce, petunia) often need only a light press into the surface. Check your packet for specifics—sowing too deep is a common failure.
- Create the Microclimate: Cover the tray with your humidity dome. This traps evaporating moisture, eliminating the need to water again until after germination.
- Provide Consistent Warmth: Place the tray on your heat mat, set to the temperature recommended on the seed packet (typically 70-80°F / 21-27°C for most vegetables). No light is needed yet.
Your job now is patience and vigilance. Check daily for condensation and the first signs of life. This seed starting guide approach turns the mysterious waiting period into a controlled, predictable process.
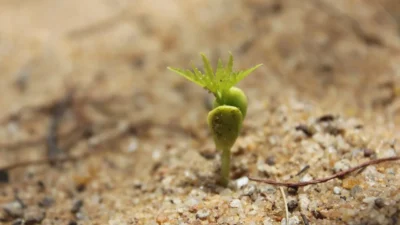
The First 48 Hours Post-Sprout: Critical Transition
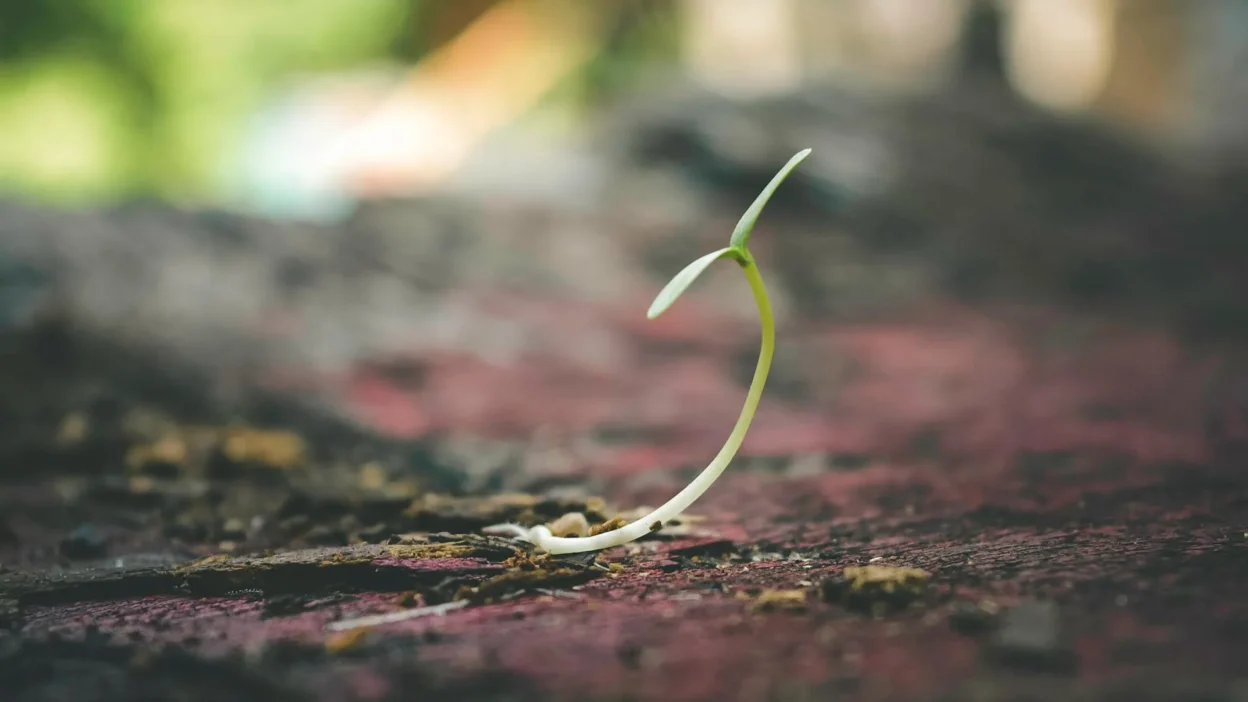
The moment you see the first hypocotyl (the initial stem) arching upward, the game changes instantly. The passive germination phase is over, and active young seedling care begins. This 48-hour window is the most critical in your seedling’s life. Hesitation here leads directly to the number one seedling problem: legginess.
Immediate Actions (Day 1)
Remove the Humidity Dome: Do this immediately. The 100% humidity that aided germination now fosters fungal diseases like damping-off. Seedlings need air circulation.
Introduce Intense Light: This is the most urgent step. Place seedlings under a bright grow light, positioned just 2-3 inches above the tops of the plants. If using a sunny windowsill, choose a south-facing window and be prepared to rotate trays daily. The light source must be close to prevent stretching.
Adjust Temperature: If you were using a heat mat, you can often lower the temperature by 5-10°F. Cooler temperatures (around 65-70°F / 18-21°C) encourage sturdier growth now that they have light.
Recovery Checkpoint: Already Leggy?
If your seedlings are already stretched with thin, weak stems, all is not lost. First, move them to the brightest light possible, bringing your grow light as close as you can without burning the leaves. When you transplant them later, you can bury the elongated stem deeper in the soil—tomatoes are famous for thriving with this treatment. For other plants, provide support with a small stick and focus on perfecting light from here on out.
This rapid shift from a warm, humid incubator to a bright, airy nursery is the cornerstone of strong seedling growth. It signals the plant to stop investing in stem elongation and start developing leaves and roots.
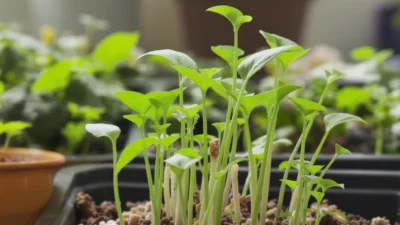
The Seedling Strengthening Phase: Light, Food, and Air
With the initial transition complete, your seedlings enter the vegetative growth phase. Your goal is no longer just survival, but building robust, transplant-ready plants. This requires managing three key inputs: light, nutrients, and air movement.
Mastering Light for Density
Insufficient light is the root cause of 90% of weak seedling issues. A windowsill is rarely enough, especially in early spring. A simple LED shop light or a dedicated grow light is a game-changer. Provide 14-16 hours of light per day. If stems are leaning, the light is too far away. If leaves are bleaching or curling, it’s too close. The University of Minnesota Extension offers excellent guidance on light intensity for plants.
Feeding: The “Weakly, Weekly” Rule
Your soilless mix has minimal nutrients. Once the first set of true leaves (the second set that appears, which look like the plant’s mature leaves) is fully developed, it’s time to start feeding. Use a balanced, water-soluble fertilizer diluted to ¼ to ½ the recommended strength. Apply this weak solution once a week. Over-fertilizing is far more dangerous than under-fertilizing at this tender stage.
The Unsung Hero: Air Circulation
Still, quiet air is a seedling’s enemy. Gentle air movement from a small oscillating fan, set on low and placed a few feet away, performs two vital functions: it strengthens stems by forcing them to flex and resist, and it drastically reduces surface moisture on leaves, preventing fungal diseases. Run the fan for a few hours a day.
Pro-Tip: The Strengthening Trifecta
For the sturdiest seedlings, combine these three practices:
- Brush Them Gently: Lightly run your hand over the seedlings a few times a day. This mimics wind and stimulates stem thickening.
- Let the Soil Dry Slightly: Water only when the surface feels dry to the touch. This encourages roots to search for moisture.
- Avoid Crowding: If you sowed thickly, thin seedlings early. Competition for light causes stretching.
This phase of attentive young seedling care builds the physical resilience plants need to handle the upcoming stress of transplanting seedlings outdoors.
Troubleshooting Weak Seedlings: Diagnosis and Recovery
Even with the best protocol, issues can arise. Don’t panic—view problems as diagnostic clues. Use this flowchart to move from symptom to solution quickly. For a deeper dive into plant pathology, resources like the Penn State Extension plant disease library can be helpful for specific issues.

Specific Recovery Protocols
Damping-Off (Seedlings collapse at soil line): This fungal disease is fatal and contagious. Immediately remove and discard affected seedlings. Increase air circulation dramatically, reduce humidity, and let the soil surface dry. Water with a mild chamomile tea solution (a natural fungicide) or a commercial product containing cinnamon oil. Sterilize tools and containers before next use.
Yellowing Leaves (Chlorosis): If lower leaves turn yellow, it’s often a sign of overwatering—let the soil dry out more between waterings. If new growth is yellow, it may be a nutrient deficiency (often nitrogen). Begin your weak fertilizer regimen if you haven’t already.
Purple or Red Stems/Leaves: This can indicate temperature stress (too cold) or a phosphorus deficiency. Ensure nighttime temperatures aren’t too low. If temperatures are fine, a balanced, weak fertilizer should correct a phosphorus issue.
Stunted Growth: Check root health by gently lifting a seedling. If roots are brown and slimy (root rot), overwatering is the cause. If the plant is root-bound (a dense web of roots circling the container), it’s time to pot up into a larger container.
Common Pitfalls and How to Sidestep Them
Many seedling struggles stem from a few repeated mistakes. Awareness is your best defense. Here’s how to avoid the most common traps in your germination and seedling care journey.
Germination Phase Pitfalls
- Overwatering at Sow: Sowing into soggy, cold mix can rot seeds. Always pre-moisten warm mix to a damp, crumbly consistency.
- Inconsistent Warmth: A cold windowsill at night can stall germination. A heat mat provides the steady, bottom heat seeds rely on.
- Planting Too Deep: Follow seed packet instructions. When in doubt, err on the side of too shallow rather than too deep.
Seedling Care Phase Pitfalls
- Light Starvation (The #1 Mistake): Assuming a bright room is “bright enough.” Invest in or rig up supplemental lighting. It’s the single best thing you can do for strong seedling growth.
- Over-Loving with Water: Constant wetness weakens stems and invites disease. Learn the “finger test” and water only when needed.
- Ignoring Air Flow: Still air equals weak plants and fungal issues. A small fan is a cheap, vital tool.
- Transplanting Too Early or Too Late: Transplanting when seedlings are too small shocks them. Waiting until they are severely root-bound stunts them. The sweet spot is when you see a healthy root mass but before roots start circling densely.
From Seedling to Garden Stalwart
Mastering the protocol outlined in this guide does more than just fill your garden beds; it builds a foundational skill that pays dividends all season long. The resilience you cultivate in those early weeks translates directly to plants that establish faster, resist pests and weather more effectively, and ultimately produce more abundantly. You’ve moved from hoping for sprouts to engineering them.
View this process not as a series of fragile tasks, but as a reliable, repeatable system. Each seed you start strengthens your understanding of what plants need to thrive. When you transplant those sturdy, dark-green seedlings into your garden, you’re not just planting a plant—you’re investing the confidence and care of a strong start. The rest of the season is about supporting the vigor you’ve already built.
This germination and seedling care guide breaks down the process into two distinct phases. First, the Germination Protocol focuses on creating a passive, consistent environment of warmth and moisture—set your seeds up correctly, then let them be. The moment they sprout, you immediately switch to the Seedling Strengthening Phase, which is all about active management: intense light, slight soil drying, gentle feeding, and air circulation to build sturdy stems and healthy roots.
The core principle is the shift from a nurturing incubator (for germination) to a toughening nursery (for seedling growth). By sidestepping common pitfalls like overwatering and insufficient light, and using the troubleshooting flow to correct issues early, you can apply this reliable framework to grow robust transplants from virtually any seed.