If you’ve ever watched a prized cutting wither in a glass of water or a propagation tray, you’ve likely bought into the most pervasive myth in home horticulture: that severing a stem is the best, or only, way to clone a plant. For intermediate gardeners ready to level up, this belief is a major roadblock. The truth is, for many woody, slow-to-root, or finicky species—from magnolias to monsteras—the “patient gardener’s secret weapon” isn’t a sharper knife, but more patience. Layering and air layering propagation methods turn a perceived disadvantage (time) into an overwhelming advantage by allowing a stem to root while it remains fully supported by the parent plant. This continuous lifeline of water and nutrients creates a near-100% success rate nursery right on your existing plant, making these advanced propagation techniques not a plan B, but a first-rate strategy for reliably expanding your collection.
Layering and air layering are plant propagation techniques where you induce roots to form on a stem while it remains connected to the mother plant. This ‘life support’ system dramatically increases success rates, especially for woody or finicky species that often fail with traditional cuttings. In essence, you create a new, rooted plant before ever making the final cut, ensuring it has the best possible start.
The Core Myth: Why We Think Cuttings Are King (And Why We’re Wrong)
In the world of plant propagation, stem cuttings have been crowned the undisputed champion. The logic seems flawless: snip a piece, stick it in soil or water, and grow a new plant. It’s fast, it’s simple, and it’s everywhere you look. But here’s the uncomfortable truth: for a huge range of plants, especially woody ornamentals, fruit trees, and finicky houseplants, cuttings are a high-risk gamble with a shockingly high failure rate.
The moment you sever a cutting, you cut off its lifeline. It must immediately scramble to heal its wound, develop roots from scratch, and support its leaves—all without a steady supply of water or nutrients. It’s a race against time that many plants lose, resulting in wilted, rotten, or simply dormant stems. We’ve been conditioned to see this as a normal part of the process, but it doesn’t have to be.
This is where the myth falls apart and the power of plant propagation by layering comes into focus. Layering isn’t the “slow alternative”; it’s the safety net. By allowing the stem to root while still attached to the mother plant, you eliminate the single biggest point of failure. The parent plant acts as an intensive care unit, providing everything needed until a robust new root system is fully established. It turns patience from a passive waiting game into an active strategy for near-certain success.
The Simple Science: How a Connected Stem Guarantees Roots
Understanding the “why” behind layering’s success makes the “how” much more intuitive. At its core, it’s a brilliant hack of plant physiology. When you wound a stem—by bending, scraping, or girdling—you disrupt the flow of carbohydrates (sugars) produced by the leaves downward through the phloem. These sugars accumulate at the wound site.
This accumulation, combined with the natural plant hormone auxin that also gathers there, signals the plant to initiate root growth. Crucially, because the stem remains attached, water and minerals continue to flow up from the roots, and sugars continue to be sent down from the leaves. The wounded section is in a state of “rooting privilege,” getting all the energy it needs without the stress of survival.
Think of it as a rooting ICU. The patient (the stem section) stays on full life support (the parent plant) while it undergoes the major surgery of developing roots. The moist medium you provide (soil or moss) around the wound simply creates the dark, humid environment those nascent roots need to emerge and grow. This process of rooting stems on the plant is why layering is one of the most reliable advanced propagation techniques in a gardener’s toolkit.
Simple Layering Demystified: Bend, Bury, and Wait
Simple layering is the most straightforward of all plant layering methods. It’s perfect for plants with long, flexible stems that can be easily bent to the ground. Think raspberries, forsythia, honeysuckle, climbing roses, and many philodendrons.
The Process, Step-by-Step
1. Select and Prepare: In early spring, choose a healthy, flexible, first-year stem. Bend it to the ground to identify the spot that will touch the soil.
2. Wound the Stem: At that contact point, make a shallow upward slit or scrape away a small ring of bark (about an inch long). This wound is critical—it’s where roots will form.
3. Anchor and Bury: Dig a shallow trench (3-5 inches deep) at the spot. Bend the wounded stem section into the trench, secure it with a landscape staple or a bent wire, and cover it with soil, leaving the leafy tip (6-12 inches) exposed above ground.
4. Wait and Water: Keep the area moist. By autumn, the buried section should have rooted. You can then sever the new plant from the mother, dig it up, and transplant it to its new home.
Air Layering: The Step-by-Step Master Protocol
Air layering is the superstar of advanced propagation techniques for a reason. It allows you to clone substantial branches of trees and shrubs right where they grow—no bending to the ground required. It’s ideal for fiddle-leaf figs, magnolias, citrus, camellias, and other prized plants where you want a sizable new specimen.

Selection & Preparation
Choose a healthy, pencil-thick branch from the previous season’s growth. The ideal spot is about 12-18 inches from the tip, with several leaves above it. Clear any leaves from a 4-inch section where you’ll work.
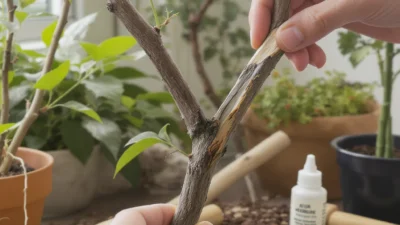
The Wound & Hormone
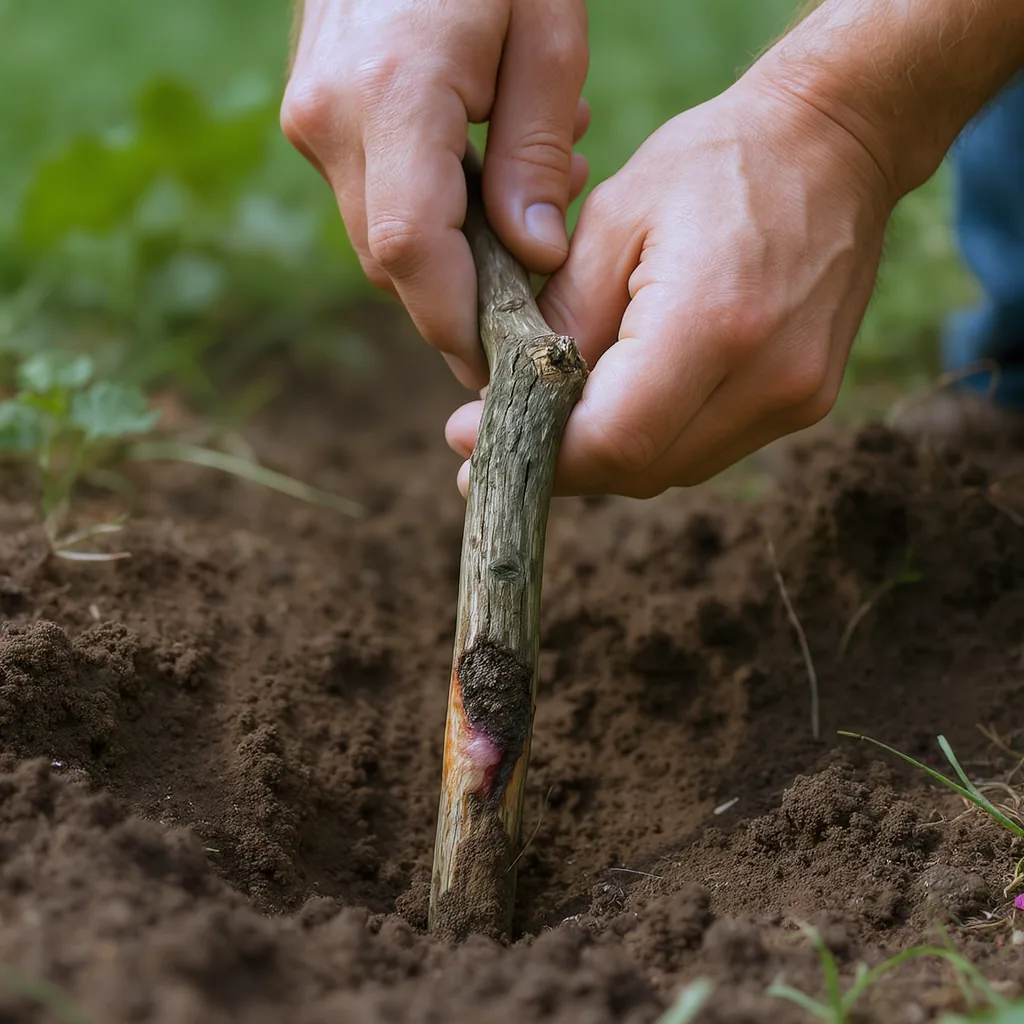
This is the most critical step. Using a sharp knife, make two parallel cuts about 1 inch apart around the stem, then remove the ring of bark and green cambium layer between them, down to the hard, white wood. This “girdling” completely interrupts the phloem. Lightly dust the exposed wood with rooting hormone powder (this is optional but highly recommended for woody plants).
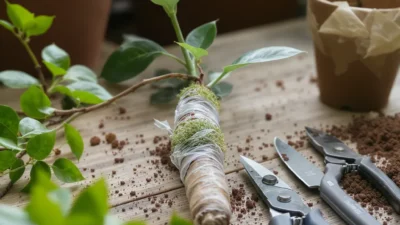
The Moss Bundle
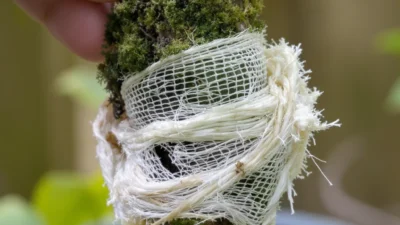
Soak a handful of sphagnum moss in water for 20 minutes, then wring it out so it’s moist but not dripping. Squeeze the moss into a baseball-sized ball and split it open. Wrap it completely around the girdled section, forming a moist, dense pouch.
Sealing the Deal
Wrap the moss ball tightly with clear plastic wrap. Ensure the plastic extends several inches above and below the moss. Seal the top and bottom securely with electrical or grafting tape to create a miniature, waterproof greenhouse. The moss must stay moist inside; if you see condensation, it’s working.
The Waiting Game
Place your air layer in bright, indirect light. Check periodically (every few weeks) by briefly unsealing the top. The process can take 2-4 months, sometimes longer. Success is visible: a dense network of white roots will fill the moss ball.
Separation & Potting
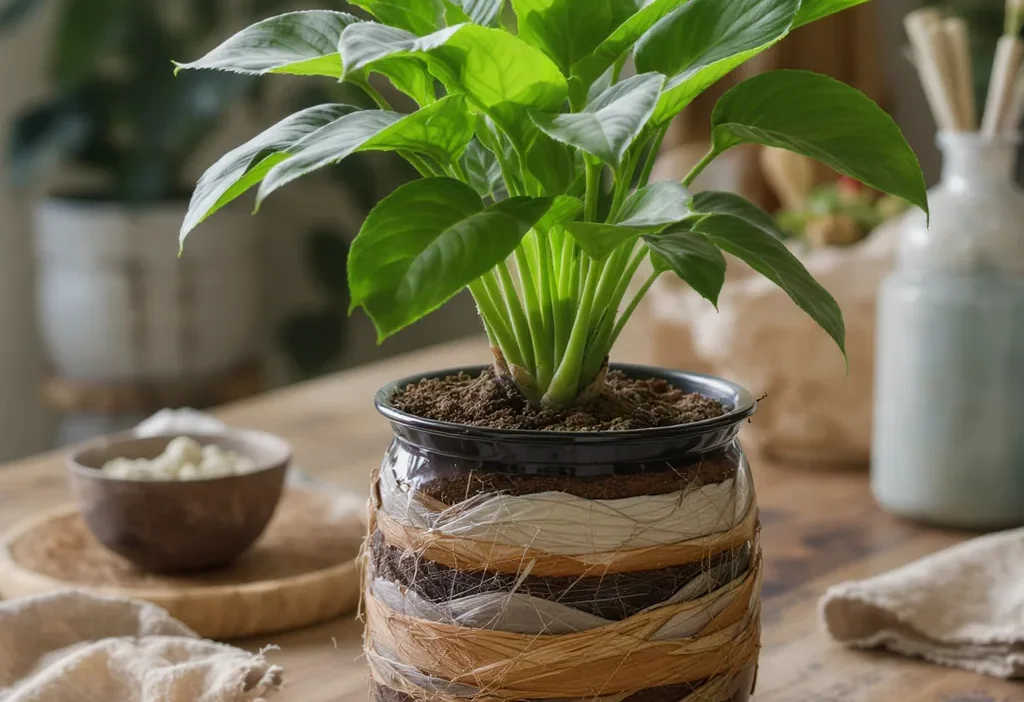
Once you see a healthy root ball, it’s time. Make a clean cut with pruners several inches below the new root mass. Carefully remove the plastic, but leave the moss intact to avoid root damage. Pot the new plant in a well-draining mix, water it in, and place it in a humid, sheltered spot (like a greenhouse or under a plastic bag tent) for a few weeks to acclimate before moving it to normal conditions.
Beyond the Basics: Tip, Trench, and Mound Layering
While simple and air layering cover most scenarios, a few other specialized plant layering methods are perfect for specific plant habits.
Tip Layering
Common for blackberries and raspberries. You simply bury the tip of a current-season cane 4-6 inches deep in late summer. The tip will form a dormant bud underground by fall, which then grows into a new plant the following spring. You can then sever it from the parent.
Trench (or Serpentine) Layering
Used for long, vine-like plants such as wisteria, clematis, or grapes. A single stem is pegged into the soil at multiple points along its length, with each buried section wounded. This creates several new plants from one stem.
Mound (or Stool) Layering
This method is excellent for shrubs that readily produce suckers from the base, like gooseberries, spirea, or dogwoods. In late winter, you cut the entire plant back to a 1-inch stump. As new shoots grow in spring, you gradually mound soil over them, burying the bases. Roots will form along the buried stems, and each can be cut away as an individual plant in autumn.
For detailed guides on these specialized techniques, resources from university extension services, like those from the University of Minnesota Extension, are invaluable.
The Pitfalls: Where Even Experienced Gardeners Stumble
Even with a high-success method like air layering, specific mistakes can lead to failure. Recognizing these pitfalls is key to mastering advanced plant cloning.
1. The Insufficient Wound
A shallow nick or scratch isn’t enough. You must completely remove the cambium layer (the green ring) in a full girdle. If this layer regenerates, it will simply heal over, and no roots will form.
2. The Dry Moss Bundle
Sphagnum moss that is too dry when applied, or a wrap that isn’t sealed tightly, will wick moisture away from the wound. The medium must stay consistently moist (not wet) throughout the process. No moisture means no root initiation.
3. Impatience & Premature Separation
Seeing a few fine roots is not the signal to cut. Wait until you have a visible, dense network of roots that clearly fills the moss ball. A weak root system cannot support the shock of separation and transplanting.
4. Neglecting the Hardening-Off Process
The new plant has lived its entire life in a 100% humidity environment. Severing it and immediately placing it in dry, bright, windy conditions is a death sentence. You must provide a transitional period of high humidity (using a plastic bag or dome) and indirect light for several weeks after potting.
5. Using Opaque or Overheating Wrap
While aluminum foil can work, clear plastic allows you to monitor root growth without disturbing the bundle. Avoid black plastic or placing the layer in direct, scorching sun, as overheating can cook the delicate new roots and stem.
Patience as Your Propagation Power Tool
The true elegance of layering and air layering lies in their fundamental trade-off. They exchange a little bit of time for a massive increase in reliability. This reframes them not as “second-choice” methods for when cuttings fail, but as first-rate strategies for cloning your most valuable, difficult, or sentimental plants.
Embracing these techniques means shifting your mindset. You’re no longer gambling on a cutting’s desperate survival instinct. Instead, you’re forming a partnership with the parent plant, leveraging its strength to guarantee the success of the next generation. In a hobby often focused on instant results, layering teaches a different, more profound skill: the strategic use of patience. That patience, it turns out, is the most reliable tool you can add to your propagation toolkit.
To successfully propagate using layering, remember these core principles:
- The Core Advantage: Roots develop on a stem still attached to the mother plant, providing continuous water and nutrients for a near-100% success rate.
- Simple Layering: Best for flexible-stemmed plants. Bend a wounded stem section to the ground, bury it, and wait for roots before severing.
- Air Layering: The go-to method for woody trees and shrubs. Girdle a branch, wrap the wound in moist sphagnum moss, seal it in plastic, and wait for a visible root ball to form before cutting and potting.
- The Key to Success: Ensure a proper, complete wound (girdle), keep the rooting medium consistently moist, and never rush the separation process. Patience is non-negotiable.
Q: Can you air layer any plant?
A: While highly versatile, air layering works best on woody dicot plants (trees, shrubs, and many houseplants). It is generally not effective on monocots like palms or grasses, or on plants with very hollow or pithy stems.
Q: How long does air layering take?
A: The timeline varies significantly by plant species, season, and climate. Typically, it takes 2 to 4 months to see a substantial root ball. Some slower-growing plants, like certain conifers, can take 6 months to a year. Patience is key.
Q: What’s the best time of year to layer plants?
A: For most plants, the ideal window is late spring through early summer. The plant is in active growth, which speeds root formation, and you have the entire growing season for the new plant to establish before winter dormancy.
Q: Can I use something other than sphagnum moss for air layering?
A: Yes, alternatives exist. Pre-moistened coco coir, a 50/50 mix of peat and perlite, or even specialized rooting pods can work. The medium must retain moisture while allowing air exchange. Sphagnum moss is preferred for its excellent water retention and slight antifungal properties.
Q: What do I do if my air layer is taking months to root?
A: First, check that the moss is still moist inside the wrap. If it’s dry, re-moisten it. If moisture is fine, the plant may simply be a slow rooter. As long as the stem above the wrap remains green and healthy, leave it. Some species naturally take much longer. If the stem appears dead or shriveled, the layer has likely failed.