You’ve bent a stem, made a careful wound, and tucked it into the soil, convinced you’ve cloned your favorite shrub. Yet weeks later, nothing has happened—no roots, no new growth, just a stubborn stem that seems unchanged. This common frustration in plant layering steps often stems from a subtle misstep in the sequence: a stem pinned too loosely, a wound covered with dry soil, or roots checked at the wrong time. It’s not that layering is difficult; it’s that success hinges on a few non-negotiable actions performed correctly. This guide strips away the guesswork with a focused, three-part layering propagation checklist centered on pinning, covering, and the critical timing for that first root check. Master these, and you’ll transform layering from a hopeful experiment into a reliable, repeatable process for your garden.
A reliable layering propagation checklist centers on three actions: pinning the stem securely to ensure soil contact, covering the wounded section to retain moisture, and checking for roots only when you see specific signs of growth above the soil. Success depends on executing each step with intention—a firm pin prevents lifting, a moist cover encourages root initiation, and patience until you see visual cues like new leaves ensures you don’t disturb delicate new roots prematurely.
Your Core Layering Propagation Checklist
Forget complicated guides. Successful propagation by layering boils down to three non-negotiable actions. Master this simple layering method, and you turn a hopeful bend into a rooted plant.

Photo by cottonbro studio on Pexels
Here is your foundational framework. Skip one, and the whole process becomes unreliable.
- Pinning: This isn’t just about holding the stem down. It’s about forcing intimate, immovable contact between the wounded part of the stem and the rooting medium. A loose pin means no roots.
- Covering: This step creates a miniature, humid greenhouse around the wound. It’s not just piling on dirt; it’s about retaining consistent moisture to trigger root cells into action. A dry cover is a dead end.
- Root Check Timing: This is where patience meets observation. Checking based on a calendar date often severs delicate new roots. You must wait for specific signals from the plant itself before you even think about digging.
Think of these plant layering steps as a chain: Pinning sets the stage, Covering maintains the perfect conditions, and perfect Timing severs the chain at the right moment to claim your new plant.
Step 1: Pinning – Securing the Stem for Success
This is the most physical step and where many first attempts fail. The goal is absolute stability.
Selecting and Preparing the Stem
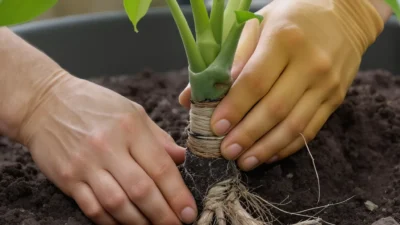
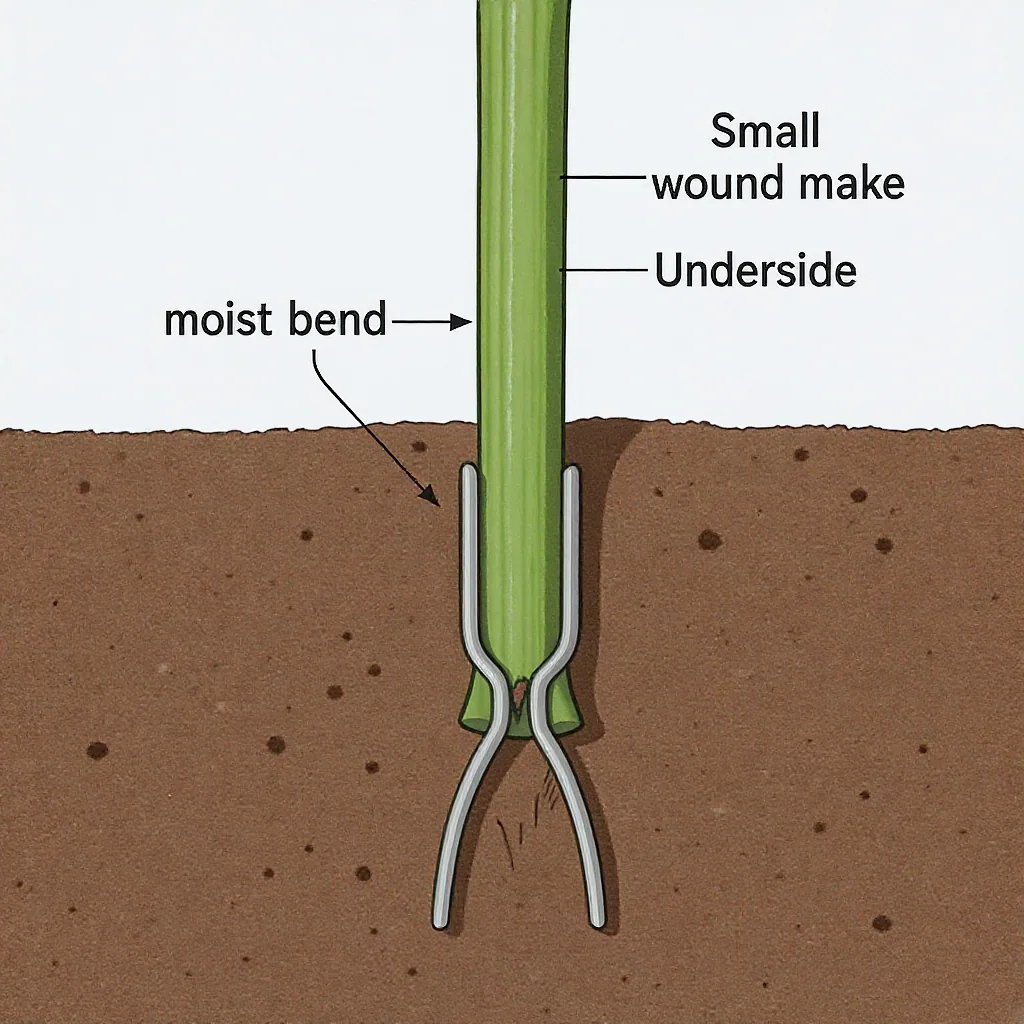
Choose a healthy, flexible stem from the current or last season’s growth. You’re looking for the “sweet spot” – not too woody (it won’t bend) and not too soft (it may rot). About 6-12 inches back from the tip is often perfect. Make a shallow upward slit or remove a thin ring of bark (about 1/4 to 1/2 inch long) on the underside of the stem at the point where it will touch soil. This wound is where roots will form.
The Mechanics of a Secure Pin
Now, bend the stem carefully so the wounded section sits flat on prepared, moist soil. This is where you pin. A U-shaped wire made from a coat hanger or a commercial landscape staple is ideal. Drive it over the stem, just behind the wound, and deep enough into the soil that the stem cannot spring back up. You should not be able to wiggle the pinned section. If you can, it’s not secure enough. The wounded tissue must be in firm, uninterrupted contact with the soil.
Step 2: Covering – Creating the Perfect Rooting Environment
With the stem secured, your job shifts to being a climate manager. You’ve wounded the stem and pinned it; now you must convince it that the best way to survive is to put down roots right here.
Choosing Your Covering Material
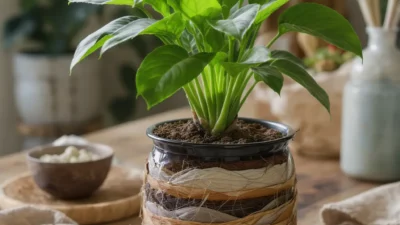
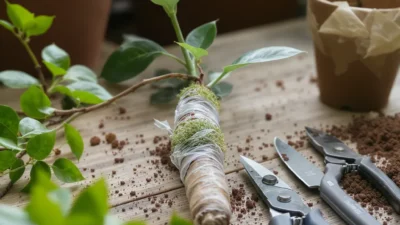
For simple ground layering, the surrounding garden soil often works if it’s loose and well-draining. For better results, mound a blend of potting mix and perlite over the area. For air layering or stems on hard surfaces, damp sphagnum moss is the gold standard—it holds incredible moisture while allowing air flow. Whichever you use, it must be pre-moistened. Think of the dampness of a wrung-out sponge.
How to Cover and Maintain
Mound your material over the pinned wound, covering it by 2-4 inches. Don’t just dump it; gently firm it around the stem to eliminate air pockets. For ground layers, the surrounding soil often holds moisture. For mounds or moss balls, you may need to cover them with plastic wrap or a small plastic pot to retain humidity. Your core task is to check periodically (every few days in dry weather) and lightly water to maintain that consistent, damp-sponge moisture level. Too wet leads to rot; too dry means the stem will callus over instead of rooting.
Step 3: Root Check Timing – The Patience Payoff
This is the step that tests a gardener’s resolve. The urge to dig and peek is powerful, but premature checking is the number one reason for layered stem failure. You don’t check roots on a layered stem because a month has passed; you check because the plant tells you it’s time.
The Signs That Roots Are Likely Ready
Ignore the calendar. Watch for these cues instead:
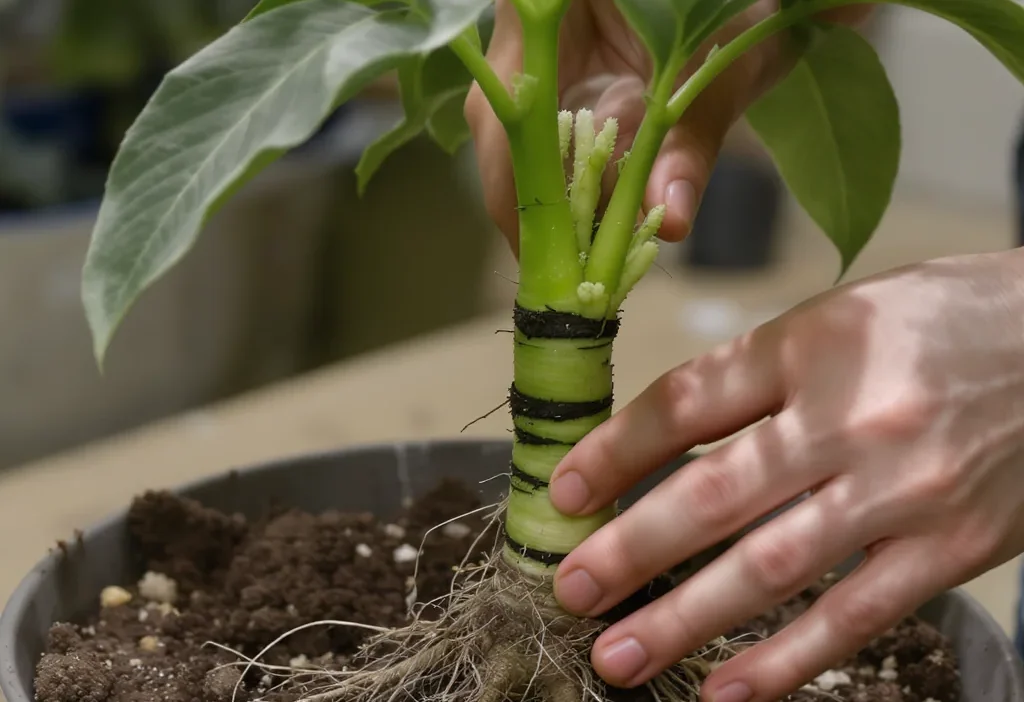
- New Top Growth: The tip of the layered stem, beyond the bend, suddenly puts on a fresh burst of new leaves or elongation. This is a strong signal that roots below are now supplying water and nutrients.
- Resistance to a Gentle Tug: This is a tactile test. Apply very slight upward pressure on the stem near the pin. If you feel firm resistance (like it’s anchored), that’s a good sign. If it lifts easily, wait longer.
The Gentle Excavation Process
When you see these signs, you can investigate. Don’t yank the plant up. Instead, use your fingers or a small trowel to carefully scrape away the covering material from the side of the mound, not directly on top of the stem. Look for white or light-colored roots. If you see a healthy cluster, congratulations—your rooting a layered branch was successful. If you only see a few feeble threads, gently recover the area and wait another few weeks. The key is to minimize disturbance.
Common Layering Pitfalls and How to Avoid Them
Even with a good checklist, small errors can derail your progress. Here are the most frequent missteps tied directly to our three steps, and how to fix them.
Problem: The stem lifts away from the soil a week after pinning.
Cause: The pin was placed over a flexible part of the stem, not directly behind the wounded, rigid section, or it wasn’t driven deep enough.
Solution: Re-pin, ensuring the staple anchors the stem immovably. You can also place a small stone on top of the pinned area for extra weight.
Problem: The covered area dries out completely or becomes soggy and moldy.
Cause: Inconsistent moisture checks or using bone-dry material to start.
Solution: Always pre-moisten your covering medium. For mound layers, a light mulch on top can slow evaporation. For plastic-covered air layers, open them briefly every week for air exchange.
Problem: No roots after months, but the stem is still alive.
Cause: Likely checking too early and disturbing the initial root initials (root primordia), or the wound wasn’t sufficient to trigger rooting.
Solution: Apply a rooting hormone to the wound at the start. Then, be patient and wait for the top-growth signal before any investigation.
Problem: Roots are found only on one side of the stem.
Cause: The wounded section wasn’t making full, even contact with the soil/moss.
Solution: Next time, ensure the stem is pinned so the entire wounded area is flush with the medium. For now, the plant is still viable; just pot it up carefully.
From Guesswork to Guarantee
Propagation by layering feels like a gardening superpower when it works. That “when” is now firmly in your control. This checklist—secure pinning, intelligent covering, and patient timing—replaces hope with a reliable process. It turns the complex stem layering process into a simple, repeatable habit.
Your decisive next step isn’t to read another article. It’s to walk outside, look at your flexible-stemmed shrubs like hydrangeas, raspberries, or climbing roses, and choose one candidate. Apply these three steps with intention this season. You’re not just bending a branch; you’re following a proven blueprint for creating a whole new plant.