If you’ve ever followed a generic leaf cutting propagation guide only to watch a prized Rex Begonia leaf turn to mush or a succulent leaf shrivel into nothing, you’ve encountered the central flaw of most advice. The common narrative treats leaf propagation as a simple, universal process—a one-size-fits-all checklist that promises success. This approach fails spectacularly for many of the most captivating houseplants, leaving gardeners confused and their cuttings doomed. True mastery isn’t about memorizing a single formula; it’s about diagnosing your plant’s specific needs and executing a tailored protocol. This guide moves beyond the basics to focus on the special-case rules and recovery operations for when standard methods don’t work, transforming your failed attempts into valuable diagnostic data.
Leaf cutting propagation is a method of cloning plants using a single leaf or leaf section, but its success is not guaranteed by a single formula. The key is diagnosing your specific plant’s needs—whether it requires a petiole, a vein cut, or special humidity—and executing the precise protocol for that case. This guide provides the universal 7-step backbone for all leaf propagation, then details the critical modifications for petiole-dependent plants, vein-notching species, and fragile succulents.
The Universal Leaf Propagation Protocol (Your 7-Step Backbone)
Before we tackle the exceptions, you need a rock-solid foundation. This 7-step framework is the universal backbone for all leaf propagation methods. Master this, and the special-case modifications will make perfect sense.

Step 1: Select the Perfect Donor Leaf
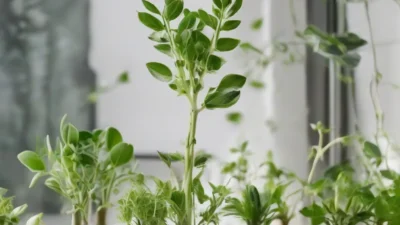
Success starts with your source material. Choose a mature, healthy leaf from a vigorously growing plant. Avoid new, soft growth or old, tired leaves. Look for vibrant color and a firm texture, free from pests, disease, or damage. This leaf contains all the energy and genetic instructions for your new plant.
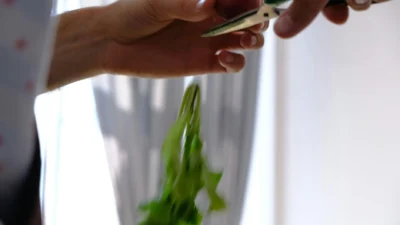
Step 2: Execute a Clean, Precise Cut
This is surgery, not gardening. Use a sterilized, razor-sharp blade (a scalpel, craft knife, or freshly sharpened pruning shears). Wipe the blade with isopropyl alcohol between cuts to prevent transmitting pathogens. The goal is a smooth slice that doesn’t crush the plant’s vascular tissues, which is critical for water uptake and callus formation.
Step 3: The Non-Negotiable Callus Period
After cutting, the leaf must form a callus—a dry, hardened layer of cells over the wound. This is the plant’s natural bandage, sealing it against bacteria and fungi that cause rot. Place the cutting in a warm, dry, shaded spot for 1-3 days (longer for succulents). A successful callus looks dry and slightly corky, not wet or mushy.
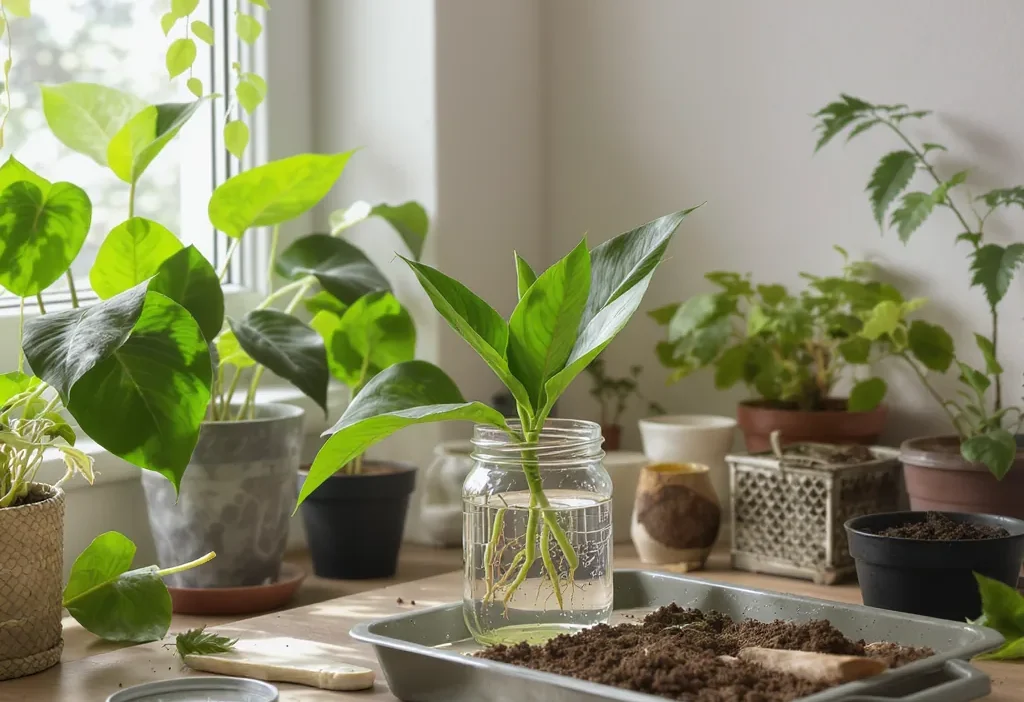
Step 4: Choose Your Propagation Medium
Your medium is the leaf’s temporary home. The choice depends on the plant and your environment:
- Lightweight Seedling Mix: Excellent for most tropicals. It’s sterile, well-draining, and retains moisture without becoming soggy.
- Water: Works for some plants (like Peperomia) and offers visible root growth, but risks rot and creates water roots that must adapt to soil later.
- Sphagnum Moss: A fantastic, airy option for high-humidity lovers. It holds immense moisture while allowing oxygen to reach the developing roots.
Step 5: Craft the Ideal Micro-Environment
Your leaf cutting now needs a nursery. Provide bright, indirect light (direct sun will cook it). Maintain warmth (70-78°F or 21-25°C is ideal). For humidity, a clear plastic bag or propagation dome is essential for most non-succulent species—it reduces water loss while the leaf has no roots. Ensure the cover doesn’t touch the leaf.
Step 6: Practice the Art of Patient Neglect
This is the hardest step. Do not overwater. The medium should be lightly moist, not wet. For leaves on soil, water from the bottom or mist the surface only when it feels dry. Lift the dome occasionally for fresh air to prevent mold. Your job is to wait and watch, not fuss.
Step 7: Pot Up the New Plantlet
When you see a healthy cluster of roots (at least an inch long) and a new shoot or baby plant forming, it’s time to graduate. Gently lift the new plantlet, keeping its roots intact, and pot it into a small container with appropriate, well-draining potting mix. Treat it as a delicate seedling, keeping it in a humid environment for a week or two as it adjusts to its new home.
Special-Case #1: The Petiole-Dependent Plants (African Violets, Peperomias)
This is where generic guides fail. For plants like African Violets (Saintpaulia) and many Peperomias, you cannot propagate plants from leaves using just the blade. The leaf’s petiole (the small stem attaching it to the main plant) contains crucial meristematic tissue—the cells capable of becoming new roots and shoots.
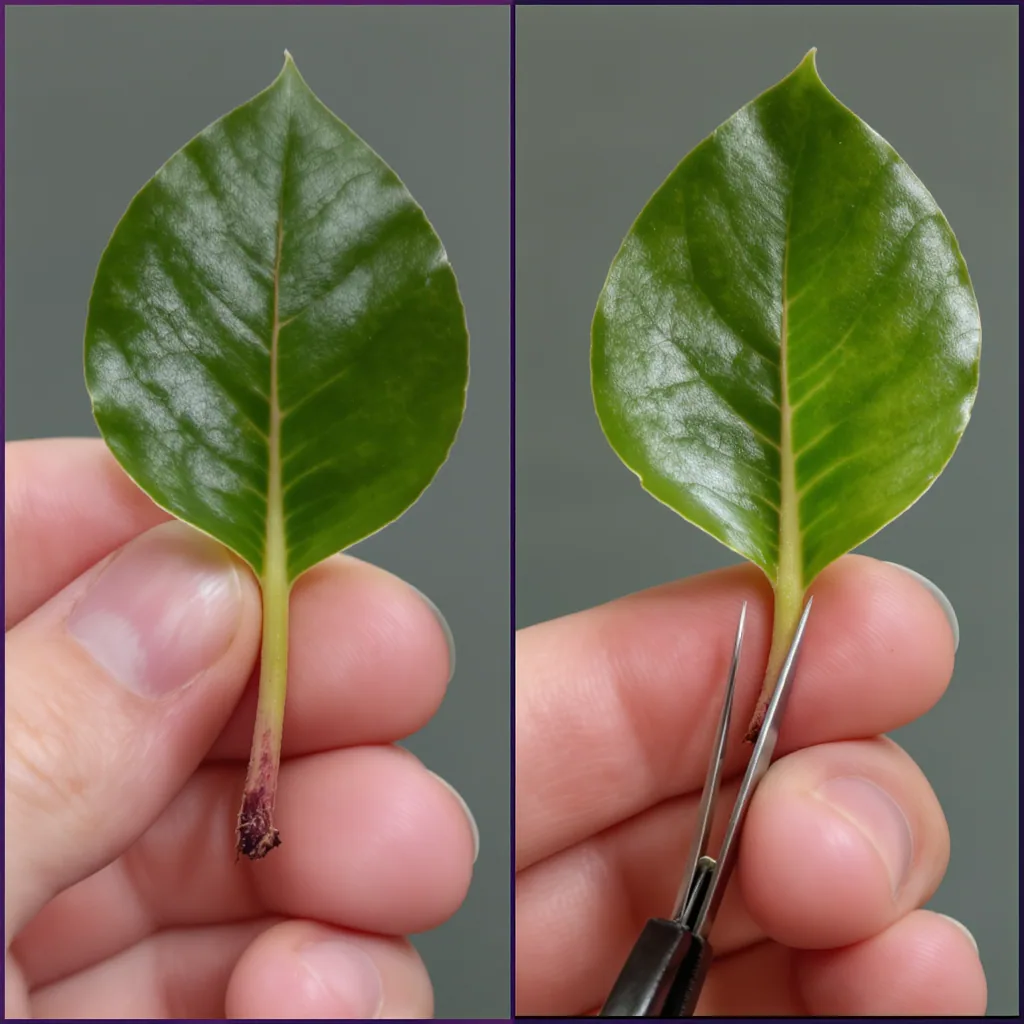
The protocol modifies Step 2 of our universal backbone. When you take your cutting, you must include 1 to 1.5 inches of the petiole. Make your clean, angled cut on the main stem, not through the leaf itself. After callusing (Step 3), insert the petiole into your medium so that the leaf blade is just above the surface. The base of the petiole is where roots will form, and the new plantlets will emerge from this junction. A light dip of the petiole end in rooting hormone powder can accelerate this process, but it’s not mandatory with proper care.
Special-Case #2: Vein-Notching for Rex Begonias and Snake Plants
Some plants have evolved a different survival strategy, and your propagation technique must mimic it. For Rex Begonias and Sansevieria (Snake Plants), the goal isn’t one new plant from a stem, but multiple plantlets triggered from the leaf’s vascular system. Standard leaf propagation methods will result in a rotting leaf, not new growth.
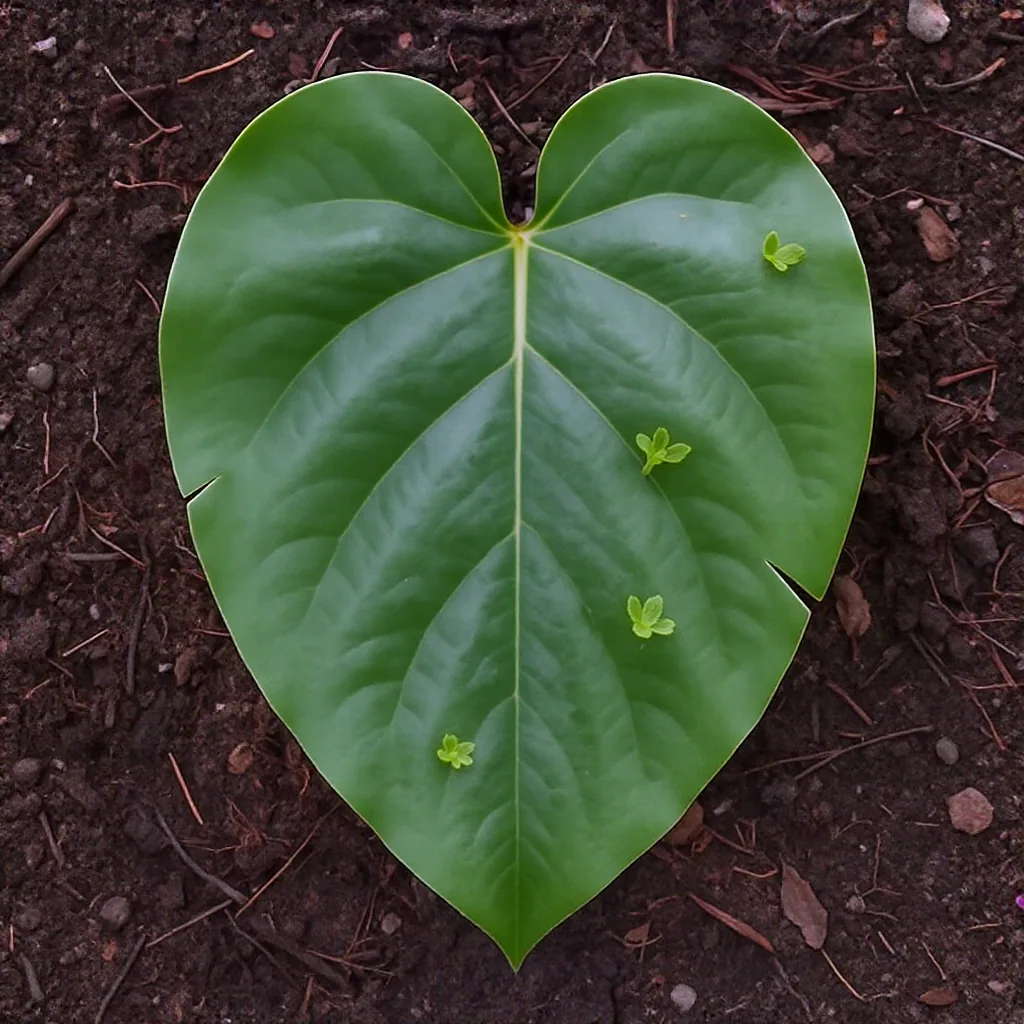
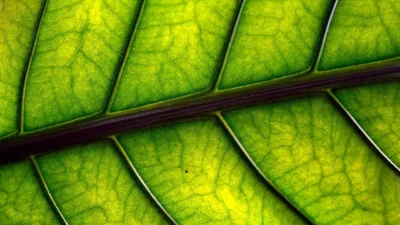
Here, you use a whole leaf or a large section. After letting the cut edges callus, flip the leaf over. Using your sterile blade, make several small, shallow cuts (notches) across the major veins on the underside. This wounding signals the plant to produce new growth at those points. Then, lay the leaf flat, notched-side down, on moist propagation medium. Use bent paperclips or small stones to pin it gently in contact with the soil. Maintain high humidity. In weeks, tiny begonia plantlets or snake plant pups will sprout directly from each notch. This leaf propagation technique yields a small army of clones from a single leaf.
Special-Case #3: The Fragile Succulents (Echeveria, Graptopetalum)
Succulent leaves are water-filled survival pods, making them incredibly prone to rot if treated like tropical foliage. The universal protocol still applies, but with extreme emphasis on dryness and patience. The most common failure is skipping or shortening the callus period.
For Echeveria, Graptopetalum, Sedum, and similar genera, Step 3 (Callusing) is paramount. The leaf must sit in a dry, airy place until the wound is completely sealed over—this can take 3-7 days. Any moisture during this phase invites rot. After callusing, simply lay the leaves on top of dry or barely damp succulent soil. Do not bury them. Place them in bright, indirect light.
Roots will often appear first, searching for moisture, followed much later by a tiny rosette. Do not water until you see both substantial roots and the start of a new plant. Even then, water very sparingly, targeting the soil near the roots, not the mother leaf. The mother leaf will eventually shrivel as its resources are transferred—this is a sign of success, not failure.
Troubleshooting and Rescue Operations
When your propagation attempt goes sideways, don’t discard it—diagnose it. Use this flow to identify and potentially rescue your cutting.
Diagnosis: The Leaf is Mushy or Translucent (Rot)
Cause: Bacterial or fungal rot, almost always due to excessive moisture, poor air circulation, or an insufficient callus.
Rescue: If the rot is at the base, you can sometimes perform “surgery.” Cut above the mushy section with a sterile blade, allow the new cut to callus completely (2-3 days), and restart from Step 3. If the entire leaf is affected, it’s a loss. Improve air flow in your propagation chamber and ensure your medium is only lightly moist, not wet.
Diagnosis: The Leaf is Shriveled and Dry
Cause: Dehydration. The cutting lost moisture faster than it could absorb it, often due to insufficient humidity, a callus that’s too thick (blocking water uptake), or bone-dry medium.
Rescue: If the leaf is still somewhat pliable, increase humidity immediately by placing it under a dome or in a bag. Ensure the propagation medium is adequately damp. For succulents, a light mist around (not on) the emerging roots may help.
Diagnosis: White or Gray Fuzzy Mold on the Medium or Leaf
Cause: Fungal growth from stagnant, overly humid conditions.
Rescue: Remove the affected leaf if mold is on it. Improve ventilation by propping open or removing the humidity dome for a few hours each day. You can lightly sprinkle the surface of the medium with cinnamon (a natural fungicide) or use a diluted copper fungicide spray. Ensure there’s no standing water.
Common Mistakes That Derail Special-Case Propagation
Advanced techniques require precision. Avoid these frequent errors to dramatically increase your success rate when you propagate plants from leaves.
- Using a Dull or Dirty Blade: A crush injury from dull shears damages tissues and invites infection. Always use a sterilized, sharp blade.
- Skipping the Callus for Succulents: Placing a freshly cut succulent leaf on soil is a death sentence. Non-negotiable: wait for a perfect, dry callus.
- Burying the Leaf Blade: For petiole-dependent plants like African violets, only the stem should be in the medium. Burying the leaf blade leads to rot.
- Over-Misting and Overwatering: The medium should feel like a wrung-out sponge, not a swamp. Constant wetness suffocates tissues and causes rot. Water only when the surface feels dry.
- Impatience and Early Abandonment: Some leaf propagation methods, like vein-notching, can take 2-3 months to show signs of life. Giving up at week 6 wastes a perfectly good cutting. Mark your calendar with realistic timelines.
Mastering the Why, Not Just the How
The true power of this leaf cutting propagation guide isn’t in memorizing steps, but in understanding the plant’s logic behind them. Each special-case protocol exists because it mimics how that plant reproduces in nature—a begonia leaf rooting where it touches damp forest floor, a succulent leaf surviving a drought before sprouting. When you see propagation as a dialogue with the plant’s biology, failures become valuable diagnostic data, not dead ends.
Equipped with the universal backbone and the key modifications for petiole, vein, and succulent types, you now have a framework to experiment confidently. Start with the recommendations here, observe your plant’s response, and adjust your environment accordingly. This adaptive approach is what unlocks the ability to clone virtually any plant in your collection, turning a single leaf into a legacy.
This guide moves beyond basic methods to master advanced leaf propagation techniques. The core philosophy is a two-part process: First, apply the universal 7-step backbone (select, cut cleanly, callus, choose medium, provide environment, wait patiently, pot up). Second, layer on the specific special-case protocol your plant requires:
- Petiole-Dependent Plants (e.g., African Violets): Must include a piece of stem (petiole) with the leaf; the meristematic tissue at its base generates new growth.
- Vein-Notching Plants (e.g., Rex Begonias, Snake Plants): Require shallow cuts across the leaf’s underside veins, then the leaf is pinned to moist soil to trigger multiple plantlets from each wound.
- Fragile Succulents (e.g., Echeveria): Demand a complete, dry callus before any contact with moisture and are prone to rot if overwatered; they root on dry soil.
Success hinges on precise execution, sterile tools, and diagnosing issues like rot or dehydration using the troubleshooting guide.