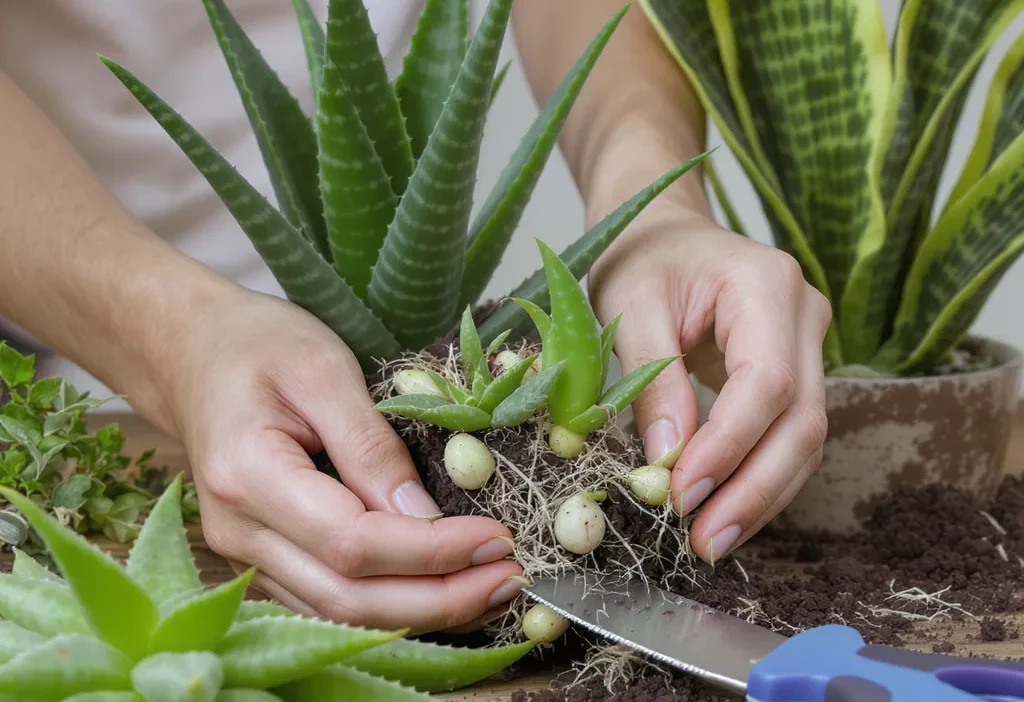
You’ve spotted a cluster of baby aloe pups or a brave snake plant pup pushing up through the soil, and the urge to separate and multiply your collection is strong. Most guides will tell you to wait until the offset is a certain size, but here’s the counterintuitive truth: the real secret to a thriving new plant isn’t just size—it’s reading the plant’s subtle stress signals and timing the separation with confidence. Propagating offsets from succulents and snake plants is less like delicate surgery and more like a straightforward, low-stakes division when you have the right protocol. This offset propagation checklist cuts through the guesswork, moving beyond the basic “wait for it to get big” advice to focus on the critical readiness cues, sterile technique, and aftercare that ensure both the parent and pup thrive after their separation.
Propagating offsets from aloe and snake plants successfully requires a simple three-part checklist: perfect timing based on the pup’s maturity, sterile separation with the right tools, and a critical ‘dry start’ period for the new plant to callus before its first watering. Forget just waiting for a certain size; the right moment is when the pup has developed a few of its own leaves and, ideally, its own root initials. Using clean, sharp tools for a precise cut prevents damage and disease, while allowing the wound to dry completely before introducing moisture is the non-negotiable step that prevents rot and encourages strong new roots.
The Pre-Separation Readiness Check
Before you make the first cut, you need to confirm the pup is truly ready for independence. Size is a factor, but it’s not the only one. A mature offset will have developed its own root system and enough foliage to sustain itself. For aloe pup propagation, look for pups that are at least one-third the size of the mother plant and have a distinct cluster of their own leaves—aim for 3-4 leaves minimum.
Gently brush away the soil at the base of the pup. You’re looking for small, white root initials emerging from its stem. This is the most reliable sign of readiness. If the pup is clinging tightly to the mother with no visible roots of its own, it’s likely still drawing nutrients directly from the parent and isn’t ready. Also, ensure the parent plant is healthy and not under drought stress, as separating a pup from a stressed plant can shock both.
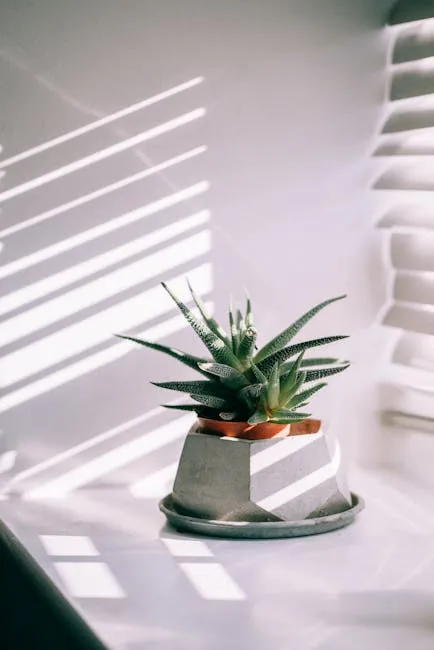
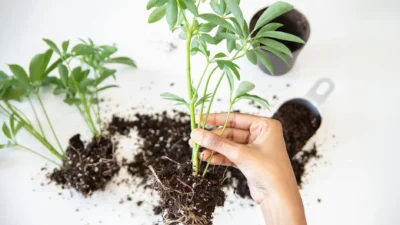
Photo by Tina Simakova on Pexels
Your Sterile Separation Toolkit
Gathering the right tools before you start makes the process smooth and dramatically increases your success rate. The goal is a clean separation, not a ragged tear. Here’s your mini-checklist:
- A sharp, sterile blade: A sharp knife, scalpel, or pruning shears is non-negotiable. Sterilize with isopropyl alcohol or a flame to prevent introducing pathogens. A clean cut heals faster than a crushed one.
- Fresh, well-draining potting mix: Use a cactus or succulent-specific blend. Regular potting soil holds too much moisture for vulnerable new roots.
- Small pots with drainage holes: The new home for your pup should be cozy, not cavernous.
- Tweezers or a small brush: For gently clearing soil away from the connection point to see what you’re doing.
- (Optional) Rooting hormone powder: While not essential for succulents, a light dusting on the cut end can encourage faster root development, especially for snake plant pup separation where the rhizome is thick.
The Step-by-Step Separation Protocol
This is the core action of your propagating offsets mission. You have two main approaches: unpotting the entire plant for the clearest view, or performing an in-pot separation for minimal disturbance. For beginners, unpotting is often best.
Method 1: The Full Unpot (Recommended for Beginners)
Gently remove the entire plant from its pot and brush away excess soil to expose the root ball and the base of the pups. Identify where the pup connects to the mother plant—this is usually a thick stem or rhizome. Using your sterile tool, make a decisive, clean cut through this connective tissue. Aim to preserve any roots already growing from the pup. If the connection is thin, you can sometimes twist the pup off with a gentle, firm motion.
Method 2: In-Pot Separation
If the pup is near the edge of the pot and clearly visible, you can sometimes separate it without disturbing the mother. Carefully excavate the soil around the pup’s base to reveal the connection point, then make your cut. This method is faster but offers less visibility.
Immediate Aftercare: Once separated, set both the mother plant and the pup aside in a dry, shaded spot. The cut surfaces need to callus over, which typically takes 1-3 days. Do not skip this step—it’s your primary defense against rot when the pup is potted.
Post-Separation: The Critical First Weeks
Your job isn’t done after the cut. The first few weeks are a delicate period where the new plant establishes itself. The most common failure point is overwatering.
The “Dry Start” Protocol
After the cut end has callused, plant the pup in dry succulent mix. Do not water it. Place it in bright, indirect light. Wait another 3-7 days before giving it its first light watering. This extended dry period encourages the pup to seek out moisture by pushing out new roots. Watering a callused pup in dry soil is far safer than planting a fresh cut in damp soil.
Reading the Signs
Success looks like: The pup remains firm and plump. After a few weeks, you may see new, bright green growth from the center, or feel slight resistance if you give the plant a gentle tug (indicating new roots).
Trouble looks like: The base of the pup turns mushy, brown, or black—a sure sign of rot, usually from overwatering. If the leaves begin to shrivel dramatically, it may be too dry, but this is less common than rot. A slightly wrinkled leaf can be normal as the plant uses stored water to fuel new root growth.
Common Mistakes to Avoid
Even with the best checklist, a few missteps can derail your vegetative propagation efforts. Here are the critical errors to sidestep:
- Separating too early: The number one mistake. A tiny pup with no roots lacks the energy reserves to survive on its own. Patience is key.
- Using dirty or dull tools: This crushes plant tissue and introduces bacteria or fungi directly into the wound, leading to almost certain infection and rot.
- Overwatering immediately: Succulents and snake plants store water in their leaves. A freshly separated pup needs to focus on rooting, not absorbing water from soggy soil. Stick to the “dry start” rule.
- Providing too much direct sun: While these plants love light, a newly potted pup is vulnerable. Bright, indirect light is ideal until you see signs of active new growth.
You’ve Got This
Propagating plants from their offsets is one of the most tangible rewards of plant care. It turns a single purchase into a growing collection and deepens your understanding of how plants live and multiply. Remember, every gardener has lost a pup to rot or premature separation—it’s part of the learning curve. Each attempt, successful or not, makes you a more observant and confident plant parent. Trust the process, follow the readiness signs, and enjoy the quiet satisfaction of creating new life from your existing favorites.