Most plant lovers think propagation is about fussing with seeds or praying that a stem cutting roots, but the easiest, most reliable method is already growing on your plant, waiting to be discovered. Offsets, pups, and rhizomes are nature’s built-in cloning system—pre-formed miniatures of the parent that just need a gentle nudge to become independent. This guide demystifies these structures, turning what might seem like a specialized technique into a straightforward, almost foolproof process. By learning to identify and separate these natural propagules, you can multiply your favorite houseplants and garden perennials with confidence, creating genetic copies for free and transforming a single purchase into a thriving collection.
Propagating via offsets, pups, and rhizomes is the most reliable way to clone your plants because you’re working with mature, pre-formed growth. Success hinges on separating them at the right time—when they have developed their own roots—and using a well-draining soil mix. This method bypasses the uncertainty of seeds and the vulnerability of cuttings, giving you a head start on a healthy new plant.
The Propagation Playbook: Your 5-Step Universal Protocol
Think of this as your master recipe. Whether you’re dealing with a spider plant offset, a snake plant pup, or a ginger rhizome, this five-step framework is your key to success. It turns the process from a guessing game into a reliable, repeatable system.

Step 1: Identify & Time it Right
First, you must correctly identify the propagule—more on that in the next section. The golden rule for timing is simple: wait until it has developed its own roots. A pup or offset without roots is like a newborn without an umbilical cord; it’s not ready to survive on its own. For rhizomes, you’re looking for healthy, plump sections with at least one growth node (a little bump or eye).
Step 2: Gather Your Gentle Toolkit
You don’t need much. A clean, sharp knife (a kitchen paring knife or craft blade works) or a pair of sterilized pruning shears is essential. Rubbing alcohol for sterilization prevents disease transfer. Have small pots with drainage holes and a well-draining potting mix ready—a standard mix with added perlite or orchid bark is perfect.
Step 3: The Separation Surgery
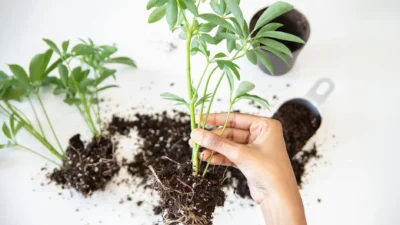
This is the moment of truth. For offsets and pups, trace the connection to the mother plant. If it’s a stolon (a runner), cut it, leaving a bit attached to the baby. If it’s a basal pup, you may need to gently unearth the soil to see where it joins. For rhizomes, you’ll be cutting through the thick, horizontal stem. In all cases, make a clean, confident cut. Avoid tearing or ripping, which can cause damage that invites rot.
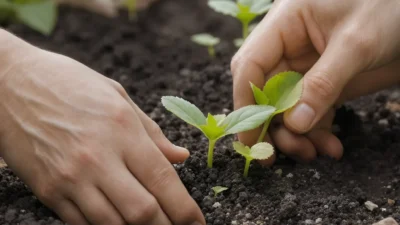
Step 4: Potting for Success
Place your new plantlet in a small pot—only slightly larger than its root system. Bury it just deep enough to support itself. For succulents or rhizomes with a fresh cut, let the wound dry and callus over for a day before potting to prevent rot. Water the soil lightly just to settle it, but don’t soak it.
Step 5: The Critical Aftercare Phase
Your new plant is in shock. Place it in bright, indirect light—no direct sun, which can scorch it. Water very sparingly, only when the top inch of soil is dry. The goal is to encourage the roots to seek out moisture, not to drown them. Patience is your new best friend.
Offsets vs. Pups vs. Rhizomes: Knowing What You’re Looking At
Before you make the cut, you need to know what you’re cutting. These terms are often used interchangeably, but they describe different structures. Correct identification tells you how the plant naturally reproduces and guides your separation technique.
Offsets (aka Plantlets)
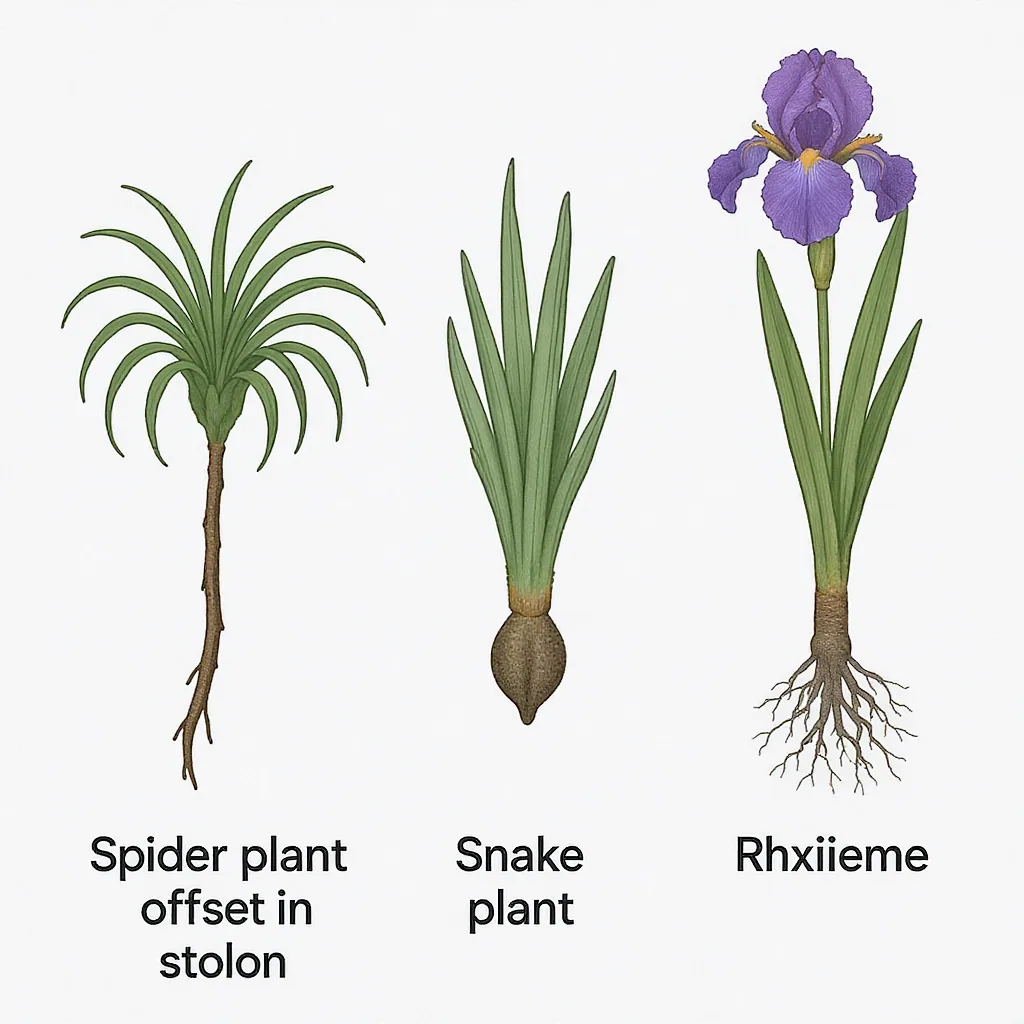
These are complete miniature plants that form on a stolon (a long, thin runner) or at the edge of a leaf. They are genetic clones, already forming leaves and often aerial roots while still attached. The classic example is the Spider Plant (Chlorophytum comosum), whose babies dangle from long stems. Hens and Chicks (Sempervivum) also produce offsets, but these cluster directly at the base rather than on runners.
Pups (aka Suckers)
Pups are baby plants that sprout directly from the base or stem of the mother plant, sharing its root system initially. They don’t have a long connecting runner. The term “pup” is very common with succulents like Snake Plants (Sansevieria) and Aloe, or with Bromeliads like Air Plants. A “sucker” is essentially the same thing but is often used for plants like Banana Trees or certain shrubs. When you propagate pups and offsets, the main difference is in how they’re attached.
Rhizomes
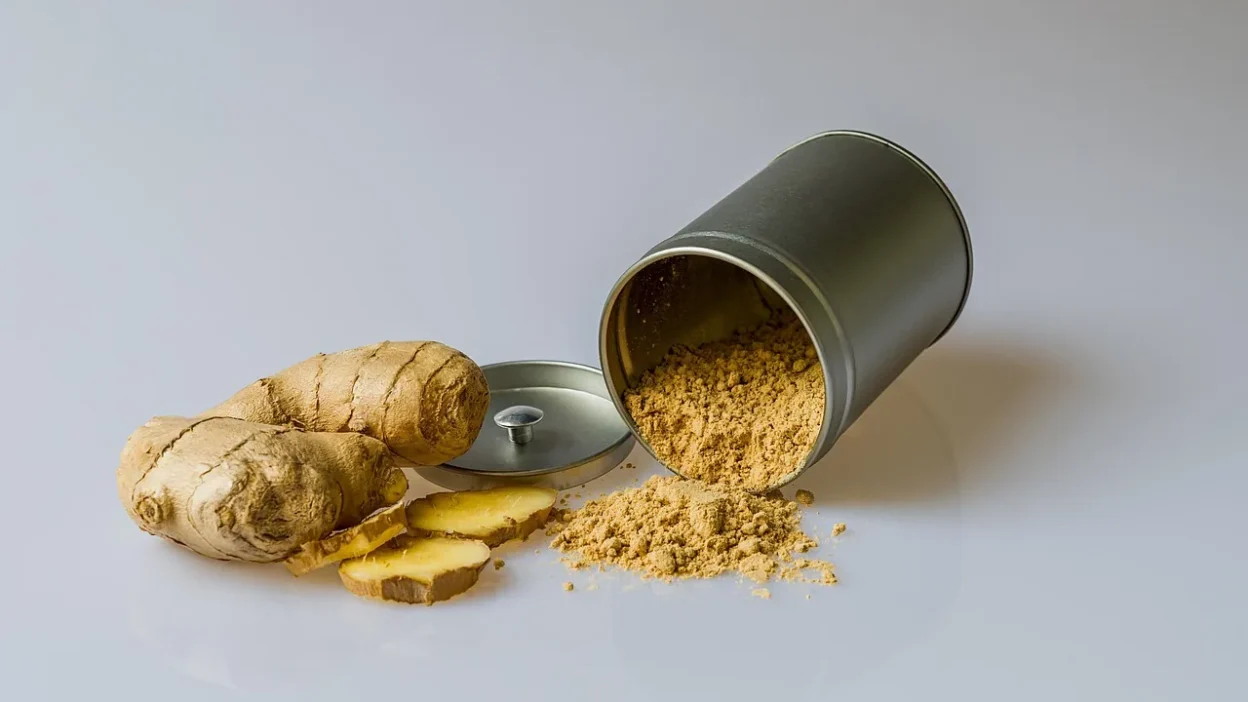
This is where things go underground. A rhizome is a modified, horizontal stem that grows beneath or along the soil surface. It stores energy and sends up new vertical shoots at points called nodes. Think of it like a ginger root in your kitchen—each knobby section can become a new plant. Irises, Ginger, Turmeric, Cannas, and ZZ Plants all grow from rhizomes. Rhizome plant propagation involves dividing these underground stems, ensuring each piece has at least one node.
Specialized Techniques for Each Type
Now, let’s apply the universal playbook to the specifics. Here are the crucial dos and don’ts for handling each type of propagule.
For Offsets (Spider Plant, Strawberry Begonia)
Do: Locate the stolon (runner) and follow it back to the baby plant. Snip the stolon about an inch from the offset. If it already has little nubs of roots, you’re golden.
Don’t: Pull or twist the offset off. This can damage the connection point on both the mother and the baby. Also, don’t separate it if it looks tiny and underdeveloped.
For Pups (Snake Plant, Aloe, Bromeliad)
Do: Gently brush away soil to see where the pup connects to the mother. Use a sterile knife to make a clean cut through the connective tissue, ensuring the pup takes some of its own roots with it. A good rule of thumb is to wait until the pup is at least one-third the size of the mother plant.
Don’t: Yank the pup out by hand. This often strips away its fragile roots, dooming it from the start. Avoid potting a pup that is nothing but leaves with no root mass.
For Rhizomes (Iris, Ginger, ZZ Plant)
Do: Unpot the entire plant and gently wash or brush the soil off the rhizome mass. Identify the fleshy, healthy sections with visible growth nodes (they look like eyes or bumps). Use a sterile knife to cut the rhizome into sections, each with at least one node. Let the cut surfaces dry and callus for a day before replanting.
Don’t: Make sections too small with no nodes. Don’t plant freshly cut, juicy rhizomes immediately into wet soil, as this is an open invitation for rot. This is a key step in any rhizome division guide.
The Top 5 Propagation Pitfalls (And How to Sidestep Them)
Most propagation failures are preventable. By knowing these common traps, you can sidestep them with ease and dramatically increase your success rate.
1. Separating Too Early (The No-Root Rush)
The Pitfall: The excitement of a new baby plant leads to separating it before it has developed any roots of its own.
The Sidestep: Be patient. If you gently tug on a pup and it doesn’t seem anchored, or you can’t see any root nubs on an offset, wait a few more weeks. A propagule with its own roots has a massive head start.
2. Using the Wrong Soil (The Soggy Grave)
The Pitfall: Potting your new division in dense, moisture-retentive soil that stays wet for days.
The Sidestep: Always use a well-draining mix. Amend regular potting soil with perlite, pumice, or coarse sand. The pot must have drainage holes. Your goal is moist, not marshy.
3. Overwatering After Potting (Drowning with Love)
The Pitfall: Interpreting the plant’s “shock” (drooping) as a need for more water and soaking it.
The Sidestep: Water lightly after potting to settle the soil, then wait. Let the top layer dry out before watering again. It’s better to underwater slightly than to overwater during the fragile root-establishment phase.
4. Insufficient Light During Recovery
The Pitfall: Sticking your new plant in a dark corner “to recover.”
The Sidestep: Provide plenty of bright, indirect light. This fuels the energy needed to grow new roots. A north or east-facing windowsill is ideal. Avoid harsh direct sun, which adds stress.
5. Not Letting Cuts Callus (Rot’s Open Door)
The Pitfall: Immediately potting succulent offsets or freshly cut rhizomes into damp soil.
The Sidestep: For any plant with a juicy stem or rhizome (Snake Plants, ZZ Plants, Aloe, Ginger), let the cut end dry and form a hard callus for 24-48 hours before planting. This seals the wound and prevents soil-borne pathogens from entering.
From Pot to Thriving: Your Aftercare Roadmap
The first few weeks are critical. Here’s a timeline of what to expect and how to care for your new plant to ensure it transitions from a dependent division to an independent, thriving specimen.
First 7 Days: The Shock Phase
Expect some drooping or mild wilting. This is normal as the plant adjusts to its new root system and environment. Keep it in stable, bright indirect light. Resist the urge to water again unless the soil is completely dry. Do not fertilize.
Weeks 2-4: Root Establishment
This is the silent work period. The plant may not show new top growth because it’s busy growing roots below the soil. You can test for root growth by giving a very gentle tug after 3 weeks; resistance means roots are anchoring. Continue with careful watering, allowing the soil to dry partially between drinks.
Month 2+: Active Growth
When you see a new leaf emerging or the existing leaves perking up and firming, congratulations—your plant has officially settled in. You can now begin to treat it more like a mature plant, gradually introducing it to its permanent light conditions and resuming a regular, but gentle, fertilizing schedule (at half strength).
A final pro tip: bottom watering is excellent for new propagations. Place the pot in a shallow dish of water for 15-20 minutes, allowing the soil to soak up moisture from below. This encourages deep root growth and avoids disturbing the delicate surface roots.
The Propagator’s Payoff
This offsets pups and rhizome propagation guide reveals the tradeoff at the heart of this method: it requires more patience and a careful eye than simply sowing seeds, but it offers far greater reliability and the instant gratification of a clone. You’re not experimenting with genetics; you’re granting independence to a part of a plant you already know and love.
The real magic begins when you start looking at your plant collection with a propagator’s eye. That crowded Snake Plant isn’t just a single plant—it’s a family waiting to be potted into new homes. That sprawling Spider Plant is a fountain of gifts. Armed with your universal protocol and the knowledge of what to avoid, you can confidently propagate pups and offsets, divide rhizomes, and turn one plant into many. Now, go take a closer look at what’s growing at the base of your favorites.
To successfully multiply your plants using their natural cloning systems, remember these core principles. First, follow the universal five-step protocol: identify a mature propagule with its own roots, use clean tools for separation, pot in well-draining mix, and provide gentle aftercare. Correct identification is crucial—offsets form on runners, pups sprout from the base, and rhizomes are horizontal underground stems.
The most common failures come from overwatering, insufficient light during recovery, and not allowing cuts to callus before planting. Success lies in patience, providing bright indirect light, and watering sparingly until new growth confirms the plant is established. This method is your most reliable path to expanding your garden with exact copies of your favorite plants.