You’ve carefully taken your cuttings, placed them in their new home, and waited with hopeful anticipation—only to watch them turn yellow and mushy, or shrivel into brittle twigs. This moment of disappointment is a universal frustration for plant propagators, and it almost always circles back to one critical dilemma: is this a case of overwatering vs underwatering in propagation? The symptoms can feel confusingly similar when you’re staring at a failing plant, and applying the wrong fix can seal its fate. This guide cuts through the guesswork. We’ll walk you through a clear, diagnostic approach to identify whether you’re dealing with suffocating roots or desiccated stems, and then provide the specific, corrective actions for each scenario to rescue your propagation project.
Here’s how to diagnose and fix overwatering vs underwatering in propagation. First, check for yellow, mushy stems and a foul smell (overwatering) versus dry, brittle, and shriveled cuttings (underwatering). The fix for overwatering is immediate action: remove affected parts, let the medium dry, and improve air flow. For underwatering, gently rehydrate the medium and increase humidity. Always tailor your response to the specific symptom you see.
The Critical Difference: Why Getting Water Right Matters in Propagation
Understanding the unique vulnerability of cuttings is the first step to solving propagation moisture problems. Unlike an established plant with a full root system to seek out water, a cutting is a wounded piece of stem or leaf with no roots at all. Its survival depends entirely on the environment you create.
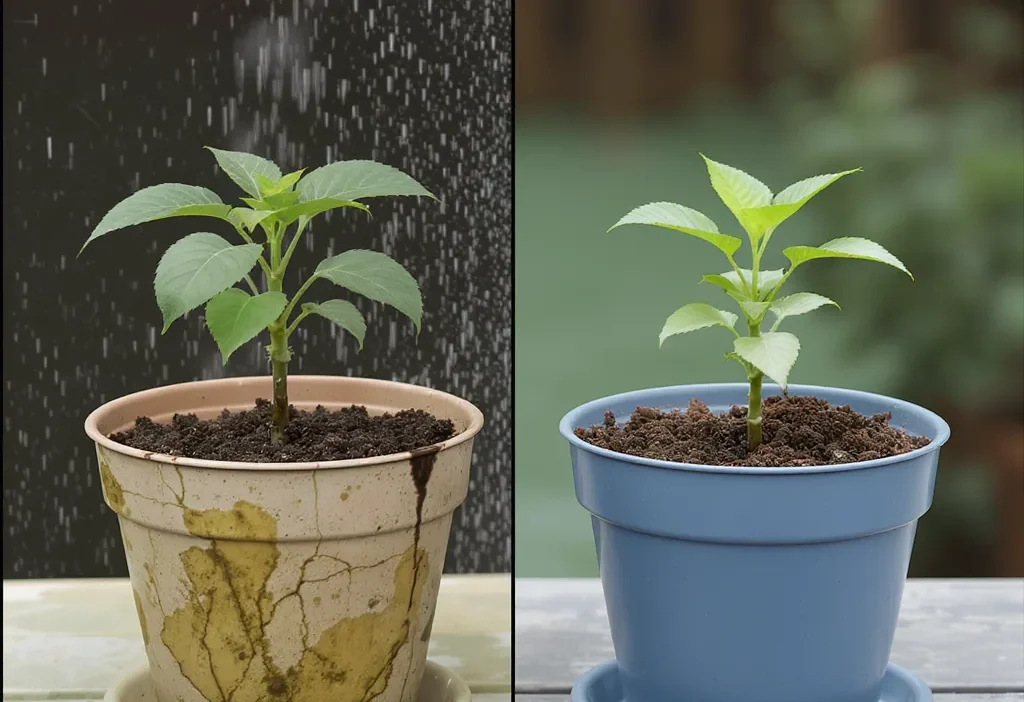
The core concept is simple but critical: overwatering suffocates, while underwatering desiccates. A cutting needs moisture to prevent its tender tissues from drying out, but it also needs oxygen to initiate new root cells. Soggy, waterlogged medium pushes out all the air, creating an anaerobic environment where roots cannot form and harmful bacteria and fungi thrive, leading to rot. On the flip side, a medium that’s too dry pulls moisture from the cutting itself, causing it to shrivel and die from dehydration.
Finding that moisture balance for propagation is the key. It’s not about a fixed amount of water, but about maintaining a state where the propagation medium feels like a well-wrung sponge—damp to the touch but not dripping wet—and the air around the foliage is humid. This balance supports the cutting’s life functions while it builds its own root system.
Photo by Jordan Rushton on Pexels
Diagnosing the Problem: Overwatering vs. Underwatering Symptoms
When your propagation attempt looks sick, don’t guess. Match the symptoms you see to one of these two clear profiles. Correct diagnosis is 90% of the battle in fixing cuttings water stress.
Signs of Overwatered Cuttings
Overwatering symptoms are often dramatic and involve decay. Look for:
- Color Change: The stem or leaves turn yellow, translucent, or even black.
- Texture: The stem becomes mushy, soft, and may collapse when gently squeezed. Leaves may feel slimy.
- Smell: A distinct, foul, or sour odor coming from the medium or the cutting base is a dead giveaway for rot.
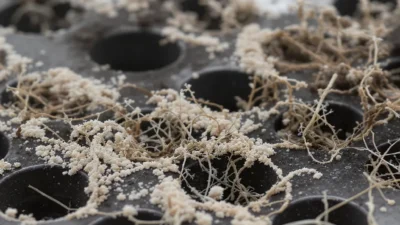
- Medium Condition: The propagation mix is constantly soggy, cold to the touch, and may have green algae or white mold on the surface.
- Lack of Progress: The cutting shows no signs of root growth over an extended period and may even lose leaves.
Signs of Underwatered Cuttings
Underwatering symptoms are about dryness and desiccation. Look for:
- Texture & Form: The cutting becomes dry, brittle, and severely shriveled or wrinkled. Leaves may curl inward.
- Color: Foliage turns dull, brown, or crispy, starting at the tips and edges.
- Medium Condition: The propagation mix is bone-dry, pulls away from the edges of the pot, and is difficult to re-wet.
- Progress: Growth is completely stalled. The cutting looks lifeless and parched.

The Right Fix for Overwatered Propagations
If you’ve diagnosed overwatering, watering less isn’t enough. You need to take immediate, corrective action to stop the rot and give the cutting a chance. This is the fix for root rot from too much water.
- Remove the Cutting: Gently take the cutting out of its soggy medium. Carefully rinse any old soil from the stem base under lukewarm water.
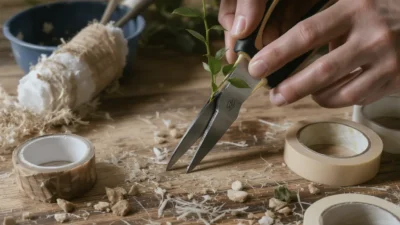
- Inspect and Trim: Using clean, sharp scissors, cut away any part of the stem that is mushy, brown, or black. Cut back to healthy, firm, white or green tissue. This step is non-negotiable—rot will spread if left behind.
- Let it Air Dry: Place the trimmed cutting on a paper towel in a shaded, airy spot for 30-60 minutes. This allows the cut end to callous slightly, which helps prevent new bacterial entry.
- Fresh Start: Repot the cutting in fresh, sterile, and barely moist propagation medium. A well-draining mix like perlite, coarse sand, or a 50/50 peat-perlite blend is ideal. Do not pack it down tightly.
- Improve Airflow: Place the pot in a location with good air circulation (but not direct, harsh drafts). If using a humidity dome, leave it partially open or remove it for a few hours each day to reduce moisture buildup.
Do not simply let the cutting “dry out” in its old, contaminated medium. That environment is already hostile. A complete reset is required.
The Right Fix for Underwatered Propagations
For underwatered cuttings, the goal is gentle, gradual rehydration without shocking the already stressed tissues. Patience is key here.
- Bottom-Water Gently: If the medium is a hard, dry brick, place the propagation pot in a shallow tray of room-temperature water. Let it sit for 15-30 minutes, or until the top surface of the medium feels barely moist. Then, remove it and let all excess water drain away completely.
- Boost Humidity: For severely wilted cuttings, increasing ambient moisture is crucial. Place a clear plastic bag loosely over the pot or use a humidity dome. This creates a microclimate that reduces water loss from the leaves while the roots recover. Ensure the bag doesn’t touch the foliage.
- Light Misting (Optional): If there’s no sign of mold, you can give the foliage a very light mist with water. This is a temporary relief, not a substitute for proper soil moisture.
- Monitor Closely: Check the moisture level of the medium daily. Do not let it dry out completely again. The line between “moist” and “soggy” is thin, so aim for consistent, light dampness.
Recovery from severe underwatering can be slow. A cutting that was just beginning to wilt may perk up in hours, but a severely shriveled one may take days to show improvement, if it can be saved at all. The key is consistent, gentle moisture from this point forward.
Mastering Moisture for Future Success
Getting water right in propagation boils down to a simple diagnostic principle: mushy and smelly means too much, dry and brittle means not enough. By learning to read these signals, you move from guessing to knowing.
The best fix, however, is prevention. Shift your focus from a watering schedule to a checking habit. Before you water, feel the medium an inch down. Choose clear containers when possible to monitor root growth without disturbance. And always start with a well-draining medium—it’s your insurance policy against the most common propagation watering mistakes.
Propagation is a skill honed by observation. Don’t be discouraged by a few failures; each one teaches you more about what your plants need. With this guide, you’re now equipped to diagnose the problem and apply the right fix, turning those frustrating losses into confident successes.
Further reading: Rooting Hormone.