You’re standing there, garden fork in hand, looking at that massive, overgrown clump of daylilies or hostas. It’s clearly too big for its space, maybe flowering less in the center—a classic sign it’s begging to be divided. That flicker of excitement is quickly followed by a wave of uncertainty: Where do I even start? What if I kill it? Take a breath. This moment isn’t a chore; it’s one of the most generous acts in gardening. Plant division is pure propagation magic, turning one thriving perennial into several free plants to spread around your garden or share with friends. To transform that uncertainty into confidence, all you need is a simple, reliable plant division checklist. This guide breaks down the entire process into three clear phases—preparation, the physical separation, and the crucial replanting steps—so you can approach your overgrown clump not with worry, but with the calm assurance of a gardener giving their plants a new lease on life.
Dividing plants is a straightforward propagation technique that involves splitting a mature plant’s root system into smaller, viable sections. Following a simple checklist ensures you choose the right time, prepare properly, separate the plant gently, and replant the divisions for healthy new growth. It’s an effective way to control size, rejuvenate older plants, and multiply your garden favorites at no cost.
Your Pre-Division Prep Checklist
Success in dividing plants step by step starts long before you lift a spade. Rushing this stage is the most common reason for failure. Follow this mini-checklist to set the stage for a smooth, successful propagation project.
- Get the timing right. This is non-negotiable. The golden rule is to divide when the plant is dormant or just beginning active growth. For most summer and fall bloomers (like hostas, daylilies, and ornamental grasses), early spring is ideal. For spring bloomers (like bearded iris or peonies), aim for late summer to early fall. This timing gives divisions a full season to establish roots before facing extreme heat or cold.
- Gather your tools. You don’t need much, but sharp, clean tools are essential. Have ready: a sharp spade or garden fork, a sturdy knife (a hori-hori or old bread knife works great), pruning shears, a tarp or bucket for holding divisions, and fresh potting mix or amended garden soil for replanting. Don’t forget your gloves.
- Prepare the plant. Water the plant thoroughly the day before you plan to divide it. Well-hydrated roots are more flexible and resilient, reducing transplant shock. If you’re dividing into pots, have them filled with soil and ready to go. Scout the new planting sites in your garden and amend the soil with compost if needed.
The Core Separation Protocol
This is the moment of truth. With your prep work done, you can focus on the gentle art of separation. The goal is to create new, viable plants—each with its own healthy roots and shoots (or “eyes,” the growing points).
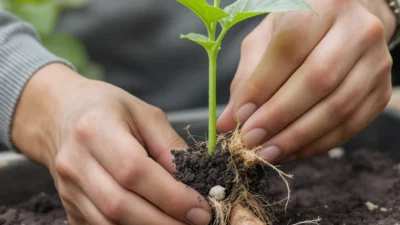
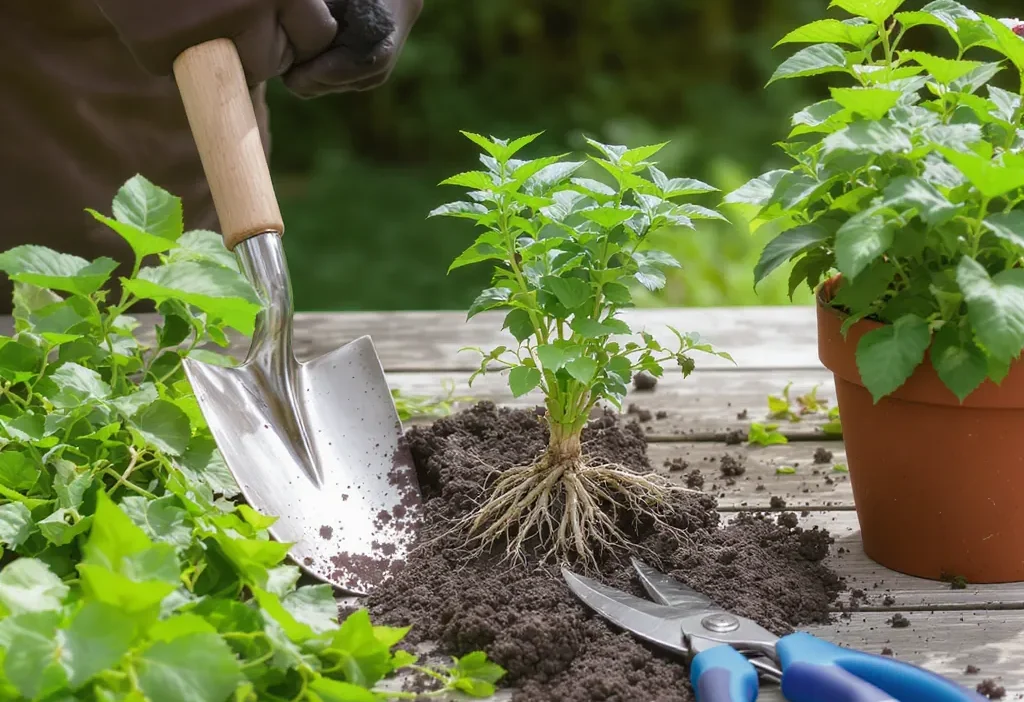
Step 1: Lift the Entire Plant
Using your spade or fork, dig a wide circle around the plant’s drip line (where the foliage ends). Work your way under the root ball and gently lift the entire clump out of the ground. Shake or brush off excess soil so you can see the root structure clearly. This visibility is key to choosing your separation method.
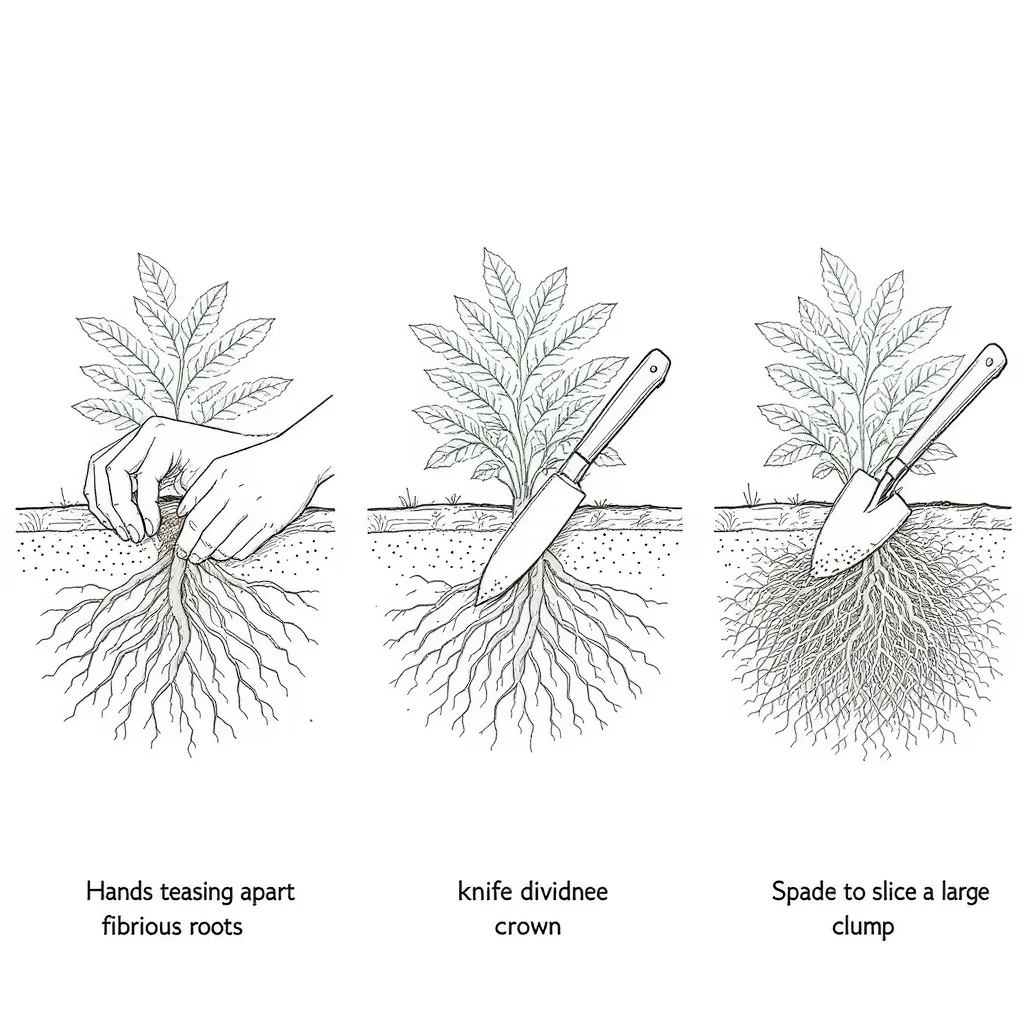
Step 2: Choose Your Separation Method
Not all roots are created equal. Match your technique to what you see:
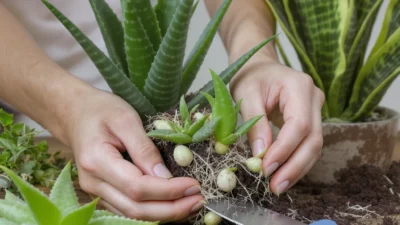
- Teasing Apart (For Fibrous Roots): Plants like asters, coreopsis, and many grasses have a tangled, mat-like root system. You can often separate these by gently pulling sections apart with your hands, teasing the roots free. If they’re stubborn, use two garden forks placed back-to-back in the center of the clump and lever them apart.
- Cutting with a Knife (For Tight Crowns): Dense, woody crowns like those on hostas or heucheras often can’t be pulled apart. Use your sharp knife to slice cleanly through the crown, ensuring each division has several healthy shoots (fans of leaves) and a substantial chunk of roots attached.
- Splitting with a Spade (For Large, Tough Clumps): Massive, established clumps of plants like daylilies or ornamental grasses may require more force. Place your spade blade directly through the center of the root ball and use your foot to drive it through, cleaving the plant into halves or quarters. You can then further divide these pieces by hand or knife.
Discard any dead, woody, or diseased material from the center of old clumps. Your final divisions should be robust—think fist-sized or larger. Tiny divisions take much longer to establish.
Immediate Aftercare & Replanting Steps
The work isn’t over once you have your divisions. How you replant after division determines whether your new plants thrive or merely survive. This quick “Do This / Not That” list keeps you on track.
Do This: Replant divisions promptly. Don’t let the roots dry out in the sun. If you must delay, heel them into a shaded spot or wrap the roots in damp newspaper.
Not That: Don’t leave bare-root divisions sitting on a hot patio for hours.
Do This: Plant at the correct depth. The crown (where roots meet shoots) should sit at the same soil level it was growing at before. Replanting too deep is a common killer.
Not That: Don’t bury the crown or plant it so high that roots are exposed.
Do This: Water in thoroughly. After planting, give each division a deep, slow soak to settle the soil and eliminate air pockets around the roots. This is the single most important step for reducing transplant shock.
Not That: Don’t just give the surface a light sprinkle and assume the job is done.
Do This: Provide supportive aftercare. Keep the soil consistently moist (but not soggy) for the first 4-6 weeks. A light layer of mulch can help retain moisture. If the weather is particularly hot or sunny, provide temporary shade with a cloth or planting basket for a few days.
Not That: Don’t plant and forget, especially during a dry spell.
Ready to Multiply Your Garden?
Armed with this straightforward protocol, you have everything you need to turn one mature plant into many. Plant division is one of the most satisfying gardening skills—it’s practical, economical, and deeply connected to the cycle of growth in your garden. The real reward isn’t just the new plants; it’s the rejuvenated vigor you’ll see in the original clump and the confidence you gain as a gardener.
Your decisive next step is simple: take a walk through your garden this week. Look for that overgrown hosta, the sprawling daylily patch, or the ornamental grass that’s dying in the center. Identify your first candidate. Then, check the calendar, gather your tools, and use this guide to plan your project. This weekend, you could be holding your first home-propagated plants, ready for a new home in your landscape or to share with a friend.