Most gardeners believe successful seed starting is a mysterious art, a blend of green-thumb intuition and sheer luck. The truth is far more empowering: seed propagation is a predictable biological science. Inside every dormant seed is a complete, miniature plant waiting for the precise environmental signals to switch on its growth program. By understanding and managing those signals—moisture, warmth, light, and air—you move from hopeful sower to confident propagator. This guide will demystify the entire journey, from the moment a seed imbibes water to the point you transplant a robust seedling into your garden. We’ll strip away the guesswork and replace it with a clear, actionable framework for growing plants from seed with consistent success, turning what feels like magic into a repeatable process you control.
Seed propagation is the science-driven method of growing plants from seed by managing the key environmental triggers—moisture, warmth, light, and air—to break dormancy and support a seedling’s early growth. It’s the controlled process of coaxing a dormant seed into a vigorous seedling. Success comes from understanding these core biological needs, not from having a ‘green thumb’.
The Seed’s Hidden Blueprint: Understanding Dormancy & Germination
Think of a seed not as a tiny plant, but as a dormant computer program, encrypted and waiting for the right password to run. This state of suspended animation is called dormancy, and it’s a survival mechanism. To unlock it and begin the process of seedling propagation, you need to provide the specific environmental signals the seed is programmed to recognize. Understanding this is the foundation of all successful seed starting methods.
The Three Key Triggers
Most seeds require a combination of three factors to break dormancy:
- Water (Imbibition): This is the non-negotiable first step. The seed coat softens and the embryo inside absorbs water, swelling and rehydrating its cells. This activates enzymes that begin converting stored starches and proteins into energy for growth.
- Temperature: Seeds have an optimal temperature range for germination, often mimicking their native climate. Tomato seeds, for instance, “know” it’s safe to grow when soil is consistently warm (70-80°F/21-27°C), while lettuce prefers cooler temps (55-65°F/13-18°C). Providing the wrong temperature can stall the process entirely.
- Light (or Darkness): This is a common point of confusion. Some seeds, like lettuce and petunias, require light to germinate and should be surface-sown. Others, like tomatoes and beans, require darkness and must be covered. Always check your seed packet; this information is crucial for your seed sowing techniques.
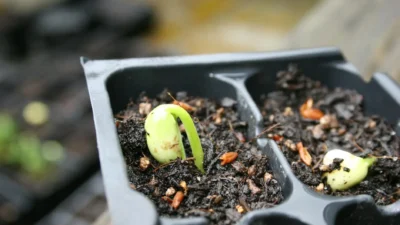
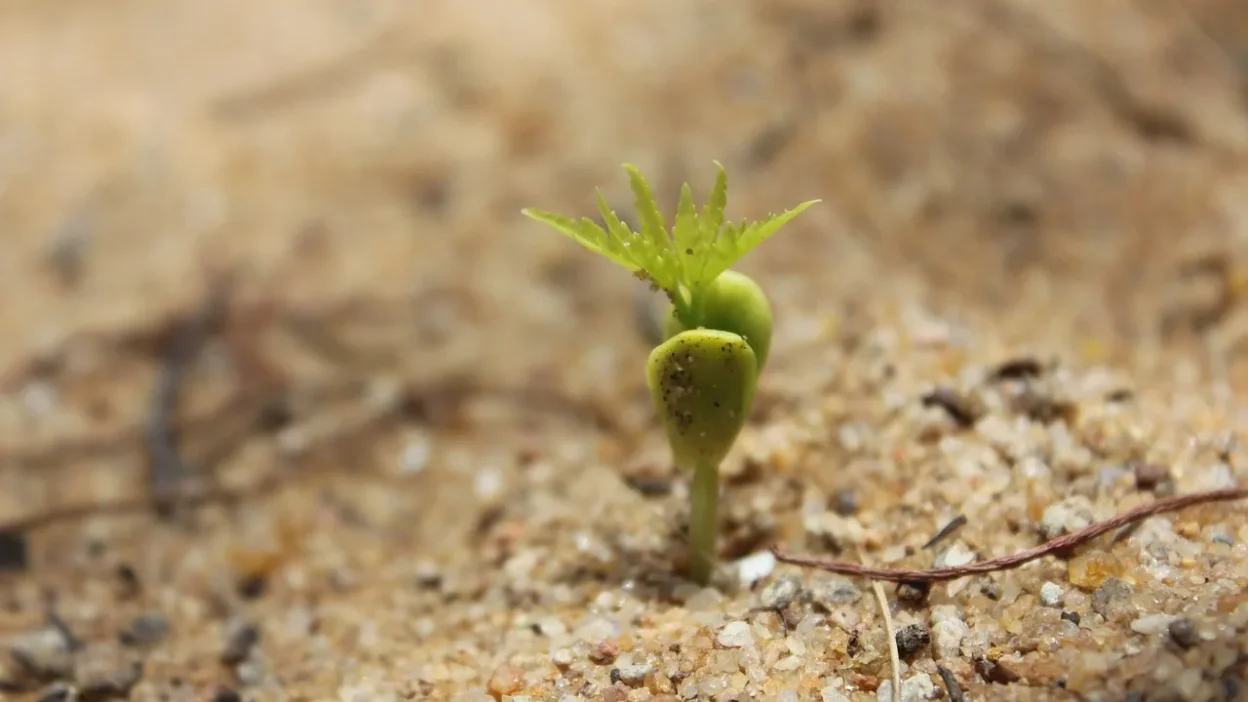
The moment the radicle (the first embryonic root) emerges from the seed coat, germination is complete. The seedling now shifts from living off its internal food stores to seeking light and nutrients from its environment—your cue to change its care completely.
Your Propagation Toolkit: Choosing the Right Method & Medium
The first major decision in growing plants from seed is where to start them. Your choice between direct sowing and indoor starting hinges on the plant’s hardiness, your local climate, and the length of your growing season. Getting this right sets the stage for everything that follows.

| Method | Best For | Pros | Cons | Key Tips |
|---|---|---|---|---|
| Direct Sowing | Root crops (carrots, radishes), hardy greens, peas, beans, and plants that dislike root disturbance. | Less work, no transplant shock, plants adapt to conditions from day one. | Less control over environment, vulnerable to pests/weather, shorter effective growing season. | Wait until soil is warm enough and workable. Sow after your last frost date for tender crops. |
| Indoor Starting | Tender, warm-season crops (tomatoes, peppers, eggplants), long-season flowers, and gardeners in short-season climates. | Head start on the season, precise control over germination environment, higher success rate for difficult seeds. | Requires equipment (lights, trays), risk of leggy seedlings, requires hardening off. | Start 6-8 weeks before your last frost date. Use a proper seed-starting mix, not garden soil. |
The Critical Foundation: Your Growing Medium
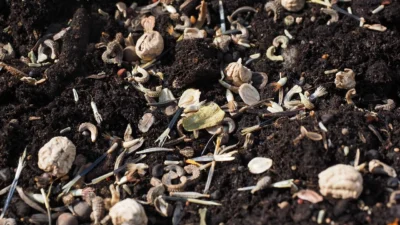
Whether in a tray or the garden bed, seeds need a specific medium to succeed. Garden soil is a poor choice for containers—it’s often too dense, may harbor pathogens, and lacks the drainage seeds need. A proper seed-starting mix is typically a soilless blend of ingredients like:
- Peat moss or Coco coir: Holds moisture and provides a fine texture.
- Perlite or Vermiculite: Creates air pockets for oxygen and improves drainage.
- A fine grade of compost (optional): Can provide a mild nutrient boost for early growth.
This sterile, well-aerated environment gives delicate roots the perfect balance of moisture and oxygen, preventing diseases like damping-off and giving your seed propagation methods the best chance of success.
The Sowing Protocol: Precision from Depth to Spacing
With your method and medium chosen, precision sowing is your next leverage point. Haphazard planting leads to poor germination and crowded, weak seedlings. Follow this protocol for consistent results.
The universal rule for planting depth is to cover the seed with a layer of mix roughly 2 to 3 times its diameter. A tiny lettuce seed needs just a dusting, while a large pea seed needs a half-inch hole. Planting too deep exhausts the seed’s energy before it reaches light; planting too shallow can leave it vulnerable to drying out.
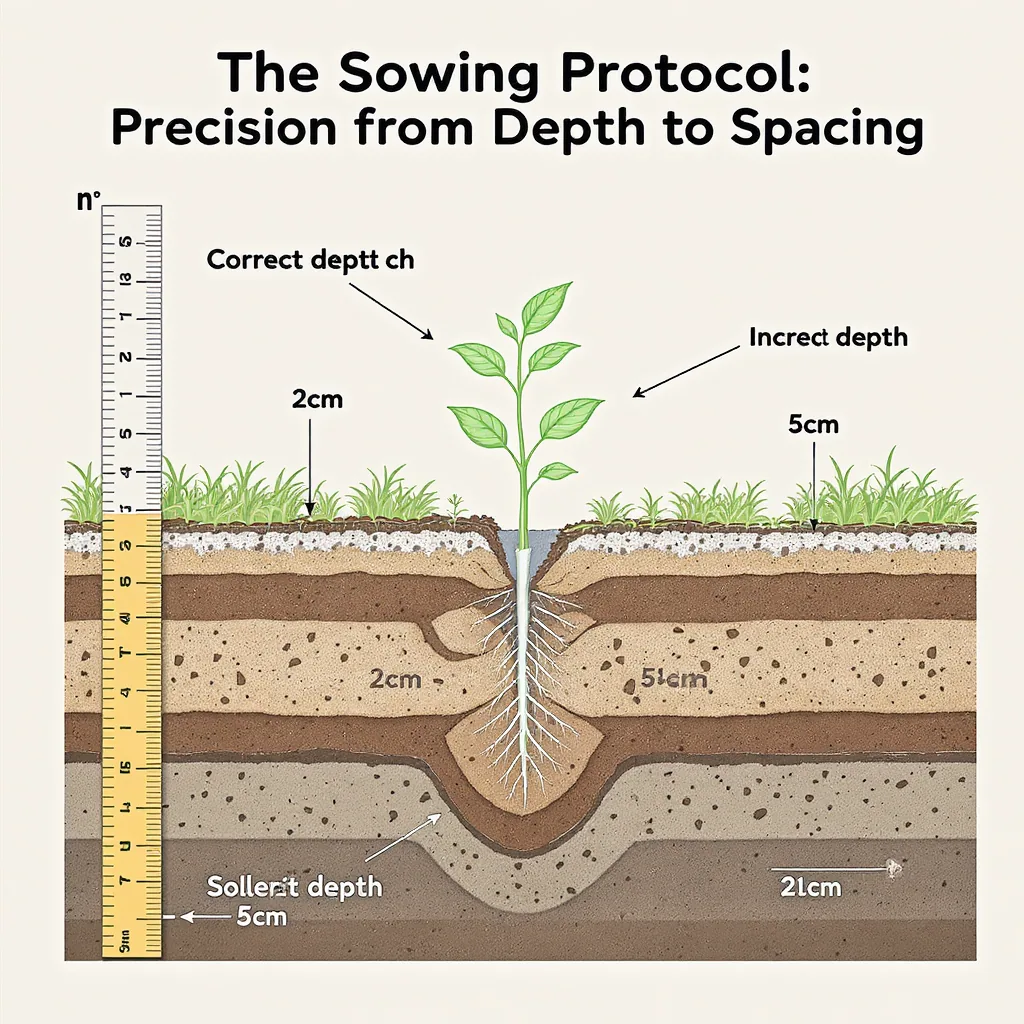
After filling your containers with pre-moistened mix, create shallow furrows or holes at the correct depth. Sow seeds sparingly—overcrowding is the enemy of strong seedlings. Gently water from the bottom after sowing to settle the mix without displacing the seeds. Finally, label everything immediately. Memory is a terrible garden record.
Sowing Cheat Sheet for Common Seeds
- Surface Sow (Needs Light): Lettuce, Petunia, Snapdragon, Begonia. Press gently into mix, do not cover.
- Shallow Sow (~1/8 inch): Broccoli, Cabbage, Cauliflower, Kale. A light sprinkle of mix suffices.
- Medium Sow (~1/4 inch): Tomatoes, Peppers, Eggplants, Basil. A common depth for many garden favorites.
- Deep Sow (~1/2 inch or more): Peas, Beans, Squash, Cucumbers. Their large size demands a deeper home.
Creating the Germination Chamber: Mastering Moisture, Heat & Light
Once sown, your seeds enter the incubation phase. Your goal is to mimic the ideal, protected microclimate they’d find in nature. This is where you actively manage the triggers of water, warmth, and light.
Consistent moisture is paramount. Cover your trays with a clear plastic humidity dome or a sheet of plastic wrap. This creates a mini-greenhouse, trapping evaporation and eliminating the need to water from above, which can disturb seeds. Check daily for condensation; if it’s dry, add water to the tray below, letting the mix wick it up.
The Heat Factor
For warm-season crops, ambient room temperature often isn’t enough. A seedling heat mat placed under your trays can raise the soil temperature by 10-20°F (5-11°C), dramatically speeding up and improving germination rates. A simple thermostat (as recommended by university extensions) prevents overheating. Remember: heat is for germination only; remove the mats once most seeds have sprouted.
Light: Germination vs. Growth
This distinction is critical. As discussed, a seed’s light requirement for germination is binary (needs it or needs darkness). However, all seedlings, without exception, require intense, direct light immediately after they emerge to grow stout and strong. A sunny windowsill is rarely sufficient, especially in early spring. Inadequate light is the primary cause of “leggy,” stretched seedlings. Be prepared to provide 14-16 hours of bright light daily from a dedicated grow light placed just inches above the seedlings.
The Great Transition: Post-Germination Care for Sturdy Seedlings
The moment you see the first green hooks is thrilling, but it’s also a critical pivot point. The care that coddled germination will now harm the seedling if not adjusted. This transition is where many seed starting guides fall short.
First, remove the humidity dome immediately. Lingering high humidity with poor air circulation is an invitation for fungal diseases. Next, provide that intense light source. If you’re relying on a window, you’ll likely see stems straining and elongating toward the light within days, becoming fragile. This is the classic experience of a beginner: the excitement of sprouts turning to panic as they become tall, spindly, and collapse. The solution isn’t magic—it’s simply providing adequate photon energy from a dedicated light source.
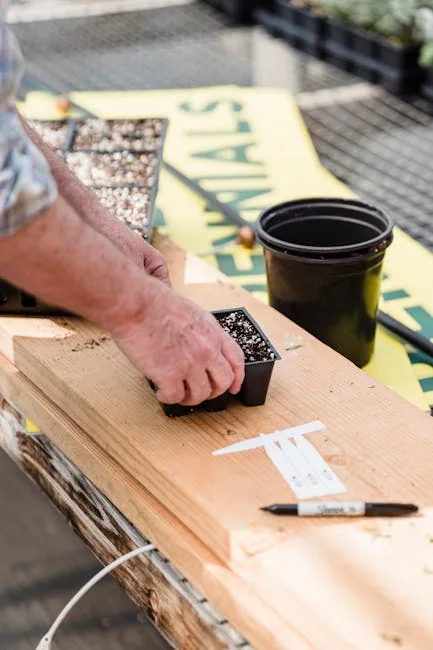
Photo by Greta Hoffman on Pexels
Building Resilience
After a week or so, introduce gentle air circulation with a small oscillating fan set on low, placed a few feet away. This simulates wind, stimulating the seedlings to develop stronger, thicker stems. It also helps keep fungal spores at bay. Once the first set of true leaves (the second set that appears, after the initial seed leaves) is fully developed, you can begin feeding with a very dilute, balanced liquid fertilizer—about 1/4 strength. The seedling has now exhausted the energy in its seed and is ready to feed itself.
Troubleshooting Seedling Setbacks
Even with perfect protocol, issues can arise. Diagnosing problems quickly is key to saving your crop. Here are the most common seedling ailments and their remedies.
Damping-Off Disease
Symptom: Seedlings sprout normally, then suddenly collapse at the soil line, often with a pinched, water-soaked stem.
Cause: A soil-borne fungal disease thriving in cool, wet, stagnant conditions.
Remedy: Prevention is the only cure. Use sterile seed-starting mix, clean containers, provide bottom heat, ensure excellent air circulation, and avoid overwatering. Water in the morning so surfaces don’t stay wet overnight.
Leggy, Stretched Seedlings
Symptom: Long, weak, pale stems stretching far between leaf sets.
Cause: Insufficient light intensity or source too far away.
Remedy: Immediately move seedlings under a stronger light source (grow light) positioned 2-4 inches above the foliage. You can sometimes carefully transplant leggy seedlings deeper, burying part of the stem.
Yellowing Leaves (Chlorosis)
Symptom: Lower or new leaves turning pale green or yellow.
Cause: Often a nutrient deficiency (usually nitrogen) from growing in a soilless mix with no food, or overwatering.
Remedy: Apply a dilute, balanced fertilizer. Ensure containers drain freely and you’re not keeping the mix soggy.
Stunted Growth or Purple Tinge
Symptom: Seedlings stop growing, leaves may develop a purple underside.
Cause: Often related to temperature (too cold for warm-season crops) or a phosphorus deficiency, which is frequently tied to cold roots inhibiting nutrient uptake.
Remedy: Ensure soil temperature is adequate. Move trays to a warmer location or use a heat mat. A mild fertilizer can help.
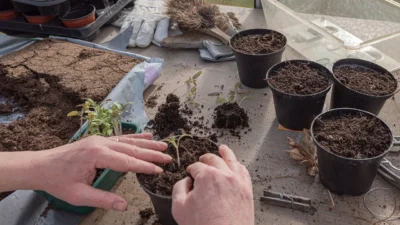
Beyond the Seed Tray: Hardening Off and Transplanting
Your robust indoor seedlings are not ready for the real world. Moving them directly into the garden sun is like sending someone from a dark room onto a bright beach—it causes severe shock, sunscald, and often death. The gradual acclimation process is called hardening off, and it is non-negotiable.
Begin 7-10 days before your intended transplant date. On day one, place seedlings in a sheltered, shady spot outdoors for just 1-2 hours, protected from strong wind. Bring them back inside. Each day, gradually increase their time outside and their exposure to direct morning sun. Avoid midday sun initially. By the end of the week, they should be staying out overnight if temperatures are safe. This process thickens leaf cuticles and adapts the plant’s physiology to outdoor conditions.
The Final Move: Transplanting
Choose a cloudy, calm afternoon or evening for transplanting to minimize stress. Water the seedlings well in their cells an hour before. Dig a hole slightly larger than the root ball. Gently remove the seedling, handling it by a leaf (not the fragile stem), and place it in the hole. Bury stems of tomatoes and similar crops deeply, as they can form roots along the buried stem. Firm the soil gently, water in thoroughly to settle the roots and eliminate air pockets, and consider applying a light mulch to retain moisture.
Advanced Techniques & Special Cases
Some seeds have evolved with extra defenses and require specific treatments to mimic natural processes that break their dormancy. If you’re venturing into growing native perennials, trees, shrubs, or certain annuals, you may encounter these terms.
Scarification: Physically breaking or thinning a hard, impermeable seed coat. This can be done by gently nicking the seed with a file or rubbing between sheets of sandpaper, then soaking overnight.
Stratification (Cold/Moist Treatment): Mimicking a winter period. Seeds are mixed with a moist medium (like vermiculite or sand), placed in a sealed bag, and kept in a refrigerator (33-40°F/1-4°C) for a period of weeks or months. Many temperate climate perennials like milkweed or lavender require this.
Soaking: Simply soaking large, hard-coated seeds (like peas, beans, morning glory) in room-temperature water for 12-24 hours before sowing can speed up imbibition.
Winter Sowing: An alternative method where seeds are sown in ventilated containers (like milk jugs) in late winter and left outdoors. Nature provides the necessary stratification and germination occurs when conditions are perfect in spring. It’s a low-maintenance method well-suited to hardy plants.
From Theory to Thriving Garden
You now possess the framework that transforms seed starting from a gamble into a reliable, repeatable science. It’s not about possessing a mythical green thumb, but about understanding the biological needs of a dormant seed and the environmental cues that guide a seedling’s early life. You’ve moved from simply hoping seeds sprout to actively managing the triggers of moisture, warmth, and light.
The decisive next step is to apply this knowledge. Choose one packet of seeds—perhaps a simple basil or marigold—and follow the process with intention. Observe the stages of imbibition, radicle emergence, and true leaf development with your new understanding. Each success builds confidence, and each setback becomes a diagnostic puzzle you’re equipped to solve. Your garden’s potential no longer starts at the garden center; it starts in your hands, with a seed.
Mastering seed propagation hinges on a few core principles. First, understand that seeds are dormant programs requiring specific triggers—water, correct temperature, and sometimes light—to germinate. Second, choose the right method (direct sow for hardy plants, indoor start for tender ones) and always use a sterile, well-draining seed-starting mix. Third, sow with precision, following the 2x diameter depth rule and proper spacing.
Fourth, control the germination environment with humidity domes and heat mats as needed, then transition immediately to intense light and air circulation post-sprout. Finally, never skip the hardening-off process; it’s the essential bridge between your controlled indoor nursery and the variable outdoor garden. This systematic approach removes luck from the equation, replacing it with predictable, biological success.
Q: Can I use garden soil to start seeds?
A: It’s not recommended. Garden soil is often too dense for delicate roots, may drain poorly in containers, and can harbor fungal pathogens and weed seeds. A sterile, soilless seed-starting mix provides the ideal balance of moisture retention and aeration, giving your seedlings the best disease-free start.
Q: How long does it take for seeds to germinate?
A: Germination time varies widely by plant species and conditions. Fast germinators like radishes can sprout in 3-4 days. Tomatoes and peppers typically take 5-10 days. Some herbs and perennials may take 2-3 weeks or longer. Always check your seed packet for an estimated range, and ensure you’re providing optimal moisture and temperature.
Q: Why did my seeds sprout and then die suddenly (damping-off)?
A: This is classic damping-off disease, caused by soil-borne fungi. It thrives in cool, wet, stagnant conditions. To prevent it, use sterile mix and containers, avoid overwatering, provide bottom heat for warmth, and ensure good air circulation with a