You’ve probably been there: you buy a new plant, or you nervously snip a cutting, only to watch it wilt in a glass of water or rot in a pot of soil. It’s frustrating, and it can make propagation feel like a high-stakes gamble. But what if there was a way to let a plant clone itself while it’s still happily attached to its parent, dramatically boosting your chances of success? That’s the almost-forgotten magic of layering, a beginner-friendly technique that bypasses the common anxiety of traditional cuttings. This simple layering propagation guide is here to show you how to harness this reliable, low-risk method to create free, healthy new plants from your existing favorites, turning propagation from a source of stress into a source of genuine satisfaction.
Simple layering is a propagation method where you encourage a stem to root while it’s still attached to the parent plant, then sever it to create a new, independent plant. It’s ideal for beginners because the stem continues to receive water and nutrients from the parent, drastically increasing success rates compared to cuttings. To get started, you essentially need just a flexible stem, some soil or sphagnum moss, something to secure it with (like a wire or stone), and a sharp knife.
Your First Layering Project: A 6-Step Checklist
Let’s translate the theory into action. This checklist is your universal protocol for most simple layering projects. Follow these steps in order, and you’ll have a new plant taking root before you know it.
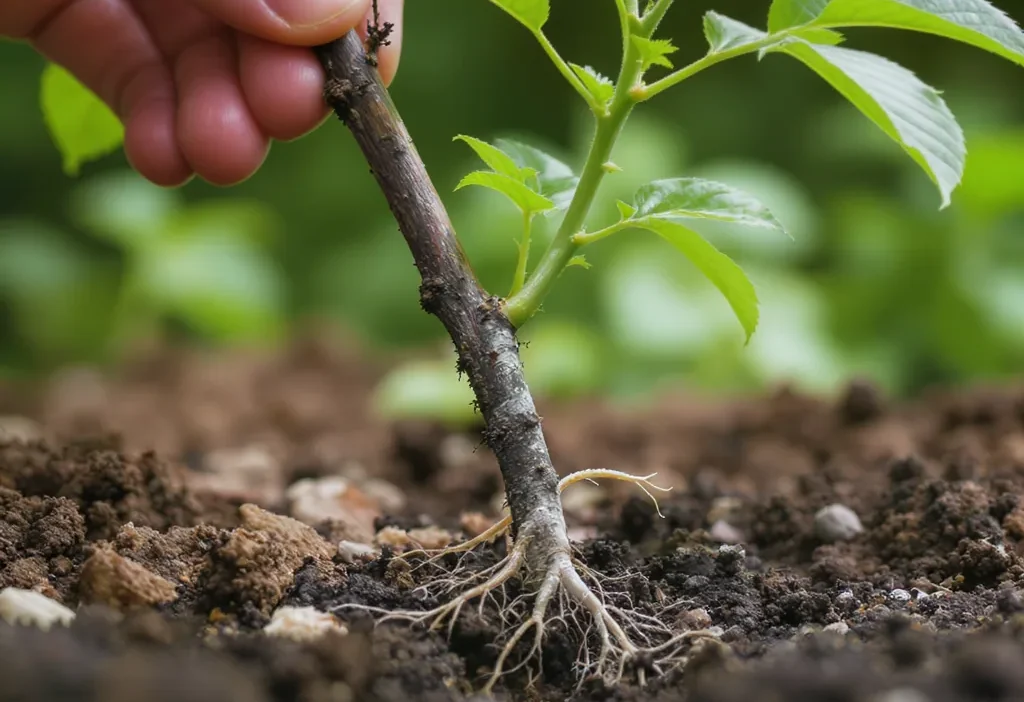
- Select and Prepare the Stem. Choose a healthy, flexible stem from the current or previous season’s growth. For ground layering, it needs to be long enough to bend down to the soil. Remove any leaves from a 4-6 inch section where the stem will make contact with the rooting medium.
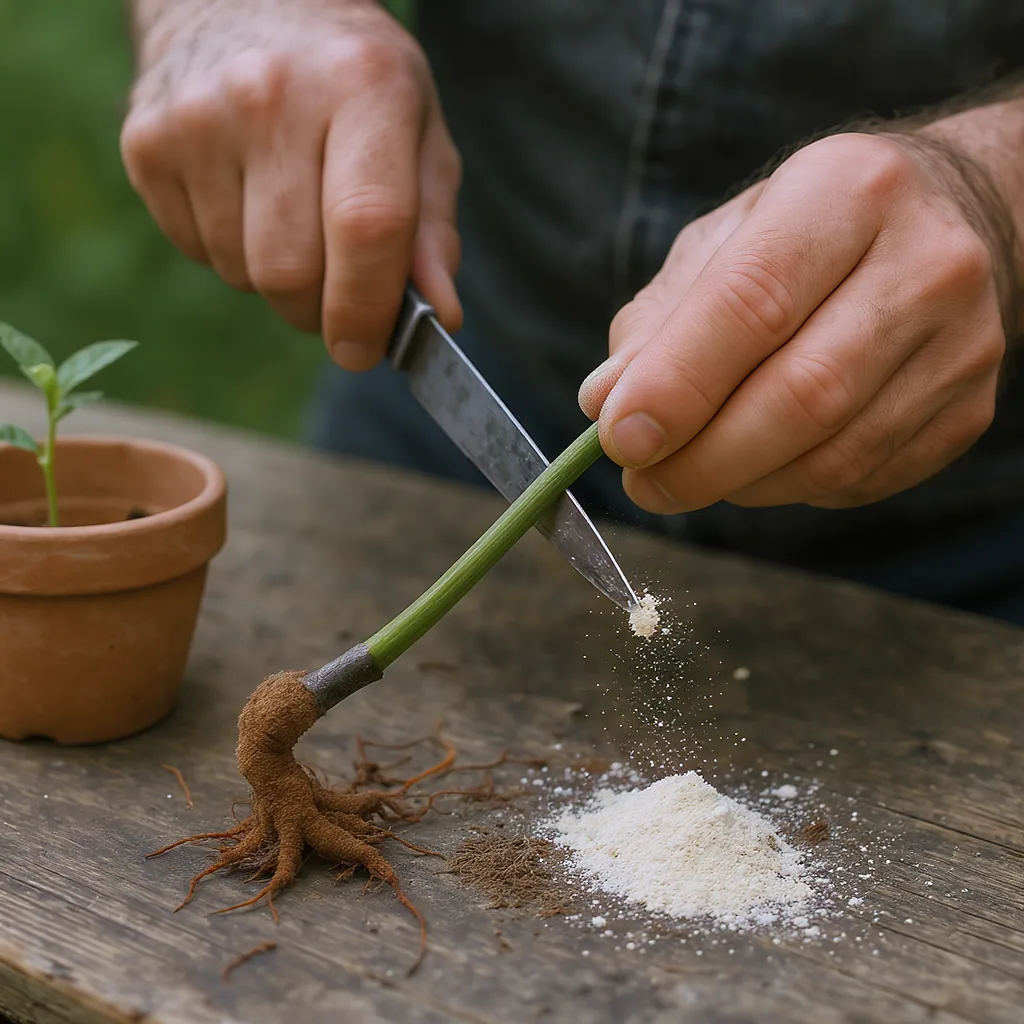
- Wound the Stem (The Secret Sauce). This is the most important step in the layering propagation basics. Using a clean knife, make a shallow, upward-slanting cut about one-third through the stem, or gently scrape off a thin layer of bark. This injury interrupts the flow of sap and forces the plant to produce root-forming cells (callus) at that exact spot.
- Apply Rooting Hormone (Optional but Helpful). While not strictly necessary, dusting the wounded area with a rooting hormone powder can significantly speed up root development and increase success rates, especially on woody plants. This is your checkpoint—once you secure the stem in the next step, the commitment is made.
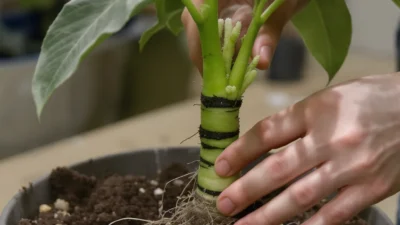
- Secure and Bury the Wounded Section. For ground layering, bend the wounded section down into a shallow hole (2-4 inches deep) in moist soil or potting mix. Hold it in place with a landscape staple, a bent wire, or a small rock. For air layering, wrap the wounded area with a handful of pre-moistened sphagnum moss and secure it with plastic wrap and ties.
- Maintain Consistent Moisture. This is non-negotiable. The rooting medium—whether soil or moss—must stay evenly moist (not soggy) for the entire rooting period, which can take weeks to months. Check it regularly, especially in dry weather.
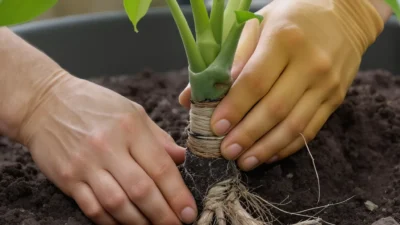
- Sever and Pot Up. Once you see healthy new roots through the moss or feel resistance when you gently tug on the buried stem (usually after one growing season), it’s time. Use clean pruners to cut the stem, separating your new plant from the parent. Pot it up in its own container with fresh soil and care for it gently as it establishes.
Which Plants Love to Be Layered? (And Which Don’t)
Not every plant is a good candidate. The best plants for this technique share a few key traits: they produce flexible stems, root readily from wounded tissue, and are often perennial. Your success starts with choosing the right subject.
Great for Layering (Flexible & Cooperative)
These plants are practically asking to be layered. They often have stems that naturally bend toward the ground or produce suckers and runners.
- Shrubs & Vines: Hydrangeas (especially climbing and mophead types), Forsythia, Honeysuckle, Wisteria, and Jasmine.
- Berries: Raspberries, Blackberries, and Gooseberries. These are classic candidates for tip layering, where the stem tip is buried.
- Herbs & Groundcovers: Rosemary, Thyme, Mint (though it propagates so easily from cuttings, layering is still fun), and Ivy.
- Houseplants: Pothos, Philodendron, Rubber Plant (Ficus elastica), and Dracaena. These are often perfect for air layering when they become leggy.
For a more comprehensive list, reputable gardening resources like the University of Minnesota Extension offer excellent guides on which plants respond best to various propagation methods.
Avoid Layering For (Poor Candidates)
Save your energy. Layering is typically ineffective or unnecessarily complicated for these plants:
- Most Annuals (like petunias or marigolds): Their life cycle is too short; it’s faster to grow them from seed.
- Plants with a Single, Deep Taproot (like carrots or dill): The structure doesn’t suit the technique.
- Very Rigid, Non-Flexible Woody Stems on mature trees: While possible via specialized techniques like air layering, it’s advanced and slow. Stick to flexible growth.
Ground vs. Air vs. Tip: Choosing Your Layering Method
All layering follows the same core principle, but the execution changes based on your plant’s architecture. Picking the right method is your first strategic decision. Here’s a simple breakdown to guide you.

Ground Layering: The Classic Approach
This is the quintessential image of ground layering plants. You bend a low, flexible stem down to the soil, secure it, and let it root. It’s ideal for shrubs with long, pliable branches (like hydrangeas or raspberries) and many groundcover plants. The stem remains partially attached to the parent, which acts as a life-support system.
Air Layering: For Upright & Woody Stems
What if your plant’s stem is tall, woody, and won’t bend to the ground? Enter air layering. You wound a section of stem up in the air, wrap it in moist sphagnum moss, and enclose it in plastic. It’s fantastic for rejuvenating leggy houseplants (like a tall Dracaena) or propagating ornamental trees and shrubs (like Magnolia or Ficus) without taking a cutting. It demystifies air layering basics.
Tip Layering: The Bramble Special
Some plants, particularly blackberries and trailing raspberries, have a neat trick: their growing tips naturally want to root when they touch the soil. Tip layering simply encourages this by burying the very tip of a long cane. It’s a specific, highly effective subset of ground layering for this plant family.
In practice, your choice often makes itself. Look at your plant. Can a stem easily reach the soil? Go for ground layering. Is it a tall, single stem? Air layering is your friend. Is it a bramble with long, arching canes? Try tip layering.
The 5 Most Common Layering Mistakes (And How to Avoid Them)
Even with a straightforward guide, small missteps can delay success. Here are the pitfalls I see most often—and how to sidestep them completely.
Mistake 1: Choosing a Stem That’s Too Old or Too Woody. A rigid, bark-covered stem from three seasons ago lacks the youthful vigor needed to produce roots quickly. Instead, do this: Select a stem from the current or last season’s growth. It should still be somewhat flexible and green or greenish-brown.
Mistake 2: Skipping or Botching the Wounding Step. A tiny scratch won’t do it, and a cut that severs the stem completely defeats the purpose. Instead, do this: Make a confident, clean cut about 1-1.5 inches long and one-third of the way through the stem. This creates a sufficient wound to stimulate rooting without killing the branch.
Mistake 3: Letting the Rooting Medium Dry Out. Roots form in response to consistent moisture. Letting the soil or moss dry out halts the process and can kill the delicate new root cells. Instead, do this: Check moisture levels weekly. The medium should feel like a well-wrung sponge—damp but not dripping.
Mistake 4: Severing the New Plant Too Early. Impatience is the enemy. Cutting the stem before a robust root system has developed dooms the new plant to struggle or fail. Instead, do this: Wait for visual confirmation. For air layering, you should see a network of roots through the moss. For ground layering, wait at least one full growing season or until a gentle tug meets firm resistance.
Mistake 5: Neglecting Aftercare Post-Severing. That new plant is a baby with a fresh root system. Throwing it into full sun or letting it wilt from underwatering can undo all your good work. Instead, do this: Pot it up, keep it in a sheltered, bright but indirect light location, and water carefully to keep the root ball moist as it acclimates to independence.
After the Cut: Caring for Your New Plant
You’ve done the hard work and severed the connection. Now, your layered plant is on its own for the first time. This transition period is critical. Think of it as helping a teenager move into their first apartment—they still need support, just of a different kind.
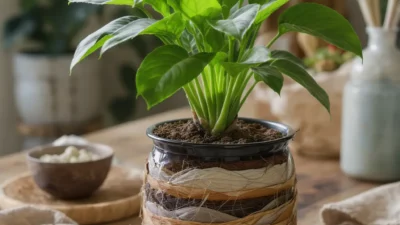
The First Potting
Use a well-draining potting mix appropriate for the plant type. A standard potting mix with some added perlite is a safe bet for most. Choose a pot that comfortably fits the new root ball with an inch or two of space to grow—not a huge pot, which can stay too wet. Gently firm the soil around the roots and water thoroughly to settle it in.
Water and Light: The Gentle Acclimation
Your new plant’s roots are likely finer and more sensitive than a mature plant’s. Keep the soil consistently moist but never waterlogged. Place the pot in a location with bright, indirect light. Avoid harsh, direct afternoon sun for the first few weeks, which can cause excessive stress and wilting. This careful start is what makes easy plant propagation through layering so reliable.
Signs to Watch For
A little drooping in the first 48 hours is normal. However, persistent yellowing leaves, severe wilting that doesn’t recover after watering, or leaf drop are signs of trouble. Usually, this points to either root damage during transplant, overwatering, or insufficient roots to support the top growth. If this happens, prune back some of the foliage to reduce demand on the roots and ensure your watering is on point. Within a few weeks, you should see new growth—the ultimate sign your simple propagation layering project is a complete success.
Your Propagation Journey Starts Now
The theory is clear and the steps are laid out. The most powerful thing you can do is to move from reading to doing. Before you close this tab, look around your home or garden. Do you see a leggy pothos, a sprawling hydrangea bush, or a raspberry cane arching toward the soil? That’s your first candidate. Mentally walk through the 6-step checklist with that specific plant in mind. The real magic of this stem layering guide isn’t in the reading—it’s in the quiet satisfaction of cutting that umbilical cord and knowing you created a thriving new plant, for free.
To recap, layering is a low-risk, high-reward propagation method perfect for beginners. Its core advantage is that the stem roots while still attached to the parent plant, providing a built-in safety net. Your success hinges on a few key decisions: choosing a flexible-stemmed plant, selecting the right method (ground, air, or tip) for its growth habit, and—above all—maintaining consistent moisture at the rooting site. Forget the anxiety of cuttings wilting in a glass of water. With layering, you’re simply helping a plant do what it often wants to do naturally.