You’re looking at your favorite pothos, spilling gloriously over the edge of its pot, and you get the urge. With a clean, confident snip, you take a piece of it. In that simple moment, you’re not just pruning—you’re beginning the magical, practical process of stem and leaf cutting propagation. This isn’t a complex botanical mystery reserved for experts; it’s a fundamental, rewarding skill for any plant lover. It’s how you turn one overgrown specimen into a forest of free, genetically identical offspring, how you save a leggy favorite, or share a piece of your collection with a friend. Mastering a few reliable cutting propagation techniques demystifies the entire process, transforming it from hopeful guesswork into a repeatable routine. All it takes is understanding the basic toolkit, following a clear protocol, and embracing a little patience. Let’s turn that satisfying snip into your next thriving plant.
Stem and leaf cutting propagation is a vegetative cloning method where a section of a parent plant is encouraged to form its own roots and shoots, creating a genetically identical new plant. It’s the fastest and most reliable way for home gardeners to multiply their favorite houseplants, requiring minimal specialized equipment. By understanding a few key principles about node placement, rooting hormone, and the right environment, you can successfully propagate plants from cuttings with a very high success rate.
Here’s how to propagate plants from cuttings successfully. The best way is to start with healthy parent plants and clean, sharp tools. For stem cuttings, snip below a node and remove lower leaves. For leaf cuttings, take the whole leaf or a section with a vein. Use rooting hormone to encourage roots, then place in a moist, well-draining medium like perlite or water. Provide bright, indirect light and high humidity until roots establish, which can take a few weeks.
Your Propagation Toolkit: What You Really Need
Think of this as your plant-cloning starter pack. You don’t need a lab, but a few key items will dramatically increase your success rate when you propagate plants from cuttings. Here’s what matters and why.
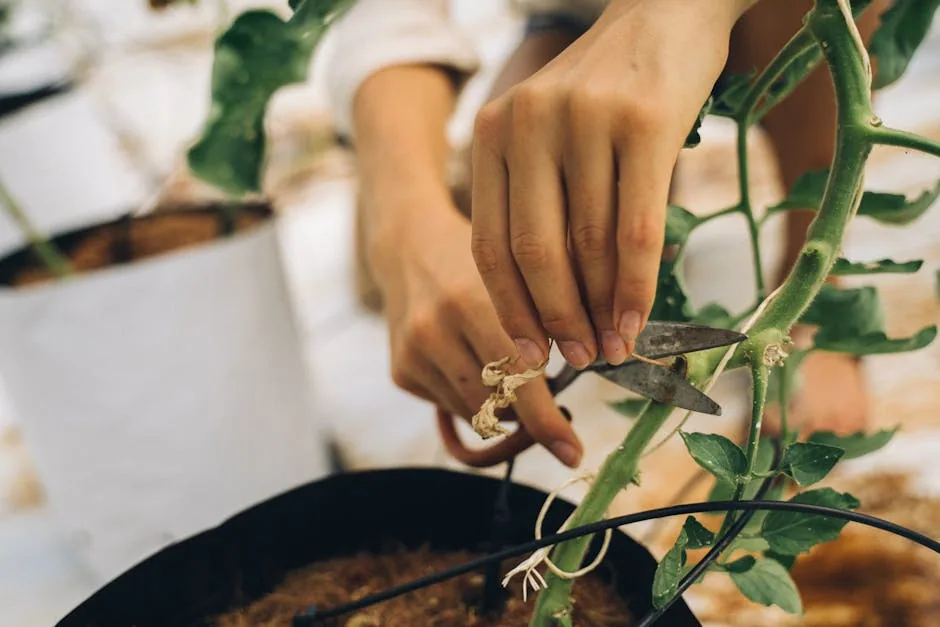
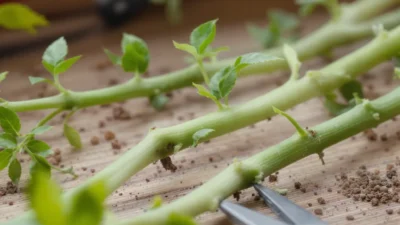
Photo by Anna Tarazevich on Pexels
The Non-Negotiables
Sharp, Clean Cutting Tool: This is your #1 priority. Use sharp scissors, pruning snips, or a blade. A clean cut slices plant cells; a dull tool crushes them, creating an open wound prone to rot and disease. Wipe blades with rubbing alcohol between plants.
Rooting Hormone (Powder or Gel): This isn’t magic, but it’s a powerful helper. It contains growth hormones that stimulate root cell formation and often includes a fungicide to protect the cut end. For beginners, it’s a confidence-boosting game-changer.
Propagation Vessel & Medium: This is where your cutting will live while it roots. You have choices:
- Water: A simple glass or jar. Best for visual learners and plants that root easily in water (like Pothos, Philodendron).
- Soil-less Mix: Perlite, vermiculite, or a 50/50 mix of peat and perlite. Provides moisture and air, reducing rot risk.
- Small Pots with Drainage: If planting directly into soil, use a tiny pot. A large pot stays too wet for a small, rootless cutting.
The Very Helpful Extras
Humidity Dome: A clear plastic bag, takeout container, or dedicated propagation dome. New cuttings lose moisture easily; a dome creates a mini-greenhouse, reducing stress. Just don’t let it get stuffy—air it out occasionally.
Labels: Write the plant name and date. Trust me, you will forget.
Bright, Indirect Light Source: A north or east-facing window is perfect. Cuttings need light for photosynthesis to fuel root growth, but direct sun will cook them.
Choosing Your Champion: Selecting the Perfect Cutting
Your success story begins with the piece you take. A weak or sickly cutting is fighting an uphill battle from day one. Here’s how to pick a winner for stem and leaf cutting propagation.
For Stem Cuttings: The Node is Everything
Look for a healthy, pest-free stem with vigorous growth. The gold is in the node—the little bump or ring on the stem where leaves, buds, and aerial roots emerge. This is where root cells are concentrated. Your cut must include at least one node (usually below it). Avoid stems that are flowering, overly woody, or look weak and leggy.
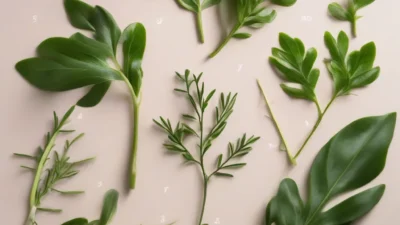
For Leaf Cuttings: It’s All About Potential
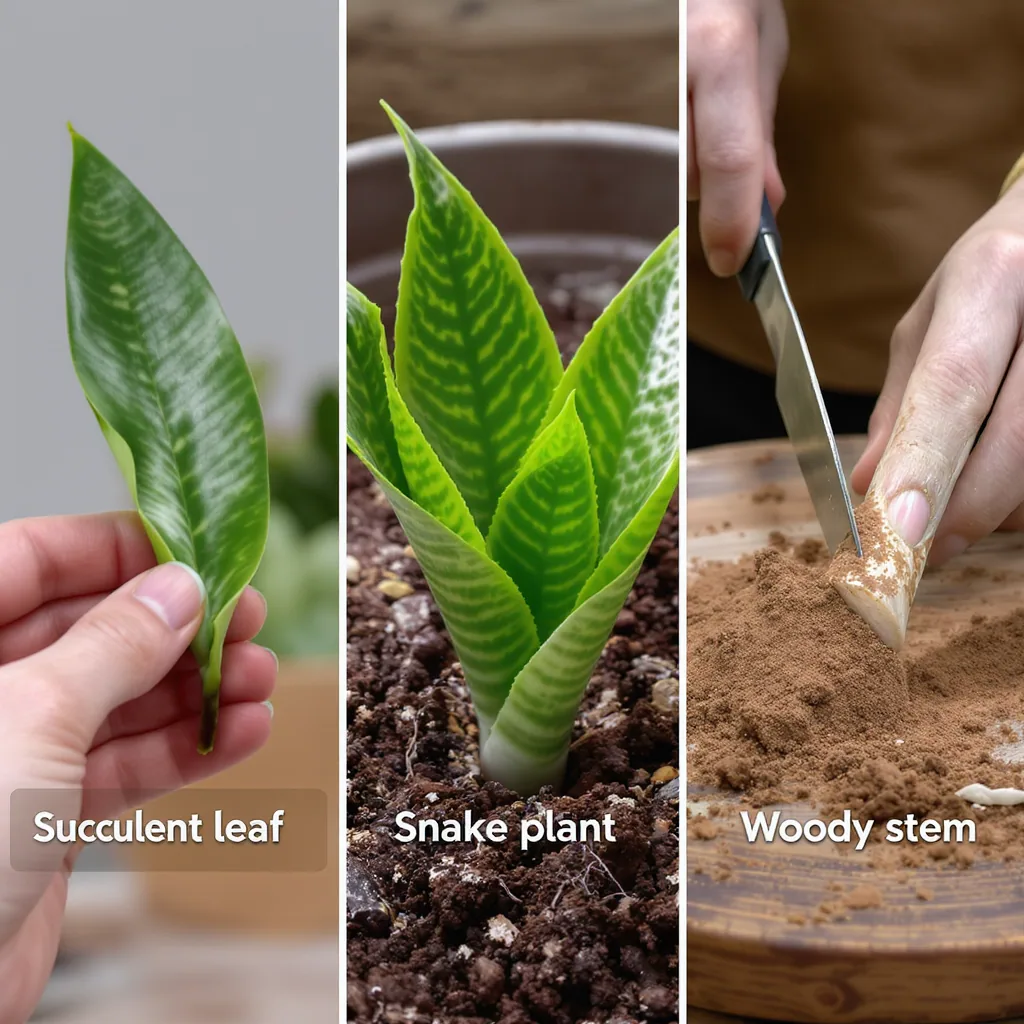
Not all leaves can become new plants. You typically need a whole, healthy leaf (like for many succulents) or a leaf section that includes a major vein (like with Snake Plants or Begonias). The leaf must be mature and plump, not old and yellowing or young and soft.
Timing is (Kind of) Key: The best time to take cuttings is during the plant’s active growing season, usually spring or early summer. The plant’s natural growth hormones are surging, leading to faster rooting. But for indoor houseplants, you can often succeed year-round if you provide warmth and light.
The Universal Propagation Protocol: A Step-by-Step Routine
This is your core, repeatable routine for most common herbaceous houseplant cutting propagation. Follow these steps to turn your selected cutting into a rooted plant.
- Sanitize Your Tools: Wipe your blades with rubbing alcohol to prevent spreading disease.
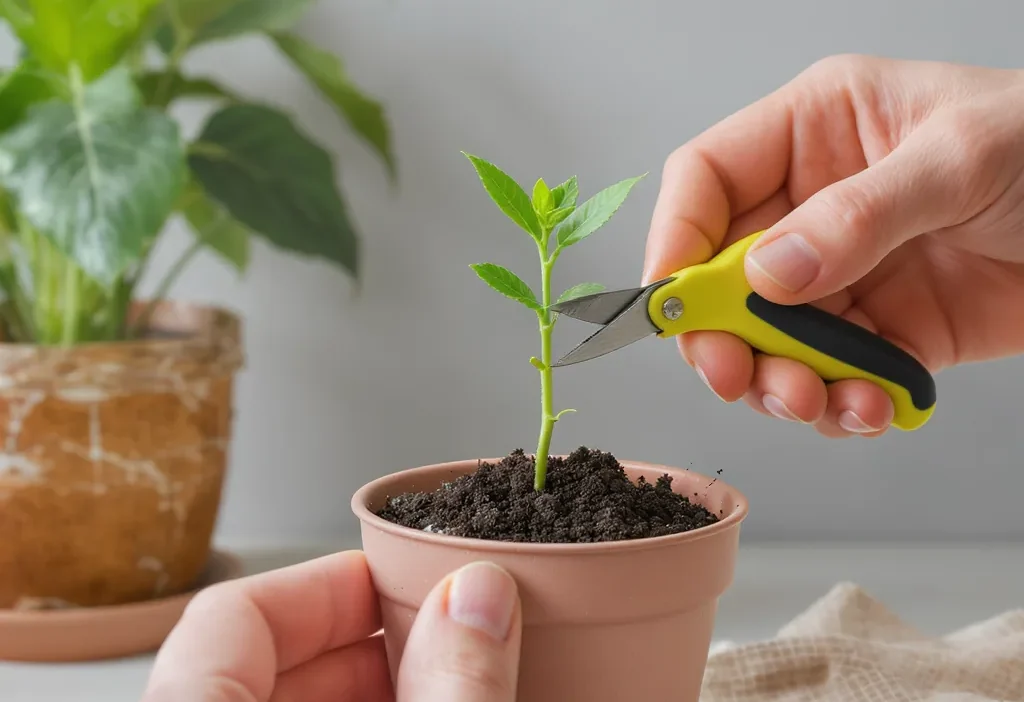
- Make the Cut: Using your sharp tool, cut the stem cleanly, just below a node. A 4-6 inch length is ideal. For leaf cuttings, make clean cuts as required by the plant type.
- Prepare the Cutting: Remove any leaves that would sit below the soil or water line. Leaves submerged in medium will rot. You can leave a few leaves at the top to support photosynthesis.
- Apply Rooting Hormone (Optional but Recommended): Dip the cut end—and any nodes that will be buried—into rooting hormone powder or gel. Tap off the excess.
- Choose Your Medium & Plant: Insert the cutting into your chosen medium. For water, ensure nodes are submerged. For soil or perlite, make a small hole first with a pencil to avoid wiping off the hormone, then gently firm the medium around the stem.
- Initial Setup: Water the medium lightly until moist but not soggy. If using a humidity dome, place it over the cutting.
- Provide the Right Environment: Place in a warm spot (65-75°F is ideal) with bright, indirect light. No direct sun.
- Monitor & Wait: This is the hardest part. Check weekly for moisture. For water propagation, top up or change the water if it looks cloudy. Resist the urge to tug on the cutting to check for roots.
- The Root Check: For water, roots will be visible. For soil, wait until you see new leaf growth emerging from the top, which usually indicates root development below. Gently tug; if there’s slight resistance, roots have likely formed.
- Potting Up: Once roots are 1-2 inches long (for water cuttings) or the new growth is evident (for soil), it’s time to transition to its first real pot.

Method Deep Dive: Water vs. Soil vs. Other Mediums
Choosing where your cutting roots is a personal and practical decision. Each method has its pros, cons, and best-use cases.
Water Propagation
Pros: It’s incredibly satisfying to watch roots grow. It requires minimal setup, and you can easily monitor progress. Great for beginners and plants like Pothos, Philodendron, and Tradescantia.
Cons: The roots that form are “water roots,” adapted to an aquatic environment. Transitioning to soil can be stressful for the plant, sometimes causing root shock or loss. There’s also a higher risk of stem rot if leaves are submerged.
Soil or Soil-less Mix Propagation
Pros: The cutting develops roots directly in their final growing medium, eliminating transplant shock. It’s often faster and more reliable for plants prone to rot in water (like many succulents, ZZ plants, and Hoyas).
Cons: It’s a “black box”—you can’t see what’s happening. It requires more careful moisture control to avoid drying out or staying too wet.
Sphagnum Moss & Other Mediums
Pre-moistened sphagnum moss is excellent for high-humidity lovers like Monsteras and Alocasias. It holds moisture while allowing air flow. Perlite or vermiculite alone are fantastic, inert options that minimize rot risk. The key with any medium is to keep it consistently moist, not wet.
Special Cases: Leaf Cuttings, Succulents, and Woody Stems
Not all plants follow the standard stem-cutting script. Here’s how to adjust your approach for these special cases.
Leaf Vein Cuttings (Snake Plants, Begonias)
For Snake Plants (Sansevieria), you can cut a healthy leaf into 2-3 inch sections. It’s crucial to note which end was down (closest to the soil). Plant the bottom end about an inch deep in a sandy mix. For Begonias like the Rex, you can lay a leaf flat, make small cuts across several major veins, pin it to moist soil, and new plantlets will form at the cuts.
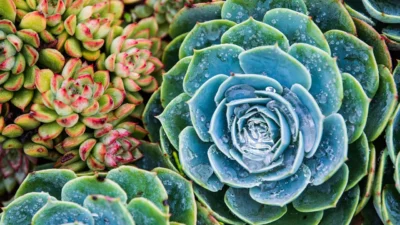
Succulent Leaves and Stems
The golden rule: let it callus. After taking a leaf or stem cutting, let the cut end dry and form a scab (callus) for 1-3 days. This seals the wound and prevents rot when planted. Then, place the callused end on top of dryish succulent soil. Wait for roots to appear before watering lightly.
Woody Stem Cuttings (Rosemary, Hibiscus, Ficus)
These cuttings from shrubs or trees are slower to root. Take a 4-6 inch cutting from semi-hardwood (new growth that has started to firm up). Remove lower leaves, apply a stronger rooting hormone, and plant in a very well-draining mix. High humidity and bottom heat (using a heat mat) can significantly improve success rates.
The Waiting Game: Ideal Rooting Conditions & Care
Once your cutting is planted, your job shifts to environmental manager. Patience is required, but these conditions tip the odds in your favor.
Do This:
- Light: Provide bright, indirect light. A north or east window is perfect. This fuels energy production without causing dehydration.
- Humidity: Maintain high humidity with a dome or bag. It reduces water loss from leaves while the cutting has no roots to drink. Open it every few days for fresh air.
- Warmth: Keep the environment warm (70-75°F). Root growth accelerates in warm conditions. A cool windowsill in winter can stall progress.
- Moisture: Keep the medium slightly moist, like a wrung-out sponge. For water propagation, keep the water level consistent.
Avoid This:
- Direct Sun: This will scorch leaves and dry out the cutting rapidly.
- Soggy Medium: Constant wetness suffocates the stem and invites rot. Ensure your pot has drainage.
- Constant Disturbance: Don’t pull on the cutting to check for roots. You’ll break delicate new root hairs.
- Drafty Locations: Keep away from cold drafts or heating vents, which cause stress and moisture loss.
Common Propagation Pitfalls and How to Avoid Them
Even with the best intentions, things can go wrong. Here are the most frequent missteps in plant propagation from cuttings and how to sidestep them.
Rotting Stem (The #1 Killer)
Problem: The cut end turns mushy and black, often smelling foul.
Solution: You’re keeping it too wet. Ensure your medium is moist, not soggy. Use a well-draining mix. For succulents, you didn’t let the cutting callus. Always use a clean cut with a sharp tool.
Cutting Withers and Dries Up
Problem: The leaves shrivel and the stem shrinks.
Solution: Humidity is too low, or light is too strong. Use a humidity dome and move to a spot with gentler, indirect light. The cutting lost moisture faster than it could absorb it.
No Roots After Weeks
Problem: The cutting looks alive but isn’t rooting.
Solution: It might be too cold. Move to a warmer spot. The cutting may also lack sufficient growth hormones—using rooting hormone next time can help. Some plants are simply slower; be patient.
Roots in Water, Then Shock in Soil
Problem: Your water-propagated cutting wilts or dies after potting in soil.
Solution: Water roots are delicate. When potting up, keep the soil consistently moist (not wet) for the first 1-2 weeks to help them transition. You can also try starting some cuttings directly in soil to avoid this step entirely.
From Cutting to Confident Plant: Potting Up and Aftercare
The final, thrilling step is graduating your rooted cutting to its own pot. Do this right, and you’ll have a robust juvenile plant.
Knowing When It’s Ready
For water cuttings, wait until roots are at least 1-2 inches long and have secondary roots (little roots off the main root). For soil cuttings, look for new top growth—a sure sign roots are working below. A gentle tug should meet slight resistance.
The Potting-Up Process
- Choose a Small Pot: Select a pot only 1-2 inches larger in diameter than the root ball. A pot that’s too large holds excess moisture around the small root system.
- Use the Right Soil: Use a well-draining potting mix appropriate for the plant type (e.g., succulent mix for succulents, aroid mix for Monsteras).
- Plant Gently: Create a hole in the moistened soil, place the roots in, and gently firm the soil around them. Don’t bury the stem any deeper than it was during propagation.
- Water In: Give it a thorough watering to settle the soil around the roots. Ensure excess water drains away.
Juvenile Plant Aftercare
For the first week or two, treat your new plant like a cutting again: keep it in bright, indirect light and consider using a humidity dome if it seems to wilt. Gradually reduce this extra humidity over a week. Hold off on fertilizer for at least a month, until you see consistent new growth. Then, begin a diluted, regular feeding schedule.
Your New Plant-Parent Superpower
Remember that overgrown Pothos from the beginning? With the simple toolkit and clear routine you now have, that single snip is no longer an act of pruning, but an act of creation. Stem and leaf cutting propagation methods demystify the process of growing new plants, turning it from a mysterious art into a repeatable, deeply satisfying habit.
You will have cuttings that rot and experiments that fail—every plant enthusiast does. View these not as failures, but as data points. Each one teaches you more about moisture, light, and the unique personality of your plants. The true success is in the practice itself, in developing the observant eye and patient hand of a confident plant caretaker.
So go ahead, take that cutting. You have the knowledge. You have the steps. You are now equipped to fill your home with green life, share it with friends, and connect with the timeless, empowering cycle of growth.
Successfully learning how to propagate plants from cuttings boils down to a few core principles. Master this checklist, and you can multiply most of your houseplant collection:
- Use Sharp, Clean Tools: A clean cut is the foundation, preventing disease and crushing.
- Find the Node: For stem cuttings, always cut below this root-generating bump.
- Embrace Rooting Hormone: It’s a reliable helper that speeds up root development and protects against rot.
- Match the Medium to the Plant: Choose water for easy-rooters, soil for rot-prone plants, and always ensure excellent drainage.
- Control the Environment: Provide bright indirect light, warmth, and high humidity while roots form.
- Be Patient & Observant: Resist the urge to disturb. Look for new top growth as the sign of success below.
Q: Can you propagate any plant from a cutting?
A: No, not all plants can be propagated from cuttings. While many common houseplants, herbs, and woody shrubs can, some plants (like most palms) must be grown from seed or through other methods like division. It’s best to look up the specific propagation needs of your plant.
Q: How long does it take for cuttings to root?
A: It varies widely by plant species and conditions. Fast-rooters like Pothos may show roots in water in 1-2 weeks. Slower plants like some succulents or woody herbs can take 4-8 weeks