You’ve made the cut, carefully aligned the stems, and wrapped the union with hopeful precision. For weeks, you watch, waiting for that first sign of life—a swelling bud, a hint of green. Instead, you’re met with a brittle, blackened graft that snaps off at the slightest touch. That sinking feeling of “why did my graft fail?” is a rite of passage for every gardener who ventures into this art. The good news is that graft failure is rarely a mystery; it’s almost always a specific, correctable mistake. This guide is your reassuring roadmap out of that cycle of disappointment. We’ll demystify the core biological reasons why grafts fail to take, translating plant science into simple, actionable fixes. Forget complex theories—we’re focusing on a safety-first protocol that prioritizes clean technique, secure unions, and protective aftercare to turn your next attempt into a thriving success.
Graft failure usually stems from the cambium layers not aligning, the union drying out, or infection. For beginners, the safest path to success is mastering a single, simple technique with sharp tools, firm wrapping, and consistent moisture control. Focus on creating a clean, precise cut to maximize cambium contact, secure the union tightly without strangling it, and protect it from the elements. This core approach addresses the most common graft union failure causes and builds a reliable foundation for more advanced methods later.
The Science of a Successful Graft Union
At its heart, grafting is a form of botanical surgery. For it to succeed, the plant itself must heal the wound you create. The magic happens when two specific layers of living tissue—the cambium—are brought into intimate contact.
The cambium is a thin, greenish layer of actively dividing cells just beneath the bark. Think of it as the plant’s stitching thread. When you align the cambium of your scion (the top piece) with the cambium of your rootstock (the bottom piece), the cells recognize each other and begin to form a protective, healing tissue called callus. This callus bridges the gap, eventually forming new vascular pathways for water and nutrients to flow. This is the graft union.
If the cambium layers don’t meet, or if they dry out before callus forms, the plant can’t “stitch” itself back together. This fundamental biological requirement is why technique is everything. For a deeper dive into plant physiology, resources like the University of Minnesota Extension guide to grafting offer excellent scientific background.

The Top 5 Reasons Your Graft Didn’t Take
Understanding the common causes of graft failure is the first step toward preventing them. Here are the top five culprits behind a failed graft union.
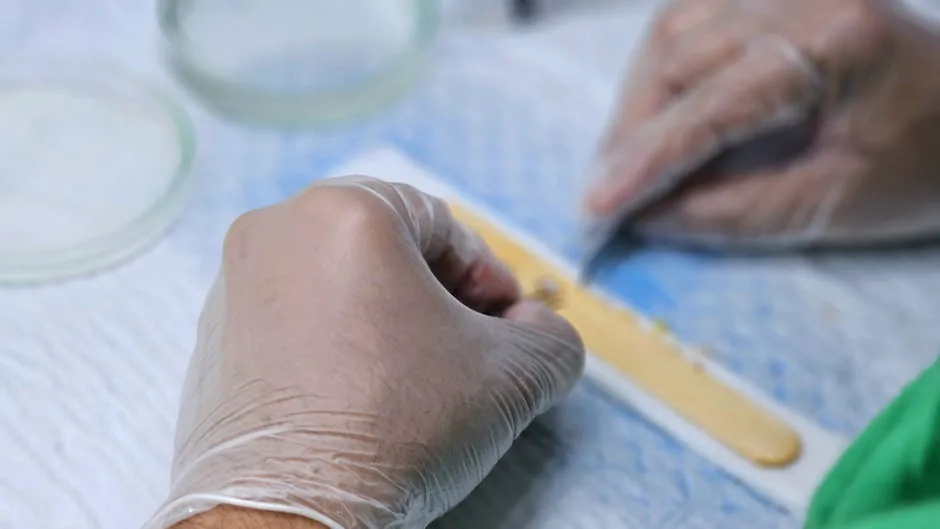
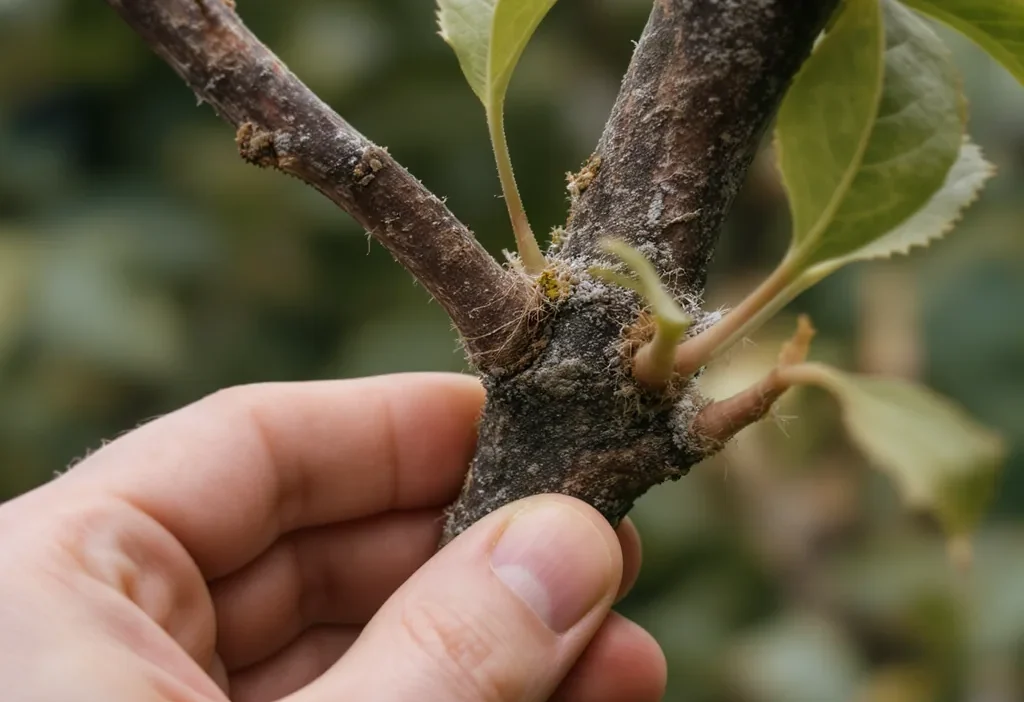
Photo by Muhammad Khawar Nazir on Pexels
- Misaligned Cambium: This is the number one reason grafts fail. Even a perfect cut is useless if the vital green layers aren’t touching. A gap of just a millimeter is enough to prevent callus from bridging.
- Drying Out: The exposed cambium cells are incredibly delicate and will die in minutes if exposed to air and sun. A graft that isn’t wrapped immediately and securely is often a dead graft.
- Infection or Contamination: Fungi and bacteria love fresh wounds. Using dirty tools, touching the cut surfaces with your fingers, or leaving the union exposed to rain can introduce pathogens that rot the union before it heals.
- Poor Stock or Scion Health: You can’t get a strong union from weak parts. Scion wood must be fully dormant, healthy, and from a compatible plant. The rootstock must be vigorous and actively growing (or ready to break dormancy).
- Incorrect Timing: Grafting is a seasonal art. For most fruit trees, late winter to early spring, just as the rootstock’s buds begin to swell, is ideal. The scion is dormant, but the rootstock is starting to move sap, which helps push callus formation.
The Beginner’s Safety-First Grafting Protocol
For your first attempts, forget about mastering ten different techniques. Focus on doing one simple graft—like a whip-and-tongue or cleft graft—extremely well. This protocol prioritizes cleanliness, precision, and protection.
Do This, Not That: Your Grafting Playbook
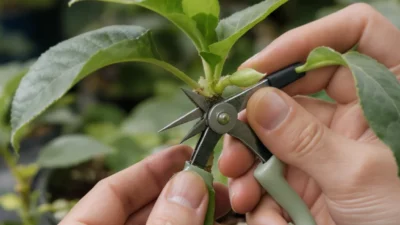
DO sterilize your tools. Wipe your grafting knife or razor blade with isopropyl alcohol before each cut. DON’T use the same dirty pocketknife you used five minutes ago.
DO make confident, single-stroke cuts. A sharp blade creates a smooth surface for better cambium contact. DON’T saw back and forth, which crushes cells and creates a rough, gap-filled surface.
DO align the cambium on at least one side. Even if the stems are different diameters, ensure one long edge matches up perfectly. DON’T center a small scion on a large rootstock and hope for the best.
DO wrap tightly and completely. Use rubber grafting bands or vinyl tape to hold the union firmly and seal out air. The wrap should be snug but not so tight it cuts into the bark. DON’T use electrical tape or leave gaps.
DO seal the top of the scion. A dab of grafting wax or a grafting tape that self-seals prevents the scion from drying out. DON’T forget this step, as the top cut is also a major moisture-loss point.
DO label your graft immediately. You will forget what you grafted and when. A weatherproof tag is part of the process.
Common Beginner Mistakes & How to Sidestep Them
Even with the best intentions, it’s easy to slip up. Here are typical beginner grafting mistakes and how to avoid them.
Mistake: Rushing the Process. Grafting requires a calm, methodical approach. Rushing leads to sloppy cuts and poor alignment.
The Fix: Set aside dedicated, unhurried time. Practice the cuts on willow or poplar branches first to build muscle memory.
Mistake: Using Dull or Inappropriate Tools. A dull blade mashes plant tissue instead of slicing it cleanly, severely limiting cambium contact.
The Fix: Invest in a dedicated grafting knife and learn to hone it, or use fresh, single-edge razor blades for each graft.
Mistake: Creating a Weak Union Wrap. A loose wrap allows movement, which breaks delicate new callus cells. An overly tight wrap strangles the stem.
The Fix: Use materials designed for grafting. Stretch rubber bands or specialized tape to provide consistent, firm pressure without cutting.
Mistake: Grafting at the Wrong Time. Trying to graft in summer heat or deep winter dormancy often leads to failure due to incompatible plant physiology.
The Fix: Research the ideal window for your specific plant. For most deciduous trees, “late winter/early spring” when the bark is slipping is the golden rule.
Aftercare: The Make-or-Break Weeks
Your job isn’t over once the graft is wrapped. The next several weeks are a critical monitoring period where your successful grafting tips for aftercare come into play.
What to Do (and Watch For)
Provide Gentle Conditions: Keep the grafted plant in a sheltered spot with bright, indirect light. Avoid full, scorching sun which can cook the graft. Maintain consistent soil moisture—don’t let the rootstock dry out, but don’t waterlog it either.
Monitor for Signs of Life (or Death): Success looks like the scion’s buds swelling and eventually breaking open with new leaves. Failure is obvious: the scion will shrivel, turn black, and become brittle. If the scion is still plump and green after 3-4 weeks, you’re likely on the right track.
Manage Growth and Wraps: Once the scion is actively growing 4-6 inches, you can carefully loosen or slit any non-biodegradable tape to prevent girdling. Don’t remove it all at once. If you used rubber bands or waxed string, they may degrade on their own. Also, rub off any shoots that sprout from the rootstock below the union, as they will rob energy from your graft.
Patience is key. Resist the urge to constantly poke and prod the union. Let the plant do its healing work, and you’ll be rewarded with the joy of seeing that first new leaf unfurl from your own successful graft.
Your Next Graft Will Be Better
Seeing a graft turn black and brittle is disheartening, but it’s a universal rite of passage for gardeners. Every failed attempt is a lesson in plant biology and your own technique. Now that you understand the primary graft failure reasons and have a clear, safety-first protocol to follow, your confidence can grow alongside your skills.
Don’t be discouraged. Take what you’ve learned here—the importance of a sharp cut, perfect cambium contact, and vigilant aftercare—and try again. The moment you see that first successful union thrive, all the effort becomes worthwhile. Happy grafting!